Question ID: 1000-13978-2-4-7-11
Recipe Description
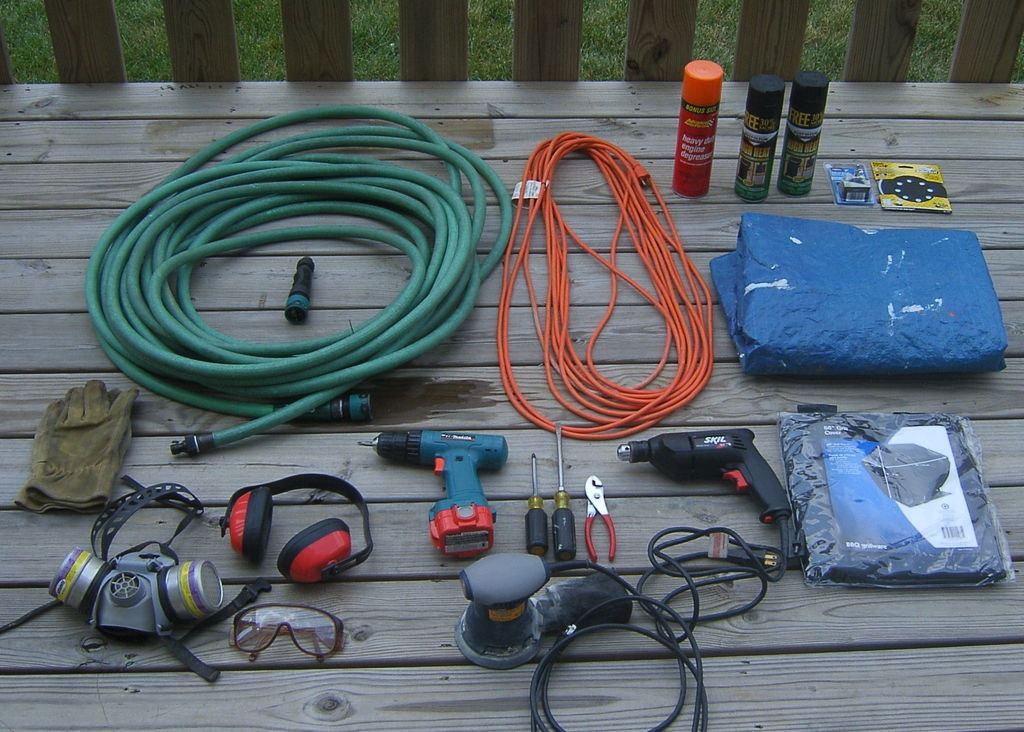
The first thing you need to do is gather your gear. Some of what I gathered is optional, some is mandatory.Mandatory:Garden hoseSpray nozzleWork glovesEye protectionScrewdrivers (size and type depend on your particular )Pliers (you might be able to get away with sockets if your grill is less rusted than mine...)Corded drill (Yes, you MUST have a corded drill to run the wire cup! Don't even think about trying it with the cordless!)Degreaser (I used engine degreaser)High-heat paint (Obtained from the local home center for about $4 per can. I used one.)Wire cupTarpGrill cover (You don't want to have to do this again next year!)Not shown: Grill brushOptional:Hearing protectionDust mask/RespiratorCordless drill (I despise turning screws by hand!)Palm sanderExtension cordSanding disksNot shown: Shopvac
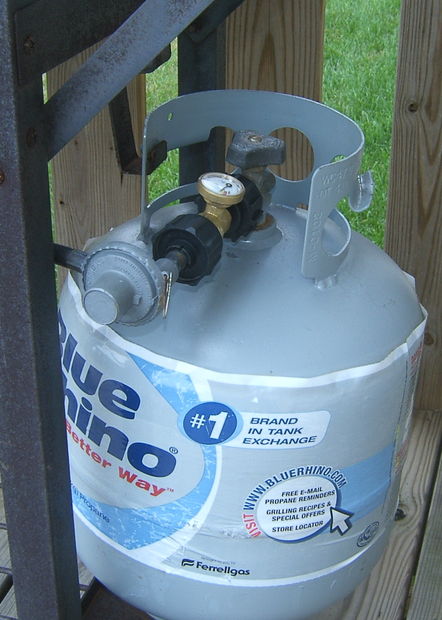
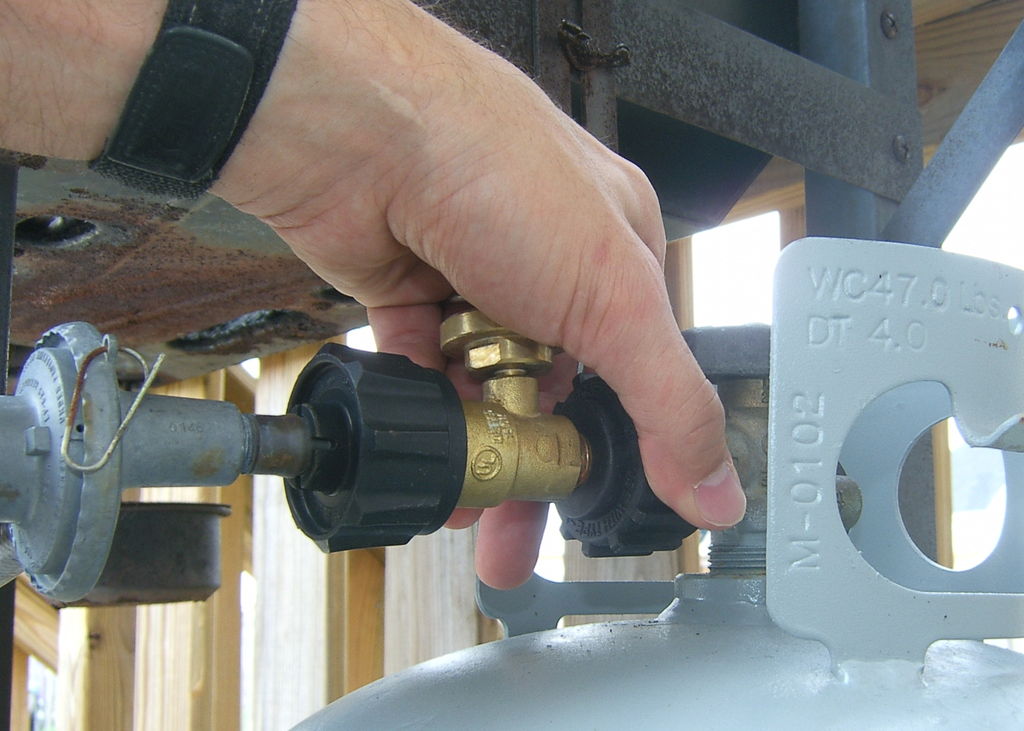
Please, please, please don't forget to disconnect the gas! Just reach down and unscrew the black plastic knob...righty tighty, lefty loosie.
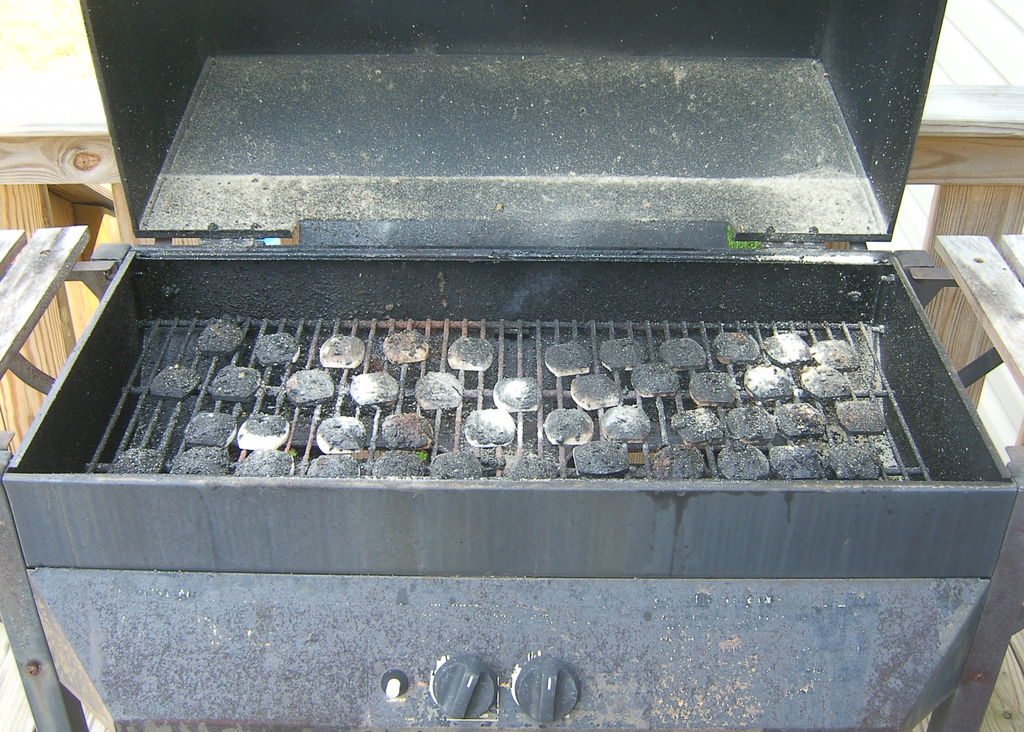
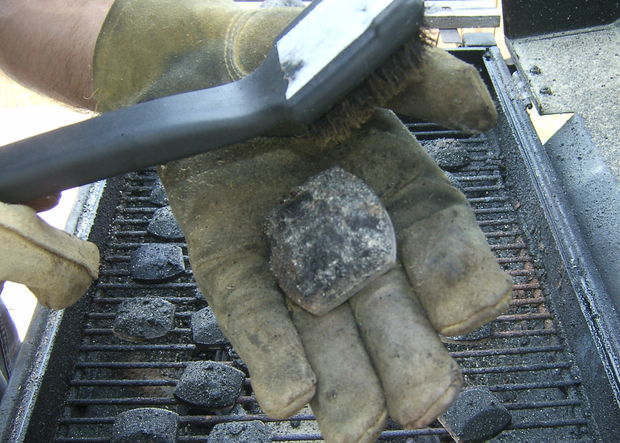
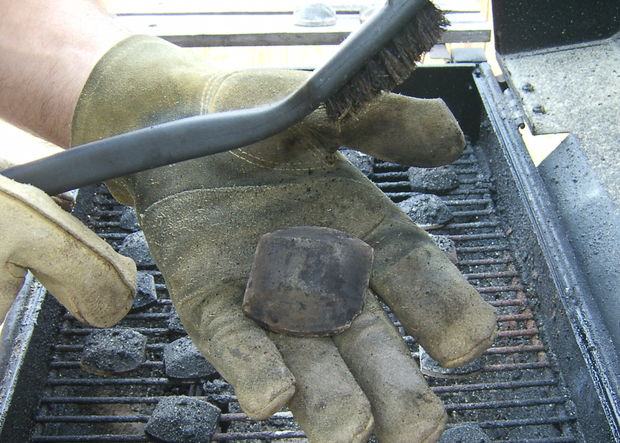
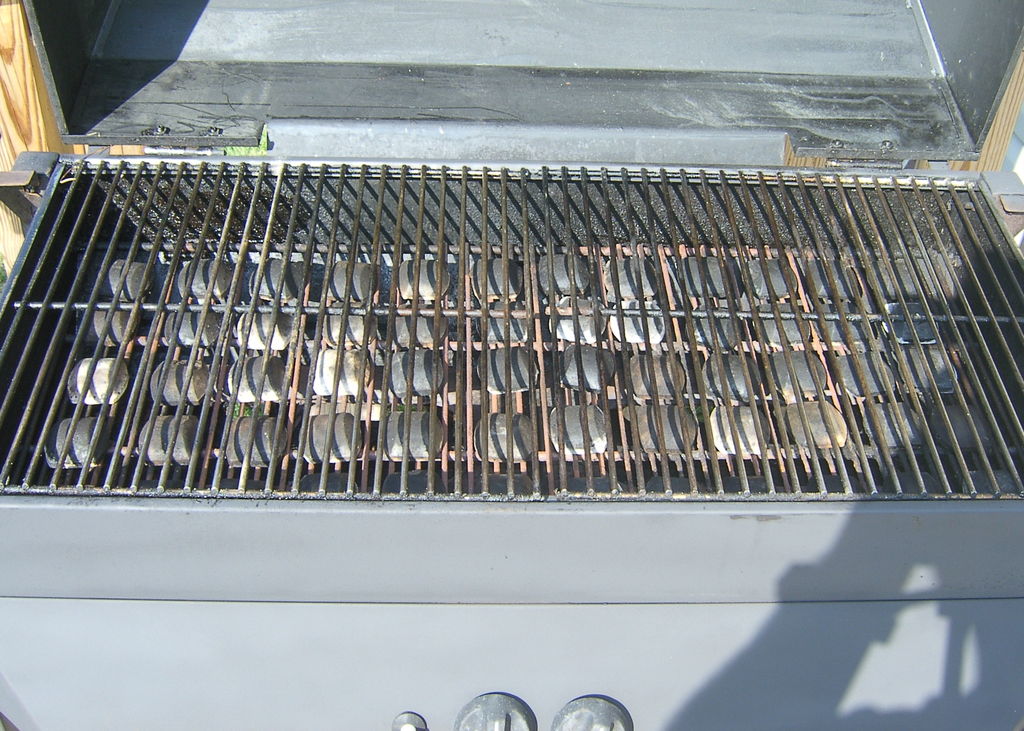
Take out those things that you burn your burgers and chicken on and set them aside. Now you have access to those rock things--you may have lava rocks, but I've got high-tech ceramic faux-charcoal briquettes. And man, are they dirty! Give them a good scrub with your grill brush.
What? Go buy new ones? Are you nuts? There's plenty of life left in these!
Note to those with lava rocks: Don't try to scrub them, it'll only make you batty. Go buy new rocks. Or if you live in Hawaii or some other volcanic region go collect your own, but don't tell them I sent you. (To those who will inevitably bring up that collecting lava rocks is illegal in some locales, I say collect elsewhere.)
Now that you've got those pesky rocks out of the way, shoot some degreaser on the underside of the hood. We'll let it soak in while we do some other stuff. While you're at it, spritz any other parts of the grill that are greasy, especially if you'll be painting them later.Disclaimer: Be sure to read, understand, and follow all the safety rules that come with your degreaser. Knowing how to use your degreaser properly will greatly reduce the risk of personal injury. And remember this: There is no more important safety rule when you're working with degreaser than to wear safety glasses.

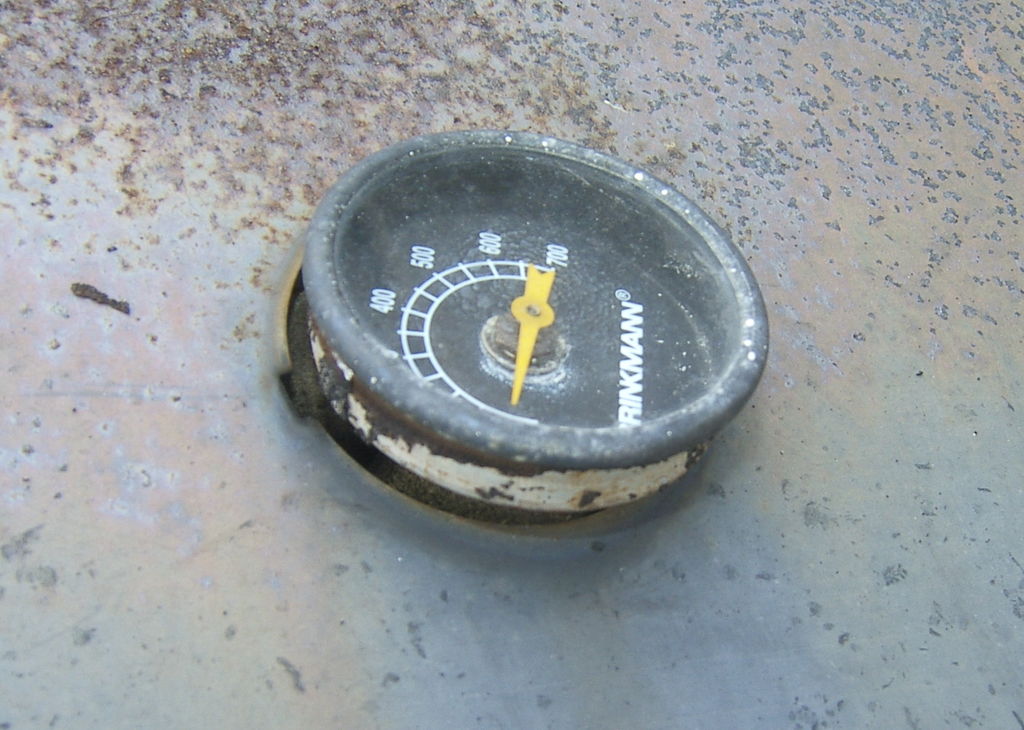
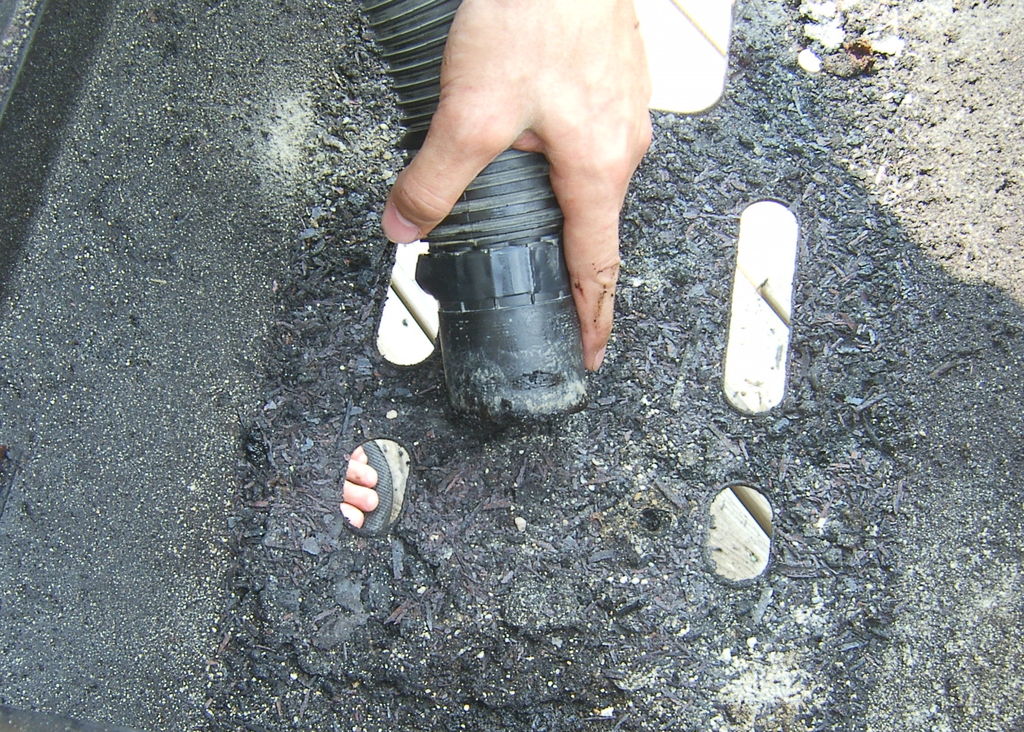
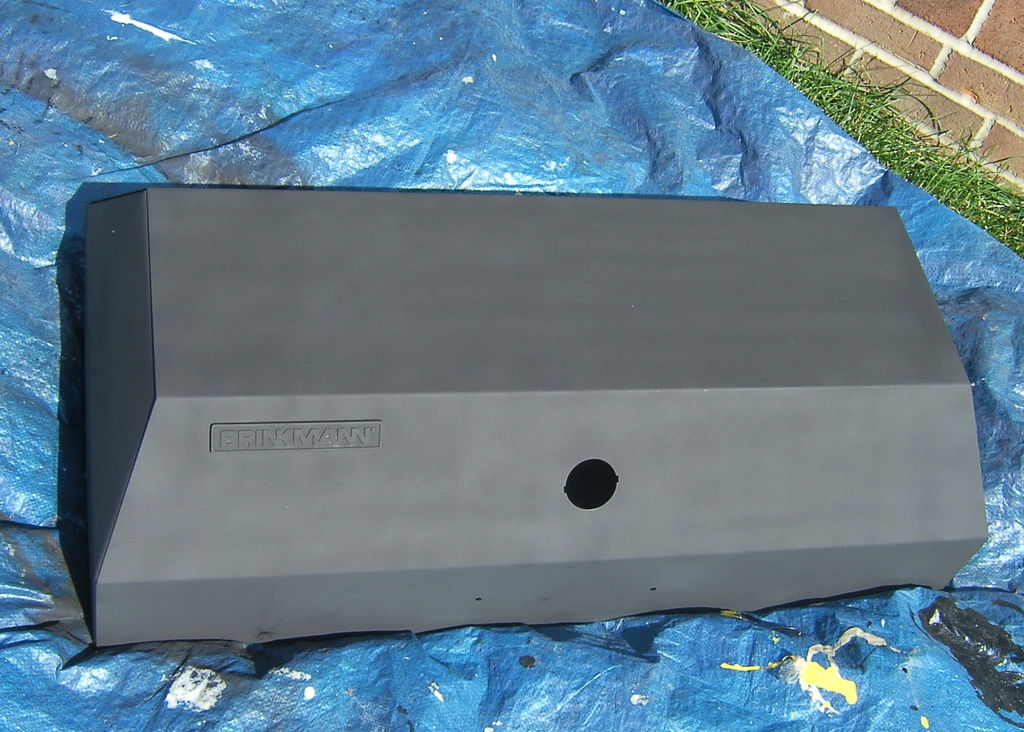
If you've got a built-in thermometer, pop it out. You'll probably need to twist it until the hole in the hood matches the tab on the thermometer, then pull the whole thermometer towards you.
While you're at it take off the handle, too. (Sorry, no pic.)
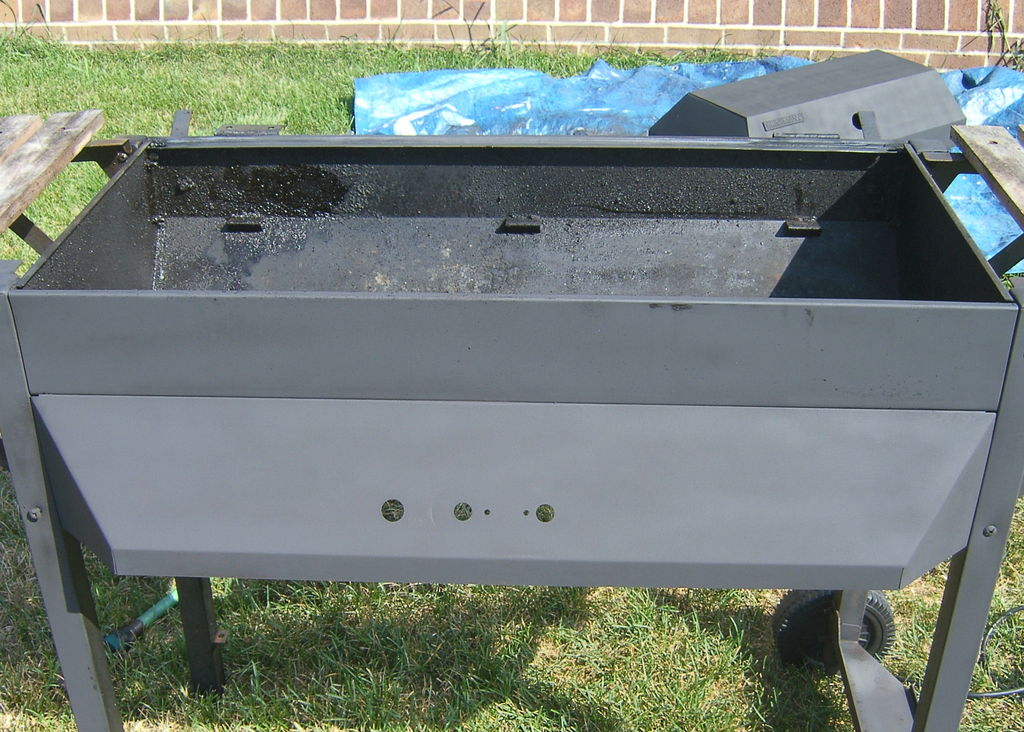
The lower grate is probably pretty gross; scrub off all the gunk. Then, remove the lower grate and set it aside. What's left is the burner unit.
On the underbelly of the grill are four screws holding the burner unit down. Now would be a great time to remove them. Unfortunately, mine were so rusted that they wouldn't spin. Fortunately, they were so rusted that when I lifted the burner unit up and the material around the screw crumbled enough that I didn't need to unscrew them.
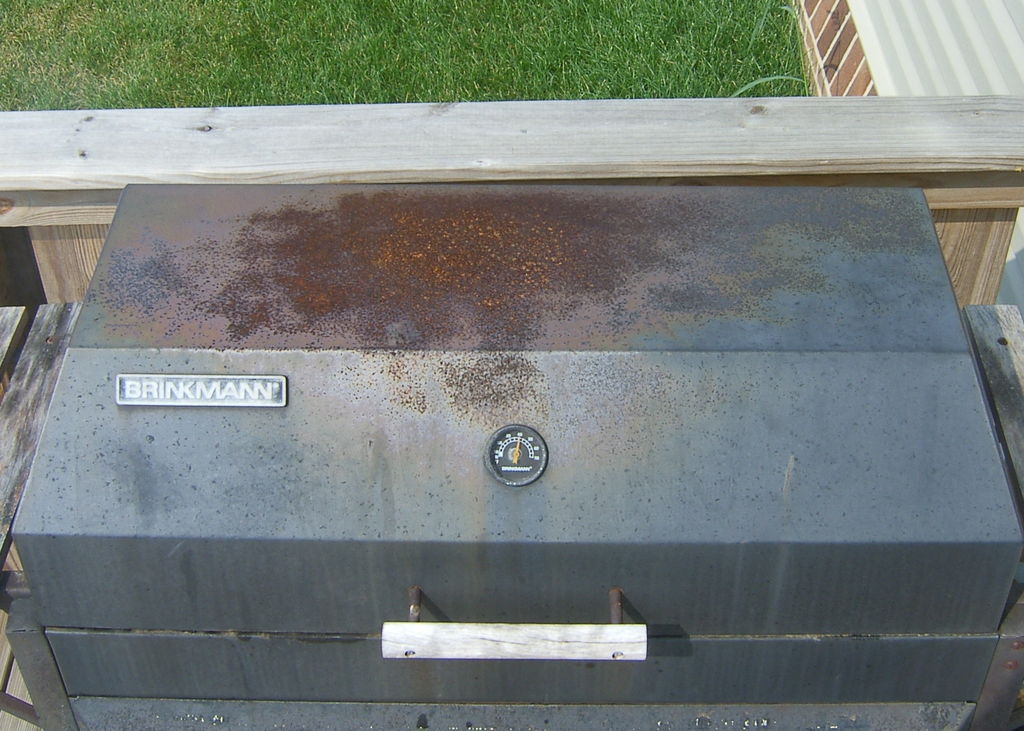
I don't think this grill will be lasting for more than another year or two...
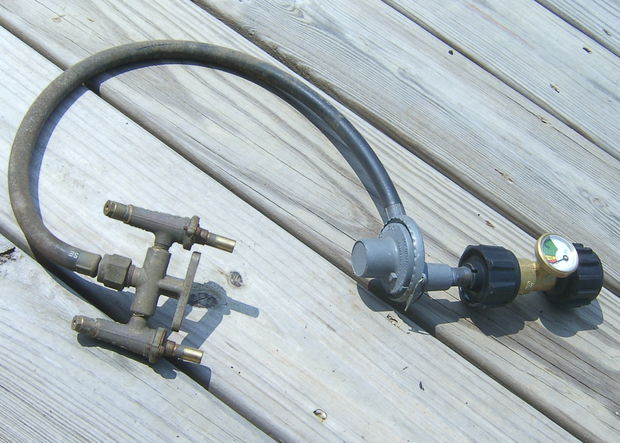
With the burner unit now unattached, lift it straight up while sliding it towards the back of the grill. This will free the burner unit's feed tubes from the control unit. Now lift the burner unit up while rotating it towards you, which will pull the feed tubes out of the hole they are in.

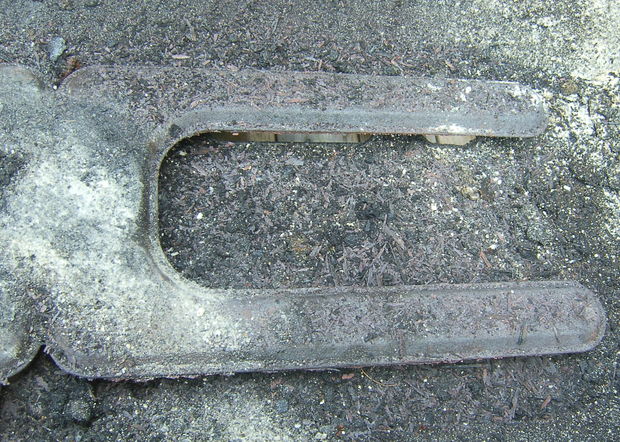

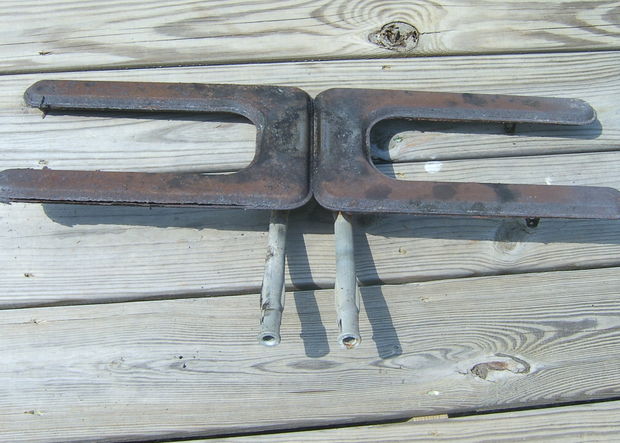
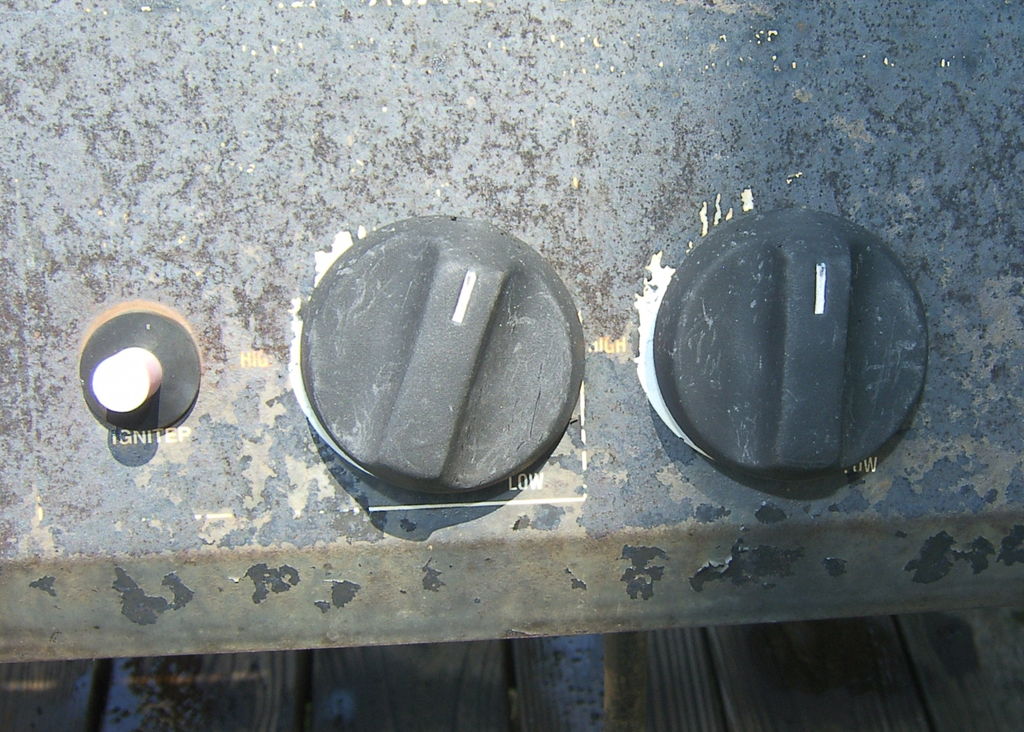
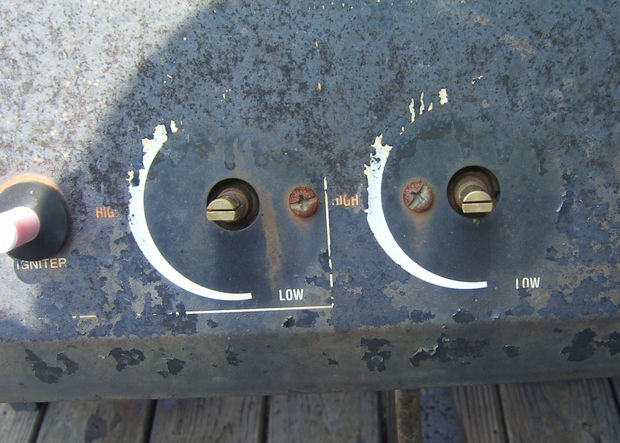
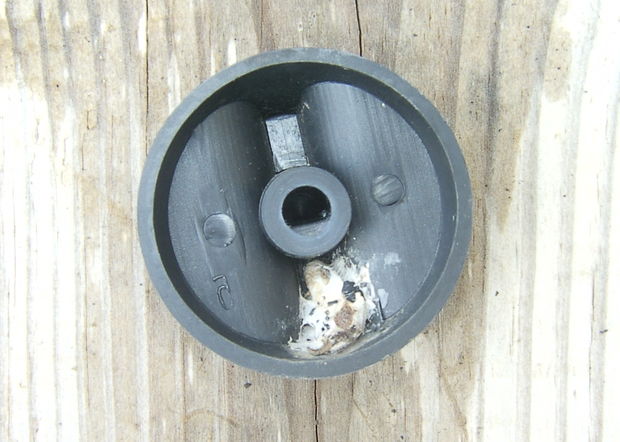
Pull the control knobs off; it may take a bit of force if they've never been taken off before. Mine didn't have setscrews holding them on, but if I were you, I'd check whether or not mine did before I applied TOO much force...
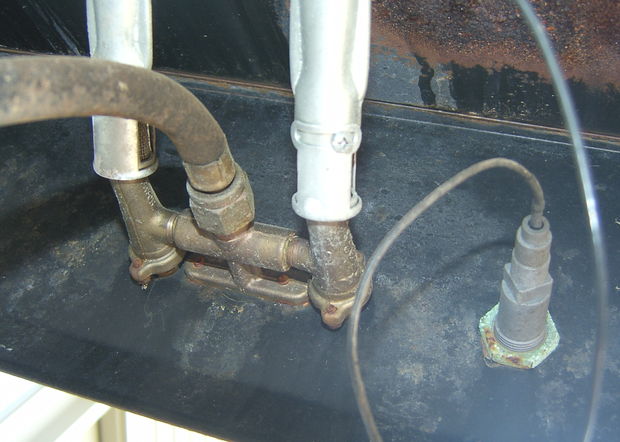
Pulling the knobs off reveals two screws. Unscrew them and the control unit should come right out.
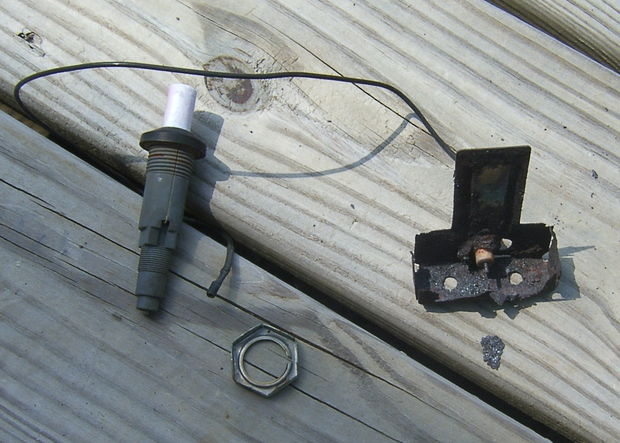
While you're at it, unscrew the nut behind the igniter button and pull it out, too. I had to pull the igniter lead out of the button in order to get the button out of the front panel. It's supposed to come apart like that though, so don't worry.
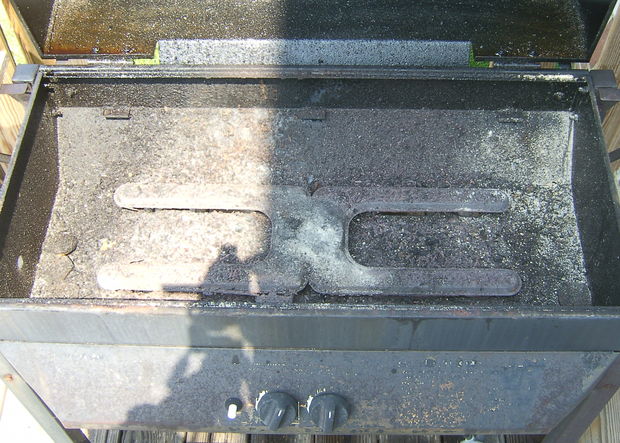
Now that all the parts have been removed from the cavity of the grill, you can see just how much rust, grease, and gunk are in there. I used a shopvac and a large, flat-bladed screwdriver to clean it out, but if you don't have a shopvac (POOR YOU!) you could just tip the whole case over and let the gunk fall onto the ground. Better yet, go buy a shopvac!
Note: If you tip the grill over to knock the gunk out, you might want to take the lid off first, as shown in the next step.
To remove the lid, unscrew the top part of the hinges in back. My grill had the bolts welded in on the inside, so I didn't need to reach around with pliers to stop them from spinning.

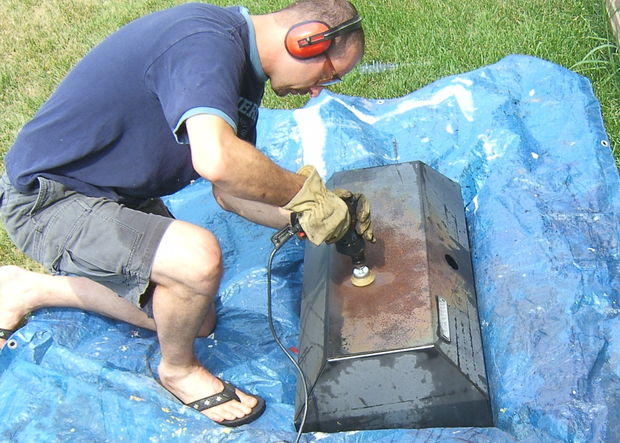
Now's when you chuck your wire cup into your drill, plug the drill into the wall, and put on your eye protection. I used the earmuffs and respirator too, because I knew it'd be loud and there would be flying rust dust.
Do I need to do the "be safe when using power tools" disclaimer? Well, be safe when using power tools, mmkay?
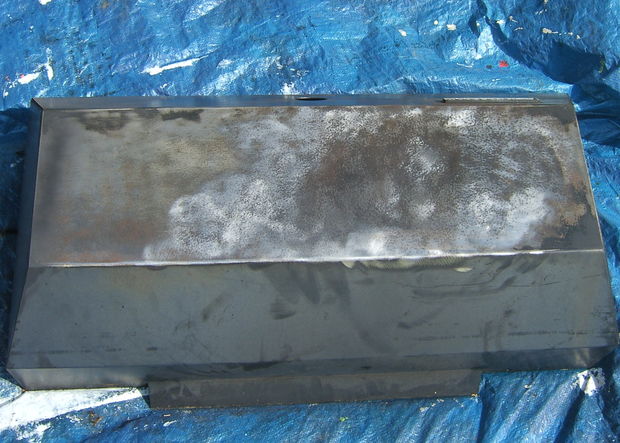
Using the wire cup and firm pressure, scrub all of that rust off! I did what I figure was an 80% removal--it would have taken more time than I had to spend in order to remove 100%, but I got all the big stuff and most of the little stuff. Anyways, I felt good about it.
When you've got off all the rust you can get, you might consider sanding with some wet/dry sandpaper. That's up to you...but if you're going for the "just try hold in there for another few years" approach like I was, you will probably skip the sandpaper part.
Aaah, the paint. The stuff I got was formulated specifically for grills and stoves. Don't even think of trying this with the can of Rustoleum you've got sitting around.
I didn't paint the interior because 1) I knew it'd just be greasy again within a week and 2) I was running out of time.
Spray according to the directions on the paint. Mine said make several light coats a few minutes apart, dry to the touch in 1/2 an hour, ready for heat in an hour.
Put everything back on that you took off.
Start with the lid. Add the handle and the thermometer.
Screw in the control unit and the starter switch. Press on the control knobs. Put the burner unit back in and screw it in (if there's anything left to screw it in to). Arrange the igniter so that it is either a) back where it came from or b) close enough that it'll ignite the gas quickly.
Gently drop in the bottom grate. Add the now-clean briquettes in any kind of pattern you care to use. I chose a boring grid pattern. Place the cooking grates back on.
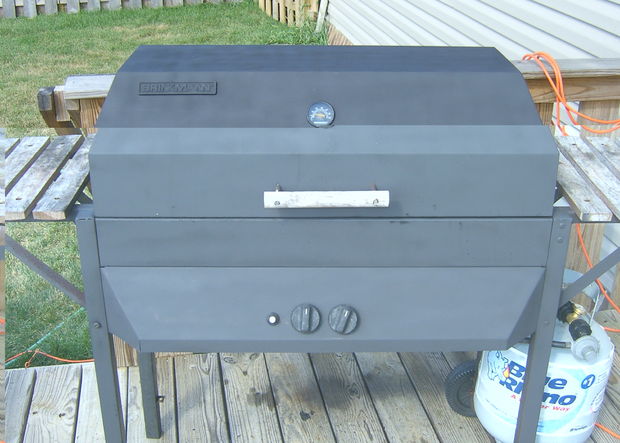
Hook the back up and check for leaks according to the manufacturer's instructions. Light it up, just to make sure it's all working. When it's cool, put on your nice new cover!

Question & Answer
Question: Choose the best title for the missing blank to correctly complete the recipe.
Cleaning Rocks
____________
Gunk Removal
Reassemble
Choices:
(A) Altoids Gas Grill
(B) Pop Out Thermometer
(C) Wood Fire Grill
(D) Buy Materials.
 (B) Pop Out Thermometer