Question ID: 3000-9060-1-2-3-4
Recipe Description
As with everything in Minecraft, the cake is a square block. So I recommend using a genuine square cake tin to make life easier. My tin is 17cm x 17cm and I got nearly the right height of cake (it was a little shorter than I would have liked). You could also make two of this size and layer. If using a larger tin, try two cake mixes to achieve a reasonable height.For this cake I used a chocolate cake that was something like this one. It's dense enough that you can sculpt over it, but of course you can use any kind of chocolate cake.
White fondant icing - as you're not covering a whole cake you won't need as much as normal and depending on the thickness, this will dictate how much you should use.Roll out your chunk of white fondant icing onto your non-stick baking paper and create a shape that is larger than your cake tin. You need the extra bits to become the sides of the cake.Once you have a large enough rolled out piece of fondant, place your tin on top as a guide and trim off the edges so you're left with a square that's a few centimeters larger than your tin on all sides. You should now have a square that is larger than your tin all the way around.Using your sharp knife, extract the corners up to the tin. Cut these little squares out so you can fold down the sides later.Next you'll need to measure your tin and make a few calculations so you have a plan on where to cut next. My tin is 17cm x 17cm so I ended up with 3cm dropping down bits and 3cm cut aways with a 1cm-ish bit on the end that would join with it's neighbouring buddy on the other side to complete the shape. I marked the measurements on my baking paper so I had a guide. Adjust calculations for your cake size, but keep in mind that everything about Minecraft is square.Press a feint line into the icing where you will trim upto, around 1cm in. Use your sharp knife to again trim out the sections of icing to be removed. As my brain struggled with which bits to keep and which to discard, I had to mark this when doing my measurements.Once you've worked your way around each side you'll have a shape that's nearly ready to use. You may also like to make a small crease line (with your straight ruler) at the point at which you'll be folding the icing, just like origami, to make the fold easier. Don't go too deep or it will cut right through.
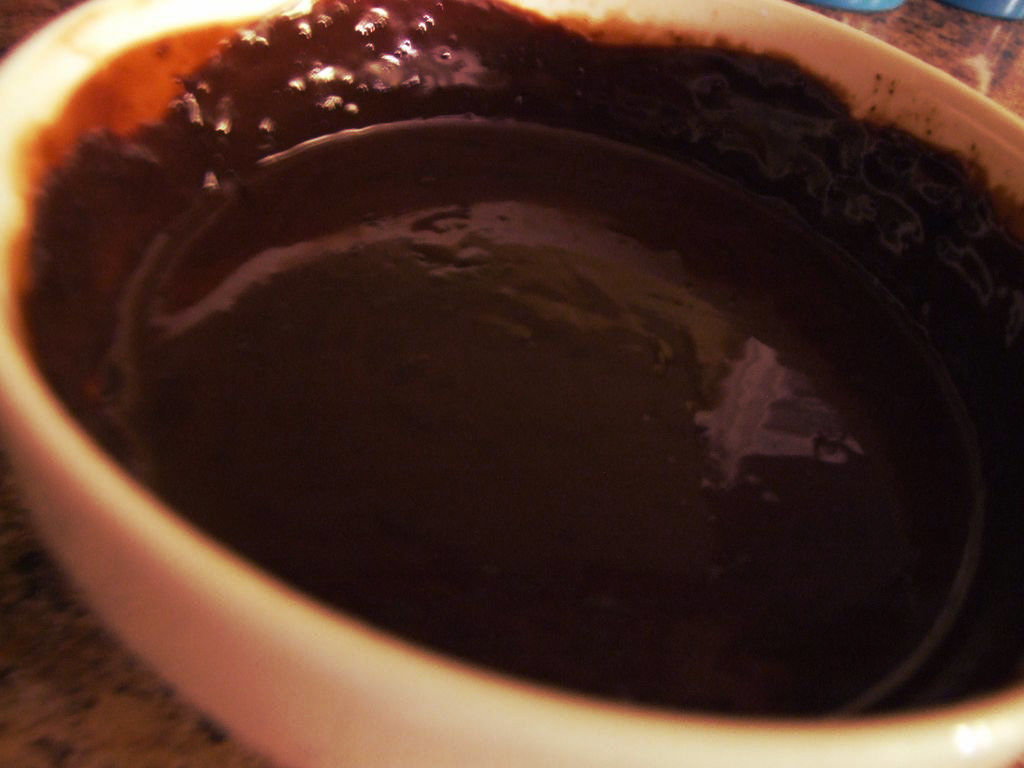
Ice your cake with whatever adhesion method you've chosen. I've used chocolate ganache because I like chocolate a lot. Using a palate knife will help to give a smooth finish and therefore a better look at the end. If you're using some other technique, don't put your glue down to the bottom of the cake sides as you need your chocolate cake to be seen through.In a deft move, flip your icing and baking paper over onto the cake and maneuver into position. Peel away baking paper. Fold down the sides getting the corner edges to touch as much as possible.
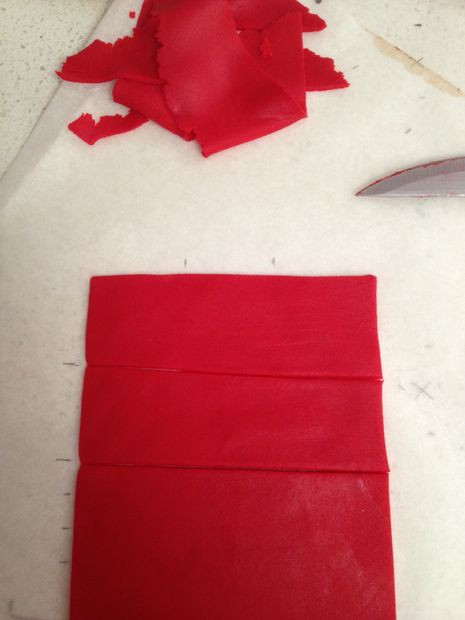
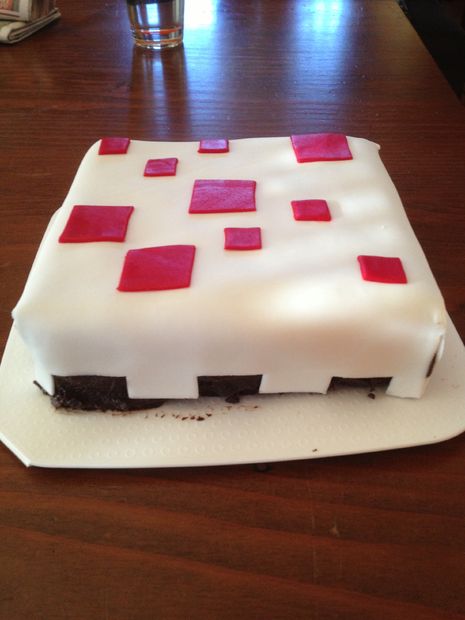
Roll out your red fondant on the baking paper (this time it's important as that red stuff is evil and you don't want it all over your benchtop if you can help it), cut the sides down so they're straight and measure out your squares. Based on the model, you'll need 4 larger squares and 6 smaller ones. I measured out 3cm x 3cm large squares and cut those large ones into 4 for the smaller squares in keeping with the dimensions of my cake.Stick these guys to the cake following the model.
The whole icing part took around 30mins including the brain bending calculations (I like eating cake, not maths). I had lots of wows from the party attendees, probably because they'd already played 4 hours of Minecraft themselves.And of course you have to cut your cake into cubes!
Question & Answer
Question: Select the incoherent image in the following sequence of images.
Choices:
 |
 |
 |
 |
|---|---|---|---|
| (A) | (B) | (C) | (D) |
|
|---|
 |