Question ID: 3000-6404-2-3-6-8
Recipe Description
1 Chocolate cake mix
1 Yellow cake mix
Red and yellow food coloring
White or cream cheese frosting
Chocolate frosting
Bundt pan
Cupcake/muffin pans
Red and yellow cupcake cups
1 sheet foamcore
1 sheet posterboard
Tissue paper
PVA glue
3 Cardboard paper towel tubes
Assorted toothpicks and bamboo skewers
Hot glue
Black & silver spray paint
Paintbrushes
Hobby Knife
Scissors
Hot Glue gun
Using the cardboard paper towel tubes as the core, first I constructed the tower itself. Since the tower was not made of cake, this happened a couple of days before the party.
The paper towel tubes were sleeved together to the approximate height that I wanted the tower to be (less the forky bit at the top). The spacing of the three tiers of the tower was marked out by eye, so that I could most efficiently ignore it later.
Four discs were cut from foamcore - two large discs for the base of the tower and the top of the first tier and two medium discs for the second tier. Two flat strips were used to bulk out the top tier a little bit. All of the discs had a hole in the center for the cardboard tube to slip through.
Now, the smart way to make the discs would have been to determine the desired diameter of each level by taking measurements from a photo of the tower from the movie, calculating accurate proportions based on the size of my Bundt pan and the height of the cardboard tube, then using a compass to mark out each disc, thus ensuring that the discs were sized consistently and the center holes were, well... centered. This is, of course, exactly not what I did.
Instead, I scoured the kitchen for bowls, cans, ramekins, bottle caps, and other circular objects that looked sorta like the right sizes, then traced around them with a pencil onto the foamcore. A spice jar turned out to be close to the right diameter for the center hole, and this was placed pretty haphazardly in the "center" of each circle, then traced.
The discs were cut out using a razor knife, and hot glued onto the center tube in almost precisely not where I had marked the tier levels earlier. I also glued a few scrap strips of foamcore onto the tube lengthwise, just for additional support. A measurement was taken of the height of each tier, and strips of poster board were cut at something resembling this measurement, then glued into place to form the outer surface of the tower.
NOTE: You don't actually have to use black foamcore & posterboard, it's just what I had available.
To make the forky bit at the top, I found a front-on photo of the tower via google, resized it to precisely match the scale of the tower I had built in the previous step, and printed up a pattern. Using the pattern, I made a basic foamcore piece in the shape of the fork.
This was when I came to the realization that the fork thingy was way too small to support the Eye of Sauron, and that I probably should have considered that kind of thing before I started randomly bashing bits of foamcore together. I needed to come up with a plan - a subtle and nuanced plan.
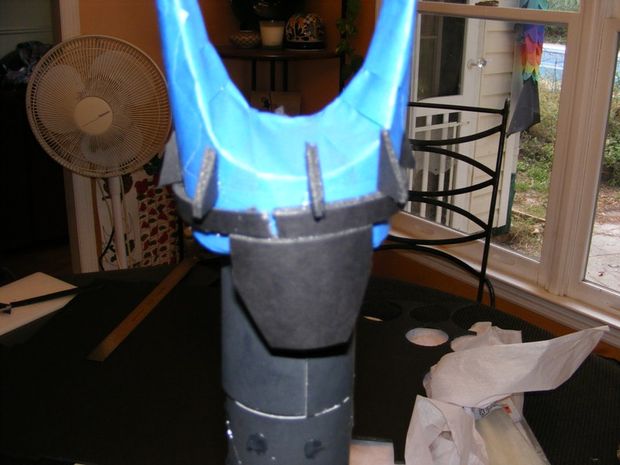
Uttering my battle cry: "Proportion be damned!", I scaled up the pattern and made a bigger fork. This was attached to a short segment of cardboard tube, then fleshed out with blue masking tape and posterboard side support pieces into a fair approximation of the tower top from the film.
At this point, the tower was assembled, and a whole bunch of unnecessary flotsam was glued to it. Little triangular bits of foamcore served as crenellations at the top of each tier, little windowish blobs of hot glue were applied all over the surface, and more hot glue was used to draw in a shape that was supposed to look like either a massive front gate or a vending machine wearing a Coolie hat.
The entire thing was then painted with PVA glue and a layer of tissue paper was applied to every exposed surface. The idea was to add a bit of texture so it didn't look so much like plain posterboard. This would have been a great idea, if I'd had it before I glued all those stinkin' crenellations on. As it was, it was still a good idea.
I cut a shield-shape out of posterboard and glued it to the front of the forky thing. Then I glued approximately a billion toothpicks, bamboo skewers, and larger bamboo skewers all over the tower, taking care to ensure that each one was lovingly trimmed to the correct length for its position on the tower. This was mostly accomplished using a wire-cutter and a lot of cursing. Please refer to the photos for some idea of the positioning, as trying to describe it in text would certainly cause me to break out in hives.
Note: My camera seems to have eaten several of the picturesthat should go here. Basically, I used toothpicks on the forky piece, thin skewers on the top tier, and thicker skewers on the bottom two tiers. These were just glued on vertically, with points protruding at the top of the tier, for the most part.
I should mention that some of the pointy things on the bottom tier were allowed to extend lower than the base of the tower, almost as if someone planned to use them to anchor the tower in some kind of soft, cakelike substance. It's probably just a coincidence, though.
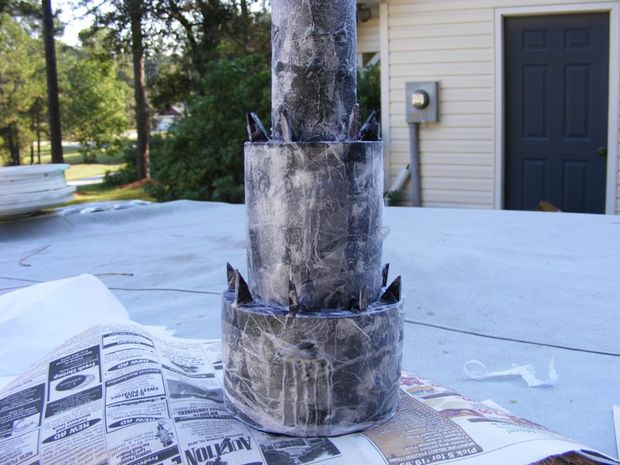
The tower was base-coated with gloss black spray paint, and then dusted with flat black. The reason for using two different blacks was to accentuate the textures and contours of the tower using advanced prop-making techniques I have developed over the years while working as a theatre professional. No really, that was the reason. It had absolutely nothing to do with running out of paint halfway through and having to scrounge another can, and anyone who claims differently is a dirty liar.
In any case, a light dusting of silver spray paint was added to the fork at the top, which coincidentally enough, also had nothing to do with running out of black paint.
Luckily, this meant that the tower was finished in plenty of time for the paint to dry completely , which in turn meant that none of the party guests would be receiving a slice of cake that tasted like wet spray paint.
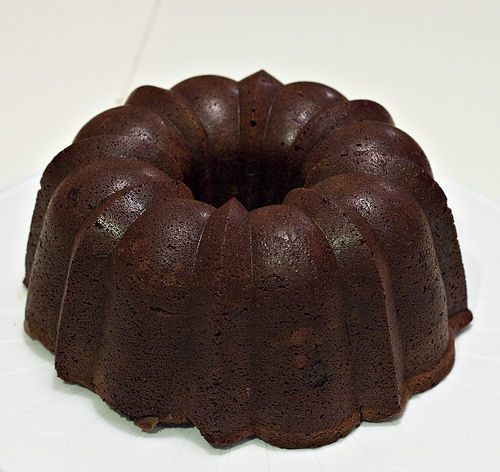
This step really should consist solely of "Then I prepared the chocolate cake mix and baked it in the Bundt pan according to the package instructions." The best thing you could do right now is to stop reading and pretend that this is, in fact, all that it does say. In the name of all that is good and right, please move on to the next step now.
I see that you are still here.
Fine.
OK, so here's what really happened. I prepared the cake mix according to the directions, but before I filled the pan and baked the cake, I remembered that RavingChild really likes raspberry jam filling in his chocolate cakes. Usually, we do this by putting the jam between layers in a regular layer cake. If I had just baked the bundt cake, then cut it in half and spread some jam in there, everything would have been fine. But no, that would have been smart.
Instead, I thought back to my childhood and remembered how RavingMom used to make Bundt cake with swirls of cinnamon or other fillings in the center, and I vaguely recalled that this involved pouring in half of the cake batter, putting the filling in, then pouring in the rest of the batter. Seems pretty straightforward.... This is the part where the experienced bakers start chuckling and shaking their heads, because they know what's coming next.
Yup, I poured half of the batter into the Bundt pan, then several large blobs of raspberry jam, then the rest of the batter. Then I baked that sucker.
Later, as I extricated the misshapen mass of chocolate-raspberry ooze from the Bundt pan, I remembered about gravity and relative density and stuff.
Nevertheless, as I was short on both time and cake mix, I glued the thing together into a vaguely ring-shaped heap using three cans of Dark Chocolate frosting, and hoped for the best. Actually, since I was going for an irregular rocky mound-shape with the cake in the first place, this worked out just fine, design-wise. I just kind of prefer to do my design work on purpose, usually.
I had also intended to paint the cake black using spray-on food color, but I guess I got a bad can. It didn't change the color of the cake at all. I decided that dark brown was close enough and called it done.
Sauron's gotta have an eye, right? And a kid's gotta have cupcakes every once in awhile.
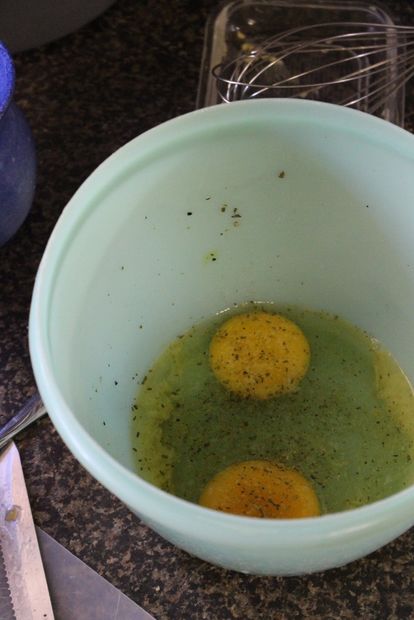
RavingChild and I took half of the prepared yellow cake batter, and colored it even more yellow with food coloring. The other half was colored bright red. The colored batter was dropped in random spoonfuls into cupcake pans lined with red and yellow paper liners. Then the cupcakes were baked, which resulted in beautiful swirly fire-colored cupcakes. (For the exact same technique, only with many more colors, check this out.)
After the cupcakes had cooled, RavingChild and I colored 3/4 of our cream cheese frosting yellow, and the other 1/4 red. We frosted all of the cupcakes in yellow, then piped a bit of red along the sides, which we then feathered a bit with a fork for that "evil flaming eyeball" effect that has been a hallmark of fine baked goods for centuries.
Using a spray can of black decorator icing, we added a slit pupil to the middle of each cupcake. We were now ready to assemble the cake. Unfortunately, we seemed to have about 23 more cupcakes that we actually needed.
Darn. Extra cupcakes. I hate it when that happens.
To assemble the cake, I first stuck the tower model into the Raspberry-Chocolate Cake Mass, using the conveniently located spiky bits on the bottom of the model. Lucky those were there....
RavingChild picked out his favorite eyeball cupcake to be mounted on the tower, and the Chosen One was placed between the fork tines and secured into place with toothpicks.
The remaining eyeball cupcakes were arranged around the base of the tower, because hey- cupcakes.
In the end, it all turned out fine. The display was very successful, the kids at the party loved it, and the grotesque raspberry-chocolate cake blob tasted very good in spite of everything.
So there.
This video cracks me up.
Question & Answer
Question: Select the incoherent image in the following sequence of images.
Choices:
 |
 |
 |
 |
|---|---|---|---|
| (A) | (B) | (C) | (D) |
|
|---|
 |