Question ID: 2000-2969-0-1-2-3
Recipe Description
1. You will need EDIBLE gold and silver leaf supplies. I emphasise the word EDIBLE as it is available as a crafting product and as a food product. The crafting product appears to be around the same price, but it may be alloyed with inedible metals. Perhaps not, but in any case, your loved one won't appreciate aluminium or lead in her chocs. A quick google search will quickly help you obtain this. I got mine from a supplier in Switzerland, which when dropped into the post-eating conversation, sounds suitably impressive.2. Given that you're springing lots of cash on gold/silver leaf you don't want to be making your chocolates with nasty Tesco value chocolate, you want to be getting some decent quality stuff. I'll leave it up to the reader to make the call on what's locally available or prefered by the recipient. For mine, I made a mix of very dark/high cocoa chocolate, smooth milk chocolate and creamy white chocolate, to cover all bases.3. Any extra ingredients? Fresh ginger makes a nice additive if you can crush it and extract the oil. It brings the dark chocolate to live and makes it zingy on the tongue.4. A mold for your chocolates. I obtained a nice plastic mould with varied heart shapes from my favourite auction site.5. A nice presentation box and some tissue paper to line it with.6. Oh, and a small, soft brush for applying the leaf. Your wife's make up brushes, suitably cleaned, work fine for this, but any soft-bristled painting brush from your kids craft box will do fine. Most gilding sites will suggest buying their super-soft brushes at a cost of £20, and whilst I'm sure it'll work alot better than my cheapo alternative, it's probably not £20 better.
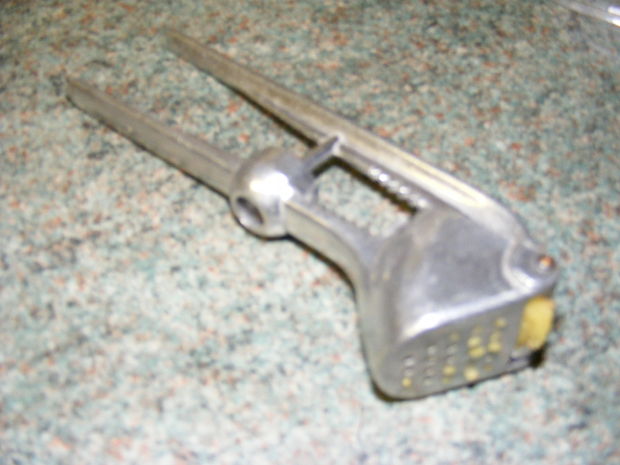
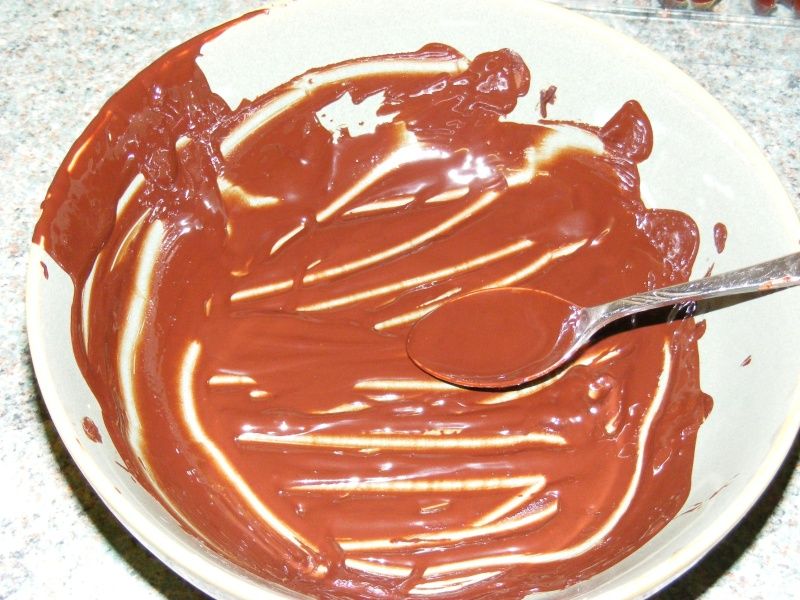
This is probably the most important part, since if you make a pigs-ear of this step, no amount of gilding can make your chocolates palatable to your loved one. And whilst it might be amusing to look on as she pretends that they're lovely, whilst simultaneously choking them down and repressing her gag reflex, it's probably not what you're trying to achieve with this endeavour.I know consumate cooks would never advocate the use of a microwave oven, and would always say to melt your chocolate on the stove inside a bowl suspended in boiling water. But we're blokes remember, and doing that is tantamount to wearing a big flowery apron. No, we're going to use the microwave. It was your best friend when you were single and you're not going to abandon it now that you're hitched.So here's what to do:1. Get 100-200 grams (i.e. a big bar) of chocolate and break it down into little cubes. Most chocolate will be formed into this anyway, so just break it up. Taste a little and put the rest in a microwavable bowl. Or, if you're me, the first bowl that comes out of the cupboard. Just make sure it's clean and free of meat sauce from last night's take away.2. Melt the chocolate in the microwave. Now - this is the bit where it can go wrong. You have to be really slow and patient doing this. You need to put the microwave on for about 10 seconds at a time, take the bowl out and stir the chocolate until it starts to leave traces on the bottom of the bowl. At the start, this won't appear to happen at all and the temptation is to stick it in for 30 seconds at a time. If you do this you'll mess your chocolate up and most likely start a small fire. 10 seconds at a time, take out, stir, put back in. That's the order of the day. You have to stir until as much choc melts as possible before putting it back in again. It should be the stirring that makes it melt, not sitting it in the microwave.3. Add any flavourings such as ginger oil or fresh vanilla pod or orange oil, or whatever she likes. One or two drops will do for about 200g of chocolate. Adding a load will stop your chocolate from setting, so be careful.4. Make sure you have your mold to hand once the chocolate has melted. It should stay melted for a few minutes and if it starts to harden can be melted gently as before.5. Carefully pour the choc into the mold.6. Let it cool naturally on the work surface for 15-30 minutes, but at this point it will still be very soft to the touch, so then you can put it into the fridge for about 15-30 minutes to make sure if goes hard. I observed that the higher the milkfat content in the chocolate then the longer it takes to harden and the easier it is to melt to the touch.Once it has set, you can remove it from the mold and begin to adorn it with your bling.
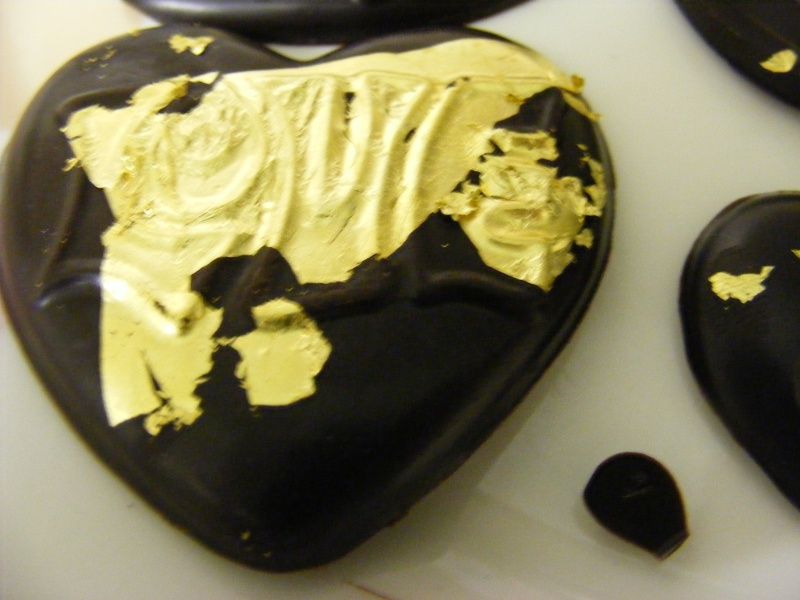
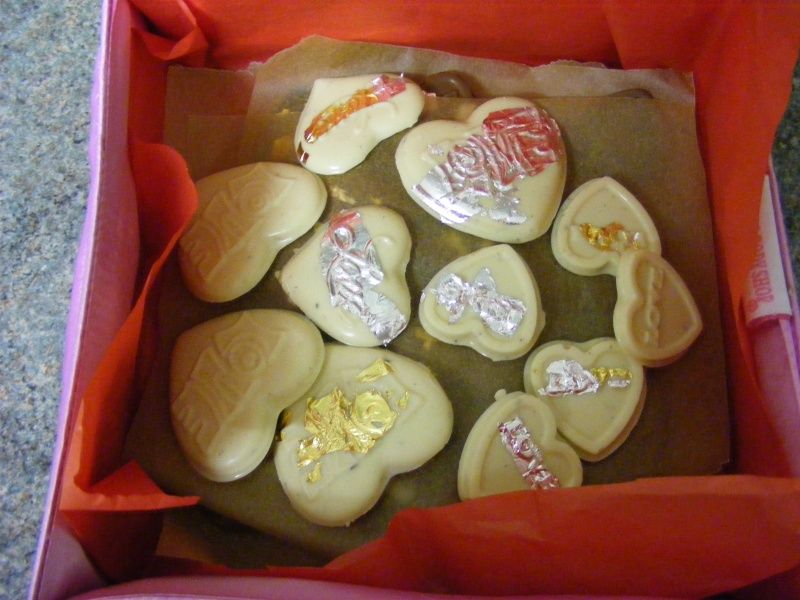
This is frankly, the most difficult bit, and when you look at the images, you'll see that I wasn't altogether successful with it. But women like a trier, so don't let your lack of artistic talent stop you from doing this. I mean, you won't know if you can apply gold leaf until you try - there's pretty much no other practical skill you can practise before this to make it any easier for you. It's an art-form in itself. Perhaps if you're good at soldering and have a steady hand then it'll help you. I'm crap at soldering too, so that probably why my applications look so bad.Gold leaf it thin. Very thin. It's not paper thin. It's air thin. So much so that if you open your gold leaf sheet and inhale sharply you might get a lungful. Seriously, it's nano-thickness and will attach to surfaces which come close to being in contact with it. It's a bit like cling flim, but cling won't disintegrate if you try to remove from your finger when it sticks. Gold and silver leaf will.However, being a practical bloke, you will use this to your advantage. At first, I wanted to completely coat an entire chocolate in gold. I was successful in doing this, but it looked wrong, and inedible. It looked even more wrong, when I did it with silver leaf, as it looked like it was still in the wrapping paper.So I decided to flake my leaf and apply it 'artistically'. Some might say unevenly and perhaps even inelegantly and sporadically, but I'll stick with my original claim.Here's how you do it:1. Get your chocolate right next to your gold leaf envelope and carefully open the top paper from the leaf.2. Turn it upside down onto your chocolate and brush gently with your soft brush. It'll probably tear a little bit, but that's fine. With enough practise you'll know how much pressure to apply to smooth the leaf and how much to apply to break a bit off.3. Tastefully apply in this manner and smooth the leaf onto the chocolate. The colder the chocolate is here, the better the result will be.4. Um...that's the extend of my expertise on this matter. It'll largely be trial and error here, but just do your best and try a few different things. At least you can always eat what goes wrong! What could be better! And with every bite you're adding value to your worthless carcass!
When you have finished, blinking the sweat and most likely, stray bits of metal, from your eyes, you can relax in the knowledge that you're almost done. The woman of your dreams will soon be revering you as a manly God you will no doubt feel you are at this moment in time.But don't give in yet. She won't be swooning in your arms if you crudely wrap them up in newspaper or put them in a cleaned out tin of 40/20 multigrade. You'll need to think how a women thinks and find something soft, girly and possibly even pink to put them in.Luckily, I had something that I could recycle in the house, so I didn't have to be seen outside with a pink silk box - phew! But at any rate, be practical and line it with tissue paper (from the crafting store) and place chocs gently into the box. If you have enough chocs to make a few layers then separate out with bits of grease-proof paper otherwise thely'll all stick together and the leaf will transfer between them. Not nice.And that's pretty much it. My lady was very much appreciative of the effort I put in this year and when she got talking with her friends and they all said that their blokes bought them nothing/ironing boards etc. I knew that they were all secretly jealous of my awesome skills and 'sensitive side'.Job done!
Question & Answer
Question: Choose the best image for the missing blank to correctly complete the recipe.
Choices:
 |
 |
 |
 |
|---|---|---|---|
| (A) | (B) | (C) | (D) |
|
|---|
 |