Question ID: 2000-2109-1-4-10-11
Recipe Description
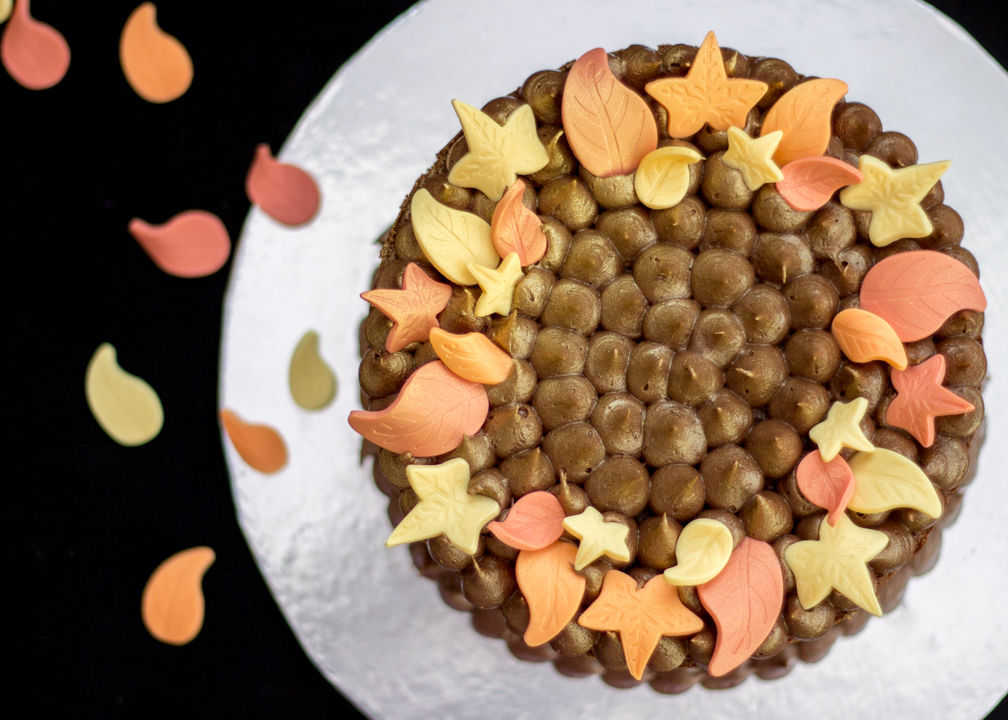
Roll out each colour (one at a time) on a surface lightly dusted with icing sugar and cut out an assortment of leaf shapes & sizes.Want to make them curvy shaped like mine? You don’t need to go out and buy loads of fancy, expensive moulds! All you need is a couple of sheets of cardboard, a rolling pin & some blu-tack. (See image)Once you’ve cut out your shapes, simply lay them however you like on your make shift moulds and allow to dry at room temperature for a minimum of 24 hours to ensure they keep their shape.And that’s it!
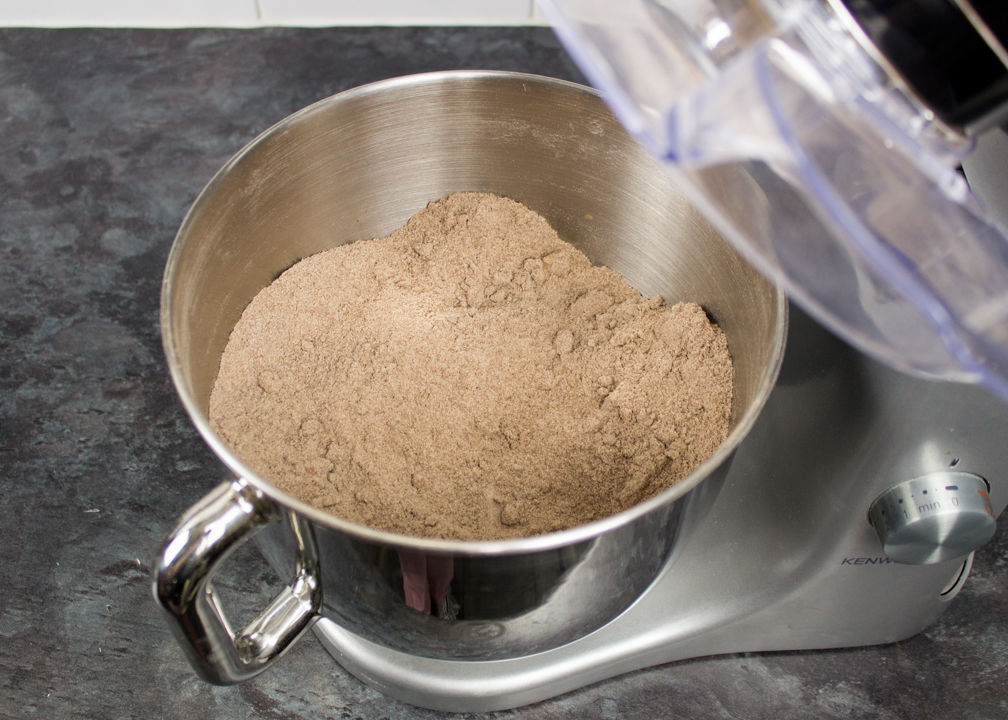
Lightly grease the 3 baking tins & line the bottoms with baking paper.Preheat your oven to 180°C/Fan 170°C. In either a stand mixer or a large bowl with an electric hand whisk, beat together the butter, sugar, flour, cocoa powder, baking powder & salt until it forms a light sandy mixture.
Beat the milk, eggs & chocolate extract together in a jug using a fork. Then with the speed on low, gradually add two thirds of the liquid into the dry ingredients. Increase the speed to medium and mix until it’s smooth, thick & shiny.
With the speed on low again, add the remaining third of the liquid – then increase to medium and mix until smooth and shiny.
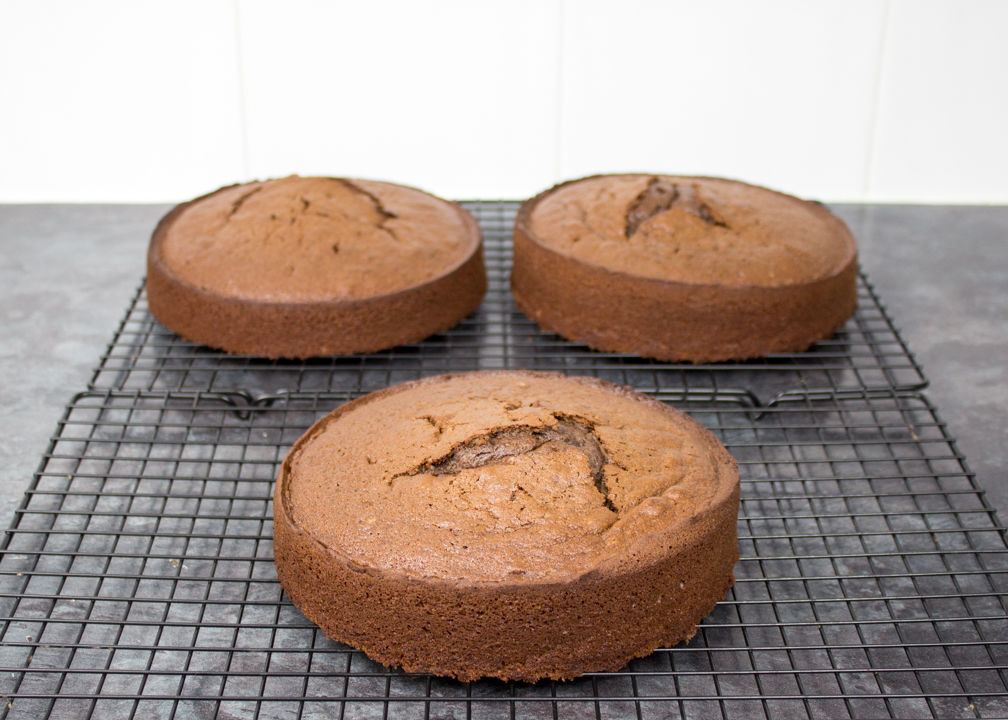
Divide the mixture evenly between the 3 prepared tins and bake in the lower section of the oven for 30-40 mins. To check if they’re cooked – insert a skewer into the middle. If it comes out clean, it’s cooked. If it has cake batter on it – it needs a little longer.When cooked, allow to cool in the tins for about 30 minutes. Then take out the tins, peel off the baking paper & transfer to a wire rack to cool completely before decorating.
Either in a stand mixer or a large glass bowl using an electric hand whisk, beat together the icing sugar, cocoa powder & butter until sandy in consistency.
With the speed on low, add in the chocolate extract & small amounts of milk (a little at a time) to loosen the mixture.Remember, you can always add more in but you can’t take it out!Once you see it turning darker in colour and smoother in texture – increase the speed to medium/high and beat until light and smooth.
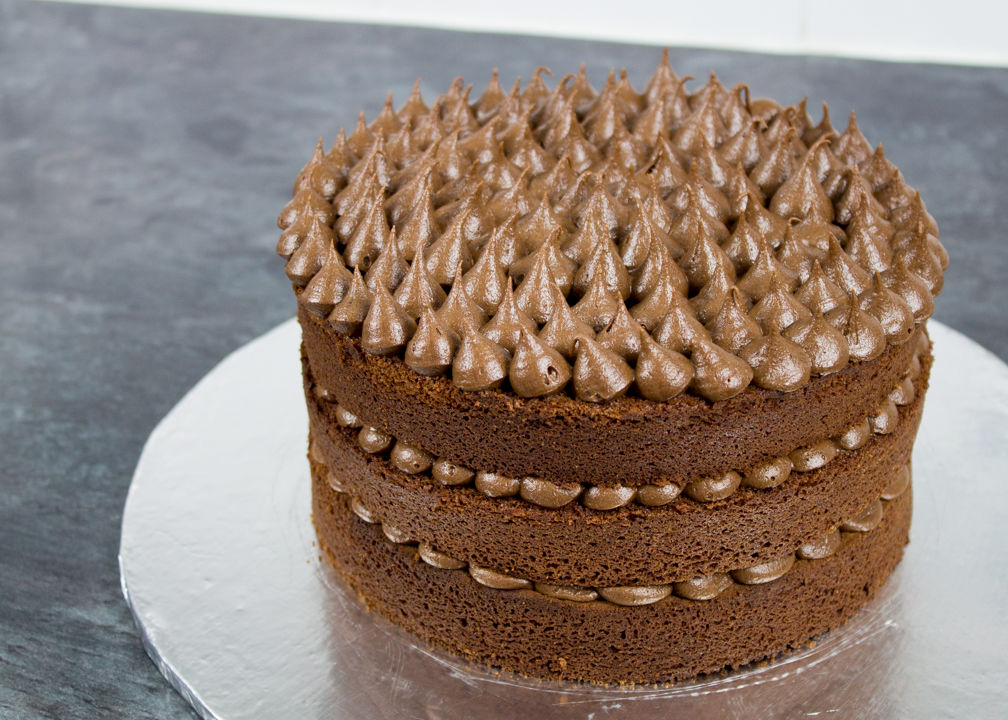
If your cakes haven’t baked perfectly even (like mine never do!) carefully slice of the tops off to make each layer flat and the same size.On a cake board or large serving plate, centrally place the bottom layer. I use this one cut side up to make sure you get a flat foundation. Load a piping bag with a large round nozzle and fill with some buttercream frosting. Start by piping blobs around the edge.
Continue by piping a spiral within the ‘blobbed’ edge – from the outside inwards.
Pop the next layer on top, cut side down – see how pretty it looks? Repeat the piping process on this layer.
Then add on your final layer. (Again, cut side down.) This time, we’re going to pipe blobs all over. So, starting from the outside and working your way to the middle, start blobbing!
Now all that remains is to lay on your leaf decorations however you like and spray all over with some gold shimmer spray. If your board looks a bit empty like mine did, simply pipe a border of blobs around the bottom of the cake.I told you it wasn’t as difficult as it looked! I love this chocolate celebration cake recipe as it’s pretty much just a case of chuck it all in, mix it, bake it, done. No faffing around for ages – just pile it all in! You could very easily adapt the decorations to suit any occasion too. For example, get some green, white & red fondant – cut out Christmas shapes (trees, presents, snowmen etc) & make exactly the same as above, maybe with some silver shimmer spray to add that extra ‘wow’.For more easy to follow step by step recipes, visit www.kitchenmason.com.
Question & Answer
Question: Choose the best image for the missing blank to correctly complete the recipe.
Choices:
 |
 |
 |
 |
|---|---|---|---|
| (A) | (B) | (C) | (D) |
|
|---|
 |