Question ID: 4000-8560-0-3-5-8
Recipe Description
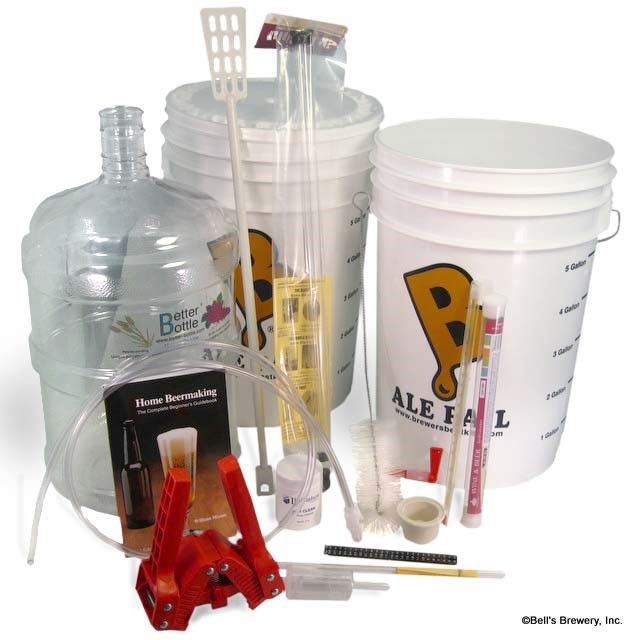
As always, you're going to need some equipment and ingredients. If you are a beginner like myself, I recommend getting an ingredient kit from your local brewing store or online. They are really great since they have all of the compatible ingredients in them and can make up for lack of experience.EquipmentLarge cooking kettle (16+ quarts) Outdoor cooking stove (this probably will get a bit messy) Stirring spoon One Step cleaner (or something similar) Measuring cup (or quart sized mason jar) Carboy/ fermenting bucket (I've heard carboys work better) Air lock Hydrometer Grain sock (often included in kit if you choose to get one) Sink for ice bathIngredients (again these are all prepackaged if you get a kit, I can't recommend it enough). If you have some experience brewing, feel free to experiment with your ingredients since I'm sure you have a better idea than I do :P Malt Yeast Favoring hops Bittering hops
One of the most important steps in home brewing is cleaning your supplies. If you are not extremely thorough with the cleaning you may contaminate your brew with a multitude of debris, most notably, yeast. By cleaning, you are limiting the debris and more precisely controlling the fermenting process. During our brewing we used One Step which is, as the name implies a one step cleanser and sanitizer. Just mix it in to your kettle that you will be cooking your wort in and dip the rest of your supplies in to finish this step. Be sure to sanitize your carboy or fermenting bucket too!
The first step for the actual brewing process is to steep the grains. This process can be thought of as brewing tea. Before you can do this however, you have to pack the grains into the grain sock and tie a knot in the end. The sock is a porous cheesecloth fabric that allows the grain flavors to permeate into the wort. You will start by filling your kettle with about 2.5 gallons of water. Put it on the stove and begin heating. Temperature-wise, you are aiming for 80-110 deg F, you don't want it to boil! Dip the sock in the water to soak it then drop it into the kettle. Now depending on how strong you want your grain flavoring to be, the time you allow your grains to steep will vary. A typical time range for the grains is between 25-60 minutes. If you don't like a very grainy beer, opt for a shorter duration. When it is time to remove the sock, don't squeeze the liquid back into the kettle, just let gravity do the work.
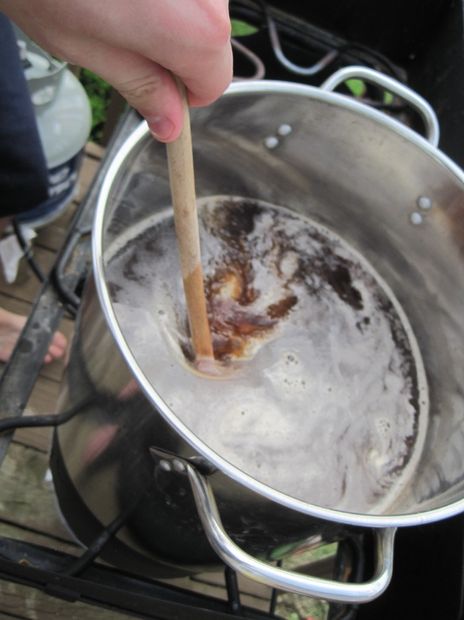
At this point, you are ready to add your malt. Malt is the ingredient that gives beer its sweet favoring. At this point it time, its time to stir and increase the heat to a boil. You are going to want to continuously stir the wort while heating until you have a nice rolling boil. Be sure to stir the bottom of the kettle too so any sediment that may have settled doesn't burn and ruin the wort. Keep an eye on the kettle in case it starts to foam, you don't want this as it can boil over and cause a huge mess (and lost future beer).
Now something that I learned during this process is that beers actually use multiple types of hops. The first is the bittering hops and the second is the flavoring hops. Each does what the name implies, adding bitterness and flavoring to the wort. If you are not using a kit, be sure that your hops are compatible with each other and for the style of beer you want to brew. When you add the hops, first add the bittering hops and allow it to boil for about 55 minutes, stirring occasionally. Once the time has elapsed, add the flavoring hops and let that boil for 5 minutes. Once the 5 minutes has passed, immediately terminate the boil.
Once all of the ingredients have been properly cooked down, you will want to cool the wort as quickly as possible. Make an ice bath by filling up a large sink or tub with ice and cold water. Continue to cool until the wort is at room temperature (about 70 deg). It is very important that the wort has cooled before you add the yeast, excessive heat will kill the yeast. No yeast= no beer. Occasionally stir the wort to ensure that it is all cooling evenly. You can use a thermometer (be sure to sanitize if you do) or just feel the outside of the kettle until you have gotten close to your desired temperature. At this time it is also a good idea to use your hydrometer to get a specific gravity reading. This number will be required after the beer is done fermenting to calculate the alcohol by volume percentage.
This step is really easy to do but even more easy to make a huge mess. Use your funnel to minimize the chance of making a mess. If you are using a fermenting bucket rather than a carboy, this step will be much easier. Whatever you are using to ferment, transfer all of the wort into the fermenting vessel. Depending on how big your batch is will determine how much water you are going to add. We were making a 5 gallon batch so we had to add about 3 gallons of water to the wort.
The last few steps go by quickly. Open the packet of yeast and dump the contents into your fermenting vessel. This is called pitching the yeast. The yeast is now ready to do its thing and tart fermenting. Now if you are not super savvy with chemistry, when yeast ferments sugar into alcohol, it creates carbon dioxide as a byproduct. We need the vessel to be closed but still allow the gasses to vent. Enter the airlock. To prepare the airlock, fill the two cylinders with water to the specified levels. Insert the airlock into the carboy and move it to its fermenting location. For best results, put it in a dark room that is between 62-70 degrees. The fermenting process typically takes two weeks but this time can vary. With this brew, the fermenting process was finished in 6 days.
Te fermenting process should begin within 24 hours of the yeast being pitched. You will know it is occurring because small CO2 bubbles will be be bubbling through the airlock. Typically the fermenting process will begin to slow down after 4-6 days. The fermenting is complete when no more bubble activity occurs for 48 hours. Once the fermenting stop you will want to bottle within a couple of days for best results. So that's all there is to it! This is a fun project that while it takes some time that I am thrilled that I got the chance to try it. After doing my first home brew, I can honestly say that I am hooked and will be doing a lot more in the future. Thanks for reading and be sure to catch my follow up tutorial on how to bottle your brews!EDIT: I have posted the follow up tutorial on how to bottle your home brewed beer. If you enjoyed this tutorial, please check it out! https://www.instructables.com/id/Bottling-Your-Homebrews/
Question & Answer
Question: What is the correct order of the images?
Choices:
    |
| (A) |
|
|
| (B) |
|
|
| (C) |
|
|
| (D) |
|
|
|---|
 (D) (D) |