Question ID: 4000-1614-0-2-5-6
Recipe Description
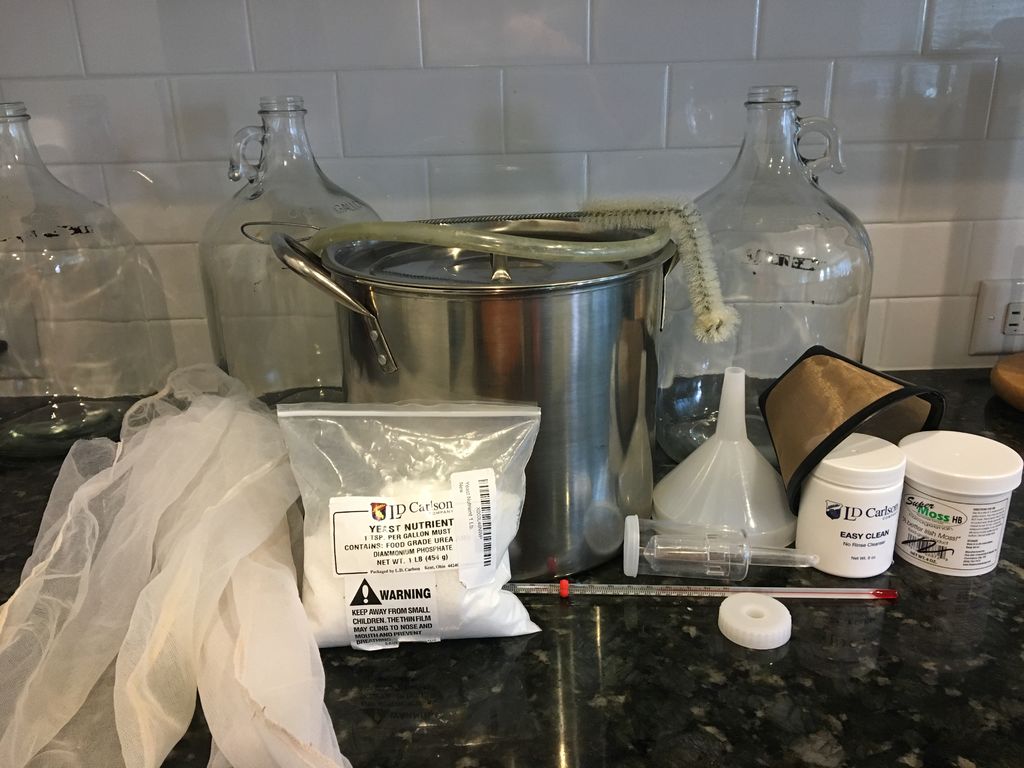
Equipment required (much of the equipment and ingredients can be purchased together online in the form of beer making kits. It's an easy way to get started immediately. Just search for "1 gallon beer making kit" in your favorite search engine and choose your favorite kit. It's how I got started.):1 gallon glass carboy (fermentation jug) Screw cap or rubber stopper (with a hole for blow off tubing) Airlock 12" thermometer No-rinse sanitizer 8 quart stock pot (a 2nd pot is handy) Funnel Fine mesh strainer Mesh grain bag (optional) Mesh hop bag (optional) Auto-siphon (optional but highly recommended - for bottling) Bottle filler (for botting, obviously) 10 empty non-twistoff or swingtop bottles (for bottling) Bottle capper and caps (if not using swingtop bottles) Carboy and bottle brushes (for clean up) 10 lbs iceIngredients required:water, grain, hops, yeast (plus sugar for bottling)This week, I'm brewing a classic Rauchbier, or smoked beer (sometimes called a "BBQ beer"), but the basic steps will be the same regardless of what style beer you want to brew (with the exception of lagers, which need to be fermented at a lower temperature). You'll change the grains, hops and hop schedule, and sometimes boil length to create any kind of beer you like. Note: this is my first time brewing this beer, which has been adapted and modified from a recipe in a book.The ingredients that I used for this instructable are as follows:1 lb. German smoked malt (beechwood smoked) 0.75 lbs. German pilsner malt 0.5 lbs German Light Munich malt 0.25 lbs. Caramunich malt 0.15 lbs Carapils malt8.5g Hallertau (German Tradition) hops 7.0g Tettnanger hops1/2 packet of Safeale 05 (ale yeast)I like my BBQ a little spicy, so I also added the following peppers (optional)1 dried ancho pepper (including seeds) 2 dried chili de arbol peppers (including seeds)
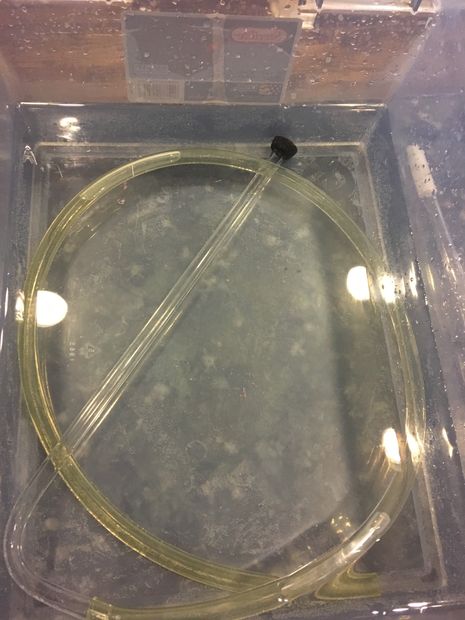
Before you begin anything, it's important to have clean, sanitized equipment. While this is important at every stage in the brewing process, it's absolutely critical after the boil (once the wort is cooled and yeast is added). Yeast is very sensitive, and any contamination could ruin your beer.I start by cleaning my brewing pot and carboy with a little warm soapy water, rinse both thoroughly. Measure out 1 gallon of water in the carboy (use good clean drinking water - NOT distilled water). I use tap water. Pour into the brewing pot and begin to heat to 160°F.While your water is heating, measure out 1 tablespoon of no-rinse sanitizer, add to 1 gallon warm water in your carboy (the carboy will need to be sanitized before you pour the wort and yeast into it later). Shake gently until the water turns clear again - at least 2 minutes. Pour the sanitizing solution into a small container. Add in your thermometer, funnel, fine mesh strainer, any measuring spoons that you'll need and anything else that needs to be sanitized before using. Don't worry too much if you don't add everything right off the bat, as you can always add them later, just be sure to leave in the sanitizing solution for at least 2 minutes prior to using.
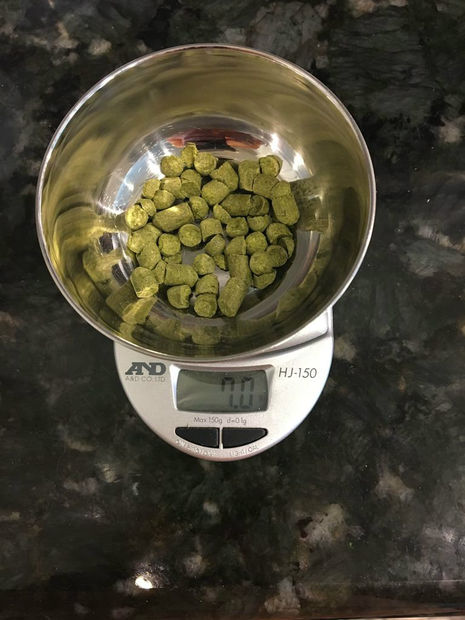
Once your water has reached 160°F, it's time to start the mash. This is where we add all of the milled grains to the hot water and let them steep, like a tea, for 1 hour.Since I use a grain bag, I put my sanitized grain bag in the pot, add my milled grains, stir (with a sanitized spoon), and take an initial temperature reading. The temperature should have dropped to somewhere between 144°F and 152°F. Cover (leave a crack open if it temperature is toward the high end of the target range) and set a timer for 60 minutes.Every 10 minutes, stir and check the temperature. It should stay within the 144-152°F range. If it drops below 144°F, set the heat to low for a few minutes and keep checking the temperature to get it back to the target range.At this point, it's advisable to go ahead and measure out your hops into clean, sanitized bowls. If you bought a kit with pre-measured hops, you can either weight them out or just eyeball it. Otherwise a small kitchen scale comes in handy here.Divide the Tettnanger hops in half, and the Hallertau into thirds.If you're adding the chilies for the spicy BBQ option, you can also cut and divide them out now.
At the end of 60 minutes, return the pot to high heat and raise the temperature to 170°F, stirring constantly. While the mash is heating to 170°, start a second pot of water heating to 170°F as well (this should be about 2 quarts of water, but my secondary pot is smaller, so I heat about 1 quart of water, and do this twice). When the grains in your brewing pot are at 170°F, lift the bag from the wort (the 'tea' that was created by soaking the grains in hot water), and set it inside a strainer or colander that will fit on top of your brew pot. Let the liquid drain back into your pot. When your second pot of water is at 170°F, pour it slowly through the bag of grains so that it also drains into your primary pot. This is called sparging. The reason we do this is to extract as much of the fermentable sugars as we can. Repeat with a second pot, if needed, until you've collected about 1.25 gallons of wort. If you have a second pot large enough to hold 1.5-2 gallons, it's preferable to recirculate all of your collected wort through the grain bag.
Once you've collected 5 quarts of wort, bring it to a boil. Keep boiling until you hit the hot break (the wort will foam) - reduce the heat to keep it from boiling over. All you want is a light boil - too hot and you'll lose volume and fermentable sugars.Start a timer for 60 minutes. Add 1/2 of your Tettnanger hops (either directly to the wort or in a hop bag).At 30 minutes into the boil, add the remaining Tettnanger hops (and 1/2 dried ancho, if using)At 45 minutes into the boil, add 1/3 of the Hallertau hopsAt 50 minutes into the boil, add remaining ancho and chili de arbol, if using. I also add 1 tsp of yeast nutrient and just a pinch of "Super moss"At 55 minutes, add 1/3 Hallertau hopsAt this point, prepare your ice bath. I just use my kitchen sink (smallest side). Add 3-5 inches cold tap water, 1-3 tablespoons of salt mix until all salt is dissolved. I don't add the ice until after I've transferred the pot. Salty ice water is the fastest way of cooling the wort quickly. Faster cooling contributes to better clarity.At 60 minutes, turn off the heat, add remaining Hallertau hops.Transfer pot to sink with salt water. Cover (to prevent ice from being accidentally dropped into the wort), add ice and water until the pot is mostly covered. Remove lid and allow the wort to cool to about 70°F, about 30 minutes.
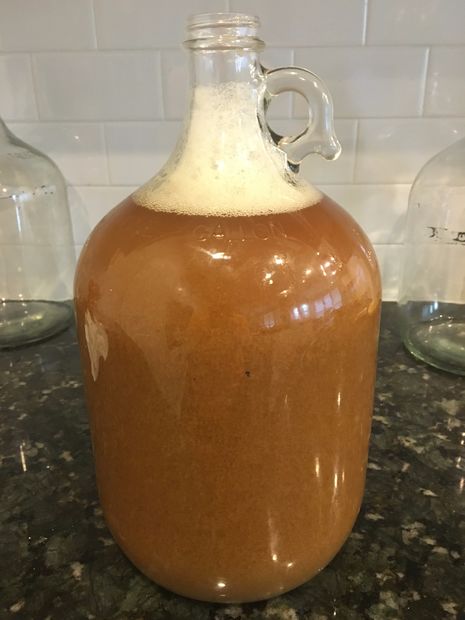
Once cooled to 70°F, place strainer over funnel and pour your beer into the glass carboy. Yeast needs oxygen and the strainer helps aerate the wort as well as catch any sediment from going into the fermenter.Add water to bring the total amount of beer to the one gallon mark, if needed.Add your yeast (1/2 a packet designed for a 5-gallon batch, or the full packet if using a one gallon kit), and shake vigorously for at least 2 minutes.Insert sanitized tubing into sanitized stopper and affix to the carboy. You've just made a blow-off tube. This will allow carbon dioxide to escape while the yeast are busy turning your wort into delicious beer. Put the free end of the tubing into a glass of sanitizing solution and set aside in a cool, dark place (ale yeast likes to ferment between 68°F and 72°F, so normal room temperature or slightly cooler - but always in a dark place - sunlight is beer's enemy).I put mine under the sink in our laundry/utility room.After 3 days, once bubbling has subsided, remove the blow-off tube and replace with sanitized airlock. Leave the beer fermenting for another 11 days or so before bottling.
Technically, after Step 5 is completed you have beer, but it will be uncarbonated. Since flat beer is not ideal, we'll go ahead and bottle the beer.You will need a few additional pieces of equipment for this step: an auto-siphon, bottle filler, empty bottles, bottle caps, and a bottle capper (or just swing-top bottles).Note on bottles: if you're re-using commercial bottles, it's important to make sure that they're clean and sanitized and not twist-off bottles. For swing tops, your choice is limited to Grolsch or a few other imports. I personally prefer brown bottles for aesthetics, so I have not used Grolsch myself. Regardless of what kind of bottle, immediately after drinking or pouring into a glass, rinse the bottle with warm (optionally soapy) water and set aside. It should be clean enough at this point to sanitize later.Note on bottle labels: if you plan to remove the labels and add your own, or just write on the bottles with a chalk pen, be aware that not all labels are the same. Some are MUCH more difficult to remove, and not worth the effort. There are many breweries whose labels come off easily just by soaking in hot soapy water. A few of my favorites are Dogfish Head, Sierra Nevada, Boulevard, and several others. Keep in mind that if you're having to scrub in order to get glue off the bottles, it's just not worth the effort. I also recommend a strong cleaner for soaking bottles, such as Star San or Ultimate Brewery Cleanser.Sanitize all of your equipment, including the bottles and caps (using the same no-rinse sanitizer as on brew day). You'll also need your large stock pot, so sanitize that as well. I start my mixing my sanitizing solution in a spare carboy, then pour it into the stock pot. I sanitize a couple of short neck bottles in the stock pot, then pour the solution into my square bin where I add the auto siphon, bottle filler, etc.You'll also need a 1/2 cup and 1 tablespoon measuring cups sanitized. Add 1/2 cup water and 3 tablespoons of "priming sugar" to the stock pot. The priming sugar can be honey, maple syrup (the real stuff), agave syrup or a table sugar solution. I personally prefer agave nectar due to its lower viscosity. The priming sugar does not affect the flavor of the beer; it's just used to carbonate it. Adding sugar before capping reactivates the yeast, so they will again poop out (a tiny bit more) alcohol and CO2 -- it's the CO2 we want now, to carbonate our beer.Insert the auto-siphon into the wort and the other end of the tubing into the stock pot with water and sugar mixture, leaving out as much of the sediment (trub) as possible. Once you've transferred the beer into the sugar mixture, attach the bottle filler attachment and siphon the beer into your 10 bottles. Close the swing tops or cap the bottles with your capper and set aside for another 2 weeks. After 2 weeks (or longer, depending on the style of beer), give one a try, being sure to refrigerate for at least 24 hours before opening. If the beer is not fully carbonated, give it another week or so, otherwise enjoy.
Question & Answer
Question: What is the correct order of the images?
Choices:
    |
| (A) |
|
|
| (B) |
|
|
| (C) |
|
|
| (D) |
|
|
|---|
 (C) (C) |