Question ID: 3000-4353-6-8-15-18
Recipe Description
This is easy. After removing the nylon straps the box slides up over the top. I left the bottom part of the box underneath the fridge to hamper slippage of the unit.
The shelving was already in place from the factory so they have to be removed. Apparently, the factory forgot to secure the right side of the freezer.
Underneath the freezer is the thermostat wire. Straighten the wire so that you can free it from its housing. Move the wire so that it's out of you way. It will be replaced in another location later.
Firmly grasp the freezer and pull forward to release it from the mounts. As you can see in the second picture once the mount reaches the larger portion of the hole the freezer will hang free. Attention: You may have to use some force to release the freezer from the mounts. If you don't feel safe pulling on the freezer fearing you might damage the coolant line, you could try unscrewing the 4 mounts and doing it that way. I didn't have to pull too hard but it didn't want to go easy.
This was the most nerve racking part of the project. EXTREME caution has to be observed while moving the freezer down and to the back. Too much force and the line can kink, break, or crack. Too much movement overall can damage the line. And moving the freezer too far back can also kink or damage the line. Because of the placement of the coolant line I found that it would have been too risky to attempt to completely flatten the freezer along the back of the fridge. Notice how it wraps around to the right side. No problem as it will not be in the way. So with ease, bend the freezer downward until it looks like the first picture. Then carefully bend the edges flat against the walls.
Break out the big guns! I needed a reciprocating saw to get the panel off. It had been glued on at the factory. There are NO screws holding the panel on. I had no consistant method of taking the panel off. I just started cutting around the edges pulling little pieces off at a time. Careful here. The plastic is sharp and it may tear the weather strip around the door and/or cut you.
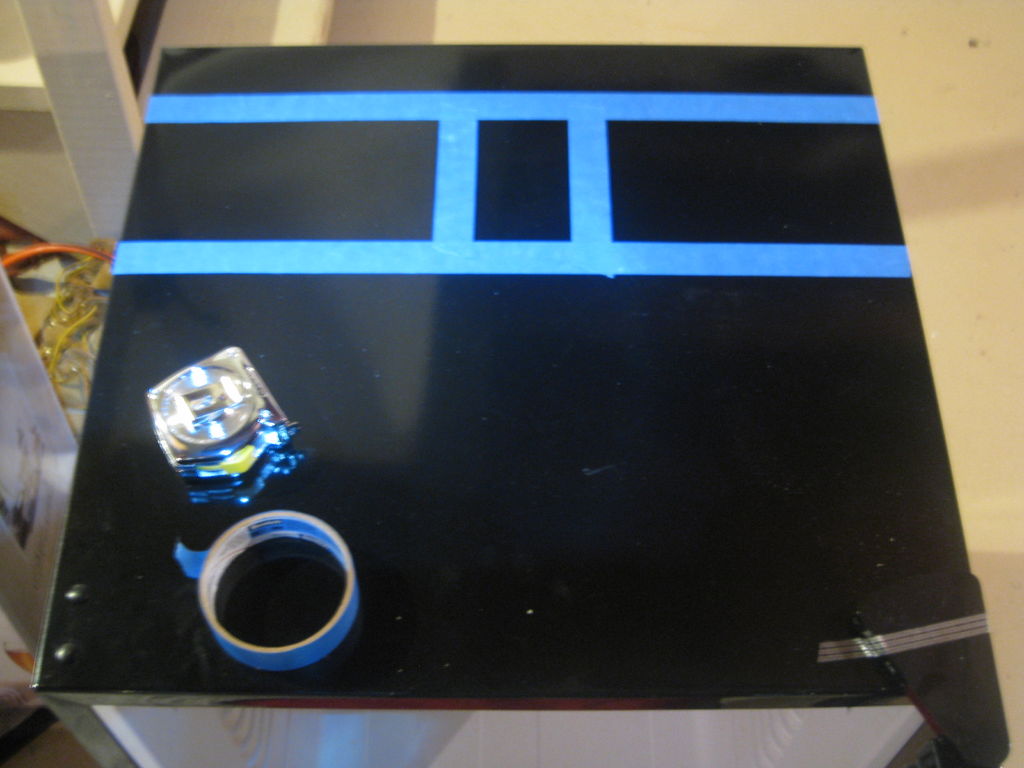
Of all the kegerators I've seen, all have the tower towards the rear of the fridge. I used painters tape to help get a general idea of where the tower will go. Use a tape measure or a square to get your lines straight.
I found the exact center of my drilling area, made a mark and began drilling. Since the fridge has a metal top, you'll need a metal hole bit. I used a 2.5" bit here. I found this size perfect. By the way, the bit will cost you $18 at Lowe's or Home Depot. Attention: Go easy on the drilling. It's not necessary to push hard. As soon as you get through the metal, STOP! You'll see why in the next step.
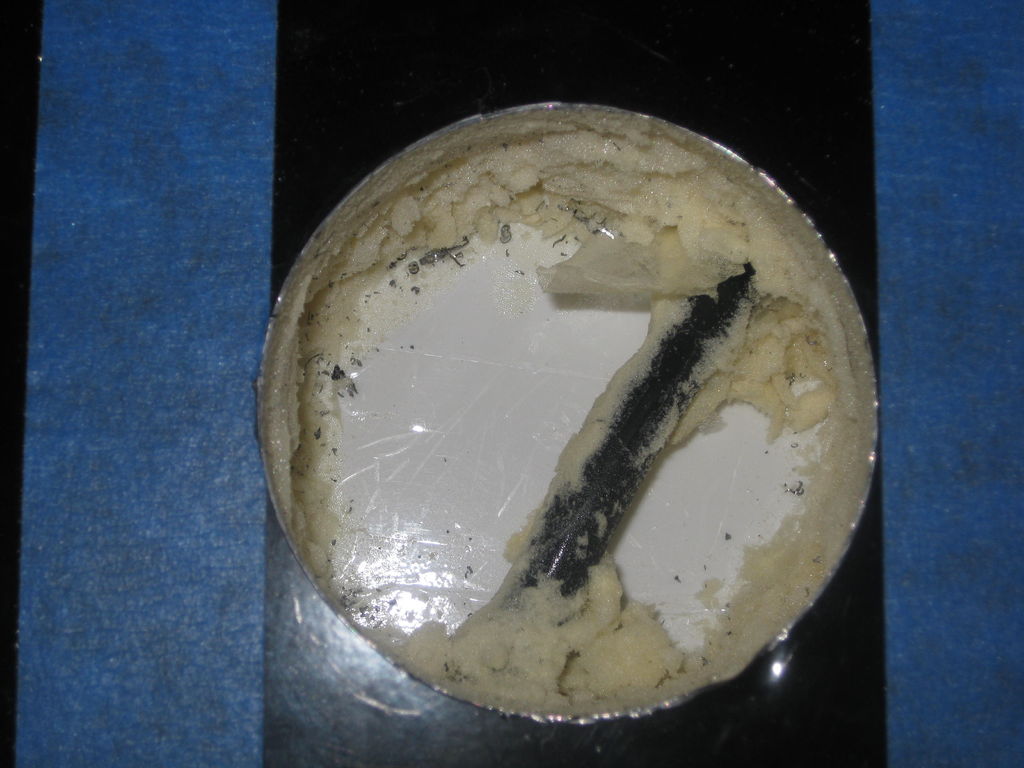
I've read other DIY kegerator projects and they all talk about internal wiring and their locations. I knew the fridge only had one wire running through it for the thermostat. No one, including GE knew where it was. I found it! Right down the middle of my hole. I used a utility knife to gently cut away the insulation to expose the wire and the top of the fridge interior.
I used a regular drill bit, no size in particular, to punch a guide hole through the plastic from above. I just eyeballed where I thought the center was. Watch the wire! The first picture shows the guide hole from the inside. Go back to your 2.5" hole bit, get inside the fridge and complete the hole. Again, watch the wire! Slow and steady wins this race.
Clean off the top of the fridge. There will be metal shavings from drilling. You don't want to scratch your fridge, do you? Now place the tower over the hole and center it so that it looks good to you. Use a visible marker and mark through the screw holes on the tower. The bolts I used to secure the tower down are 3/16th x 3" bolts. Use a drill bit slightly less than 3/16th to do your pre-drilling. Drill all the way through on three of the holes. On the fourth (note the picture), only drill until you get through the metal.
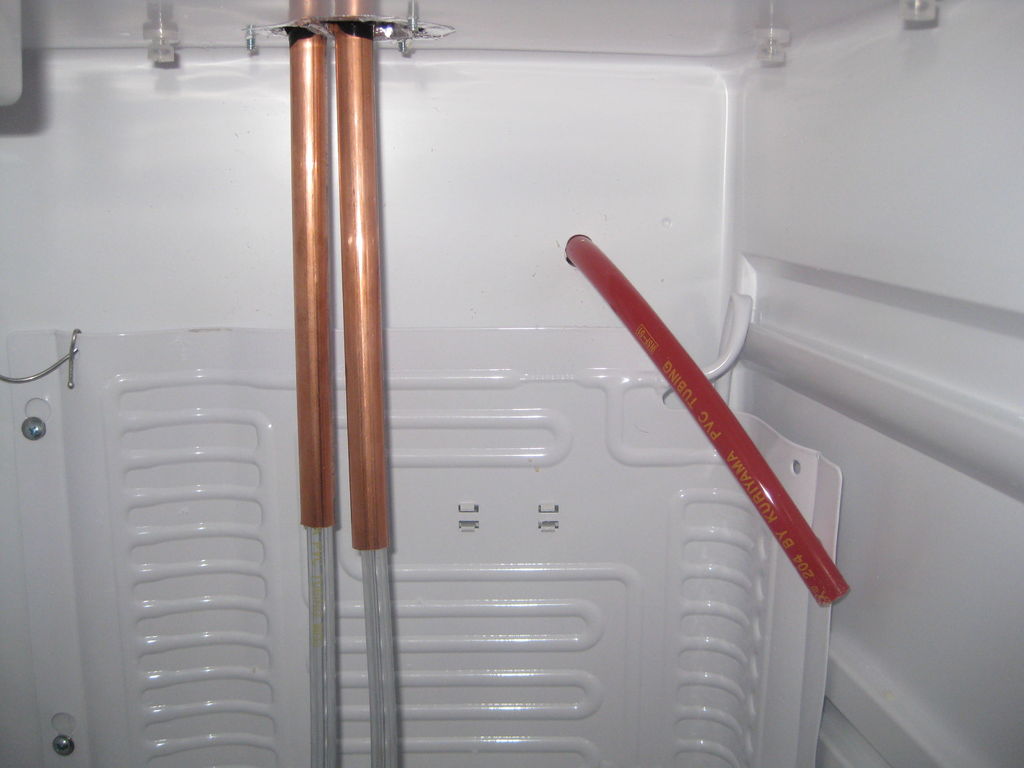
I used aluminum tape to seal the hole and prevent moisture from seeping into the foam insulation. I taped the wire, too.
The freezer at this point is now basically the cold plate for the fridge. It needs to be secured to the walls or it will just bounce around and probably break. I marked where I thought the screws should go, pre-drilled the three holes, then used 3/4" long screws and washers to secure the plate down.
I read somewhere that it helps to use copper pipe to aid in keeping the beer cold on the way to your glass. My beer lines are 3/8" so I got 1/2" pipe and cut two 16" to 18" pieces. I then cut two pieces of pipe insulation to roughly the length of the tower. I cut the peices in half, lengthwise, wrapped it around the pipes, taped it together, and slid the insulated side into the tower. Notice how I left the copper inside fridge exposed. Just to get it over with, secure the thermostat wire as shown in the picture.
The screws that came with my tower won't cut it. I need something to go all the way through. I got 3/16 x 3" bolts. They worked out perfectly. In fact, I didn't see a need to place nuts on the inside. The tower is quite secure without them. For the hole where the wire is, take one of the bolts and cut it down to about a half of an inch and screw it in. The bolt will catch on the metal and secure fine. Plus, the screw heads match.
Since my CO2 tank is too big to fit in the fridge, I had to run the line in. I chose to run the line through the back. Why? If I ever get a 5lb. tank to fit inside the fridge, I can insulate and cover the hole and it will be where no one can see it. My gas line is 1/2" but I had to use a 5/8" bit. I don't know why.
Here's what it looked like before the keg went it. Pretty, huh?
Two kegs fit in just fine. I'm sure a 5lb. CO2 tank will fit on the back ledge as well.
With the kegerator in its new place, attach your keg and your CO2 line and give it a go.
I hope you found this instructable educating and worth while. If you see something I may have left out, leave a reply. Good luck and have fun!
Question & Answer
Question: Select the incoherent image in the following sequence of images.
Choices:
 |
 |
 |
 |
|---|---|---|---|
| (A) | (B) | (C) | (D) |
|
|---|
 |