Question ID: 4000-13641-3-4-5-8
Recipe Description
Since π is a Greek letter, there was no point in re-inventing the circle, I just looked at the obvious place for a good Pi, the font menu of my graphics applications.
There are so many nice glyphs for the letter π, but what I needed was one with a generally uniform width. I just typed π in a vector art application and scaled it as big as a legal size sheet of paper could print.
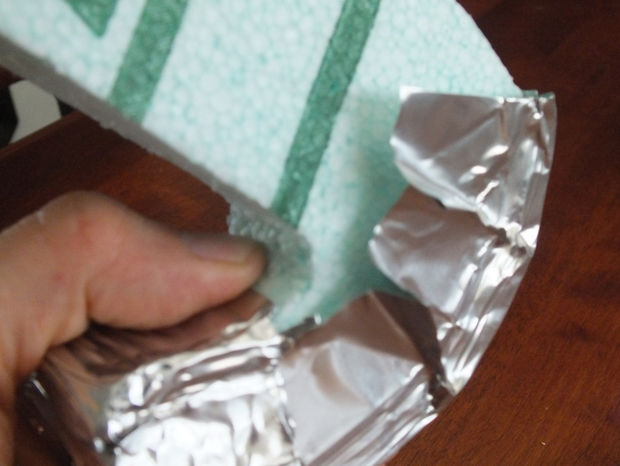
I cut it out, traced it on a piece of styrofoam and used that as my master template.
You can download our π outline in this pdf if you wish to use it.
One of our main goals was to make a re-usable mold that would make a standalone Pi.
Plain aluminun foil was too thin and weak to provide the rigidity needed for that purpose. After some research, we realized that plain dollar store disposable loaf pans were not only cheap, but sturdy, pliable and really easy to cut. Not only that, but the sheared edges where not sharp, therefore I did not end up with metal nics and cuts all over my hands. (I did poke my finger once though)
To bind the pieces of aluminum, we used aluminum foil tape made for heating and ventilation ducts. The adhesive used for this tape is non-toxic and heat resistant at high temperatures, which is exactly what we where looking for.
Before getting to work on the actual Pi project, we did a test bake of a taped aluminum mold. Apart from a light metallic scent in the oven everything else was fine and the tape held the shaped pieces in place.
Disclaimer: We made sure to lookup the properties of adhesives used for ventilation duct aluminum foil tapes and we verified ours with the manufacturer's Material Safety Data Sheet. Make sure you do the same if you choose to create a Greek letter mold of your own, regardless of it's mathematical significance.
The benefits of using loaf pans is that they where built to be light and rigid while still being very malleable.
I reshaped the corners to fit my template while keeping the length of loaf pans. I then overlapped and trimmed two sides of a loaf pan and bound them together with the tape.
The curved edges are the most challenging.
I started by shaping the tips with loaf pan corners and tacking them together with tape as the starting point.
For concave edges, I curved straight pan edges by creasing the bottom to create the desired arc. For convex ones, I cut strips out of the pan bottom so that they could be fanned out.
Once the rough shape was in place I taped the pieces in place more accurately.
Repeat the technique used to shape the two stems to the rest of the contour. Start by tacking segment pieces together and then reinforce the bind.
The shaping of the contour did leave holes on the mold bottom. For this I had planned a separate piece harvested once again from a loaf pan. I was pleasantly surprised with how much I could repurpose the original product.
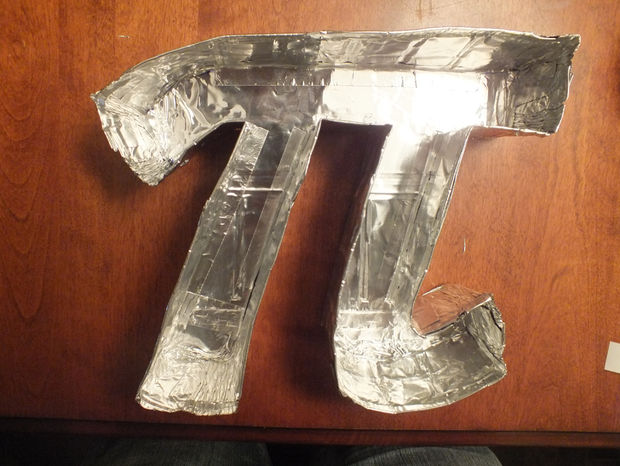
At this point, the Pi shape is made, but too tall and really flimsy.
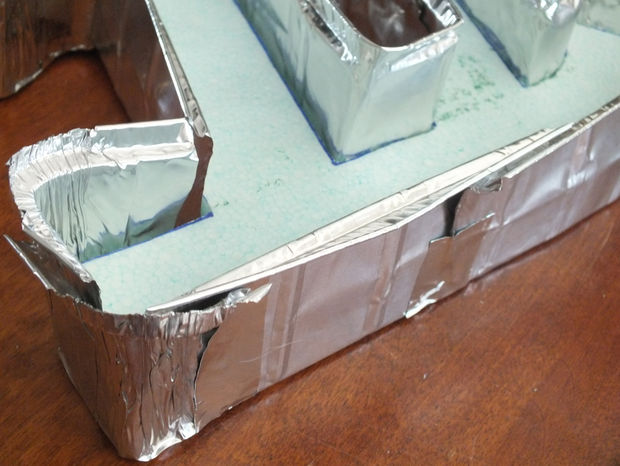
I purposely kept the full height of the loaf pans to be able to fold back a rim for structural sturdiness and to bind the top of the Pie crust.
I made a vertical cut at the corners and rolled back two folds of approximately 5mm. Tape the overlapping rim edges together and now you have a sturdy mold.
Before preparing the Pie part of this Pi. I lined the mold interior with plain aluminum foil for the purpose of facilitating unmolding and also to prevent the Pie crust from coming in contact with the aluminum tape. Even if the tape adhesive is not potentially hazardous, we preferred to isolate it from the food.
I could have used a more honorable mathematical method to obtain the Pi volume, but I resorted to approximation principles dating back to the times of Archimedes.
I filled the π with beans and counted the number of cups I used to get a reasonable Pie volume.
Wouldn't you know it, my π volume was 6 cups, which corresponds exactly to your average 9 inch circular pie pan recipe.
All credit of this pastry recipe goes to the head Chef of the No Name brand vegetable shortening company for providing us with his (or her) culinary knowledge.
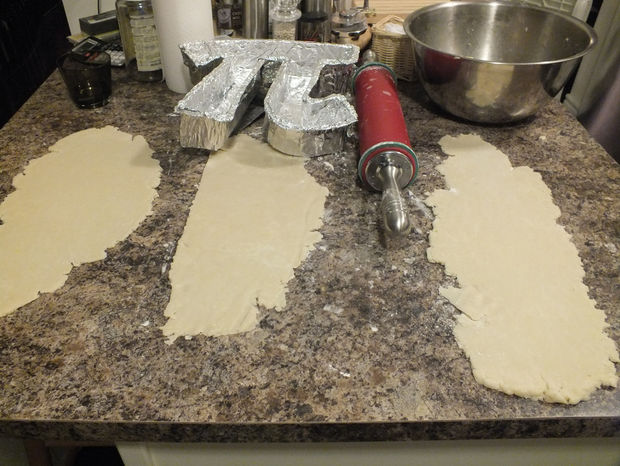
In order to obtain a Pi shell with a uniform thickness, we used rubber spacers on the rolling pin. We rolled long strips of dough and stitched them in the mold.
Here is the recipe indicated on the shortening box.
Pie Pastry
5.5 cups all purpose flour
2 tsp salt
1lb vegetable shortening
1 lg egg
1 tbsp white vinegar
In large bowl, combine flour and salt. With pastry blender or two knives,
cut in shortening until mixture resembles coarse meal with a few larger
pea sized pieces
In glass measuring cup and using fork, beat egg with vinegar. Add enough
cold water to make 1 cup, mix well. Drizzle into flour mixture a bit at
a time, mixing in with a fork, until dough looks evenly moistened and
holds together when gently pressed between fingers. You may not need to
use all of the liquid.
Divide dough into 6 equal balls. Wrap each ball in plastic wrap and pat
into 4-inch discs. Chill for at least 30 minutes before using. For best
results, chill 2 hours before using.
Roll on lightly floured surface.
Once again, credit should be given where credit is due.
We used the Summer Berry recipe from Williams-Sonoma's " Pie & Tart" p. 28 ISBN 0-7432-4316-1
(It should be noted that this book could also very appropriately be titled "π and tart" since all of the numbers in their ISBN are actually present in the numeral π)
1 cup sugar
2 tbsp cornstarch
2 tbsp quick cooking tapioca
1/2 tsp ground cinnamon
pinch of salt
6 cups mixes fresh berries (e.g. blackberries, blueberries, raspberries and/or boysenberries)
1 tbsp cold unsalted butter, but into small pieces
In a small bowl, stir together the sugar, cornstarch, tapioca, cinnamon,
and salt. Place the berries in a large bowl, sprinkle with the sugar
mixture, and toss to distribute evenly. Immediately transfer to the
dough-lined pan. Dot with the butter.
Place an oven rack in the lower third of the oven and preheat to 350F.
Bake the pie until the crust is golden and the filling is thick and
bubbling, 50-60minutes.
Before putting the π in the oven, my girlfriend mentioned that we needed to punch holes on the top crust with a fork, or make incisions with a knife to let the steam escape from the filling during baking.
I for one refuse to make any sort of alteration to π's structural integrity, but in this context to omit the surface defacing of π would cause the collapse of it's entire content.
Poking 314 holes with a toothpick did not seem like a good aesthetic option, so I resolved to just making 31 holes around it's contour.
Once the Pie had cooled down to room temperature, we put it between two trays in order to flip it face down for the removal of the mold. Once the foil was off, we used the same sandwiching technique to put our π back face up.
The mold came off intact and and the π stood on its own.
After consuming two pieces of the fruit of our π labor, we realised that we were left with Tau.
We then proceeded to declare March 15 as Tau day in honor of the left over March 14 pies.
Question & Answer
Question: What is the correct order of the images?
Choices:
    |
| (A) |
|
|
| (B) |
|
|
| (C) |
|
|
| (D) |
|
|
|---|
 (C) (C) |