Question ID: 4000-6339-0-1-2-4
Recipe Description
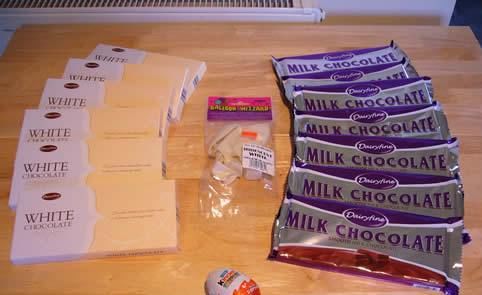
Firstly we headed to the shops where we purchased; 6 x 200g bars white chocolate (any chocolate will do really)7 x 200g bars milk chocolate 1 x packet of 12" balloons ( pearlised white suitable for helium but not for children under 3 ) 9 x kinder eggs ( 3 for photographic purposes, 6 for research and consumption ) 1 x 6" string ideally new and unused for hygiene
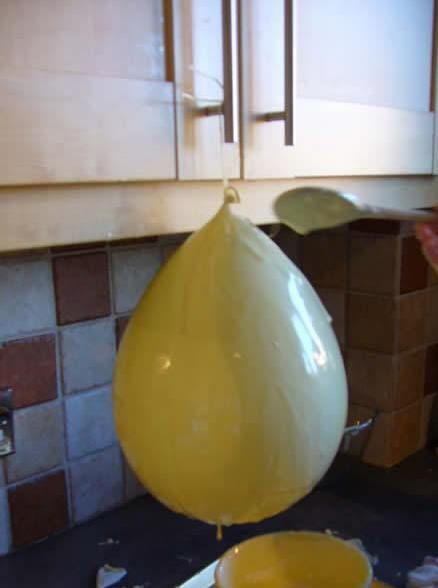
After much trial and error and searching on the web for ideas we found an article where some was using various balloons to make various weird and wonderful chocolate egg shapes. We had decided by this stage that this balloon technique was the best way to go to achieve the egg shape.We attempted filling several from the multipack with the following; expanding foam (expensive, smelly, ruins your clothing, damages the lawn and doesn't work)...........sand, flour, sugar, beans from child's beanbag (very sensual but again doesn't work)Having exhausted all of the above we decided to take a calculated risk and allow the chocolate to cool more thoroughly before dribbling over air inflated balloon.So........We started by suspended a balloon from kitchen cupboards with string.Melted some while chocolate over the hob ( in the microwave or any method for melting chocolate will be fine BUT be warned there is a risk of burning or be cautious!!!) Then we let it stand for a couple of minutes to thicken, when thicker and still runny consistency, slowly and gradually built up layers of white chocolate using the dribbling method and left to cool and harden.
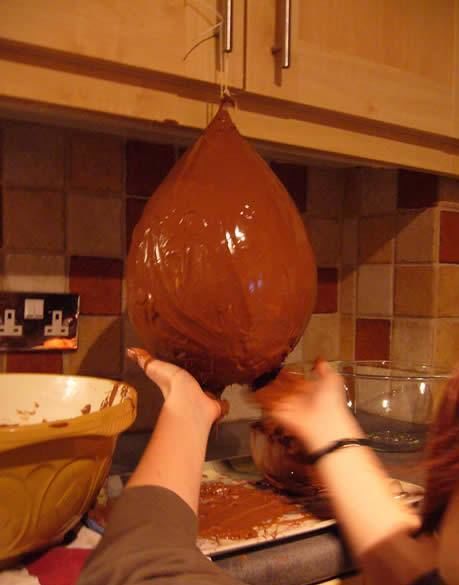
With the white chocolate now hardened we repeated process with the brown milk chocolate. The dribbling process was less satisfying with the brown chocolate and we found it went a bit gloopy as it dribbled from the top to the bottom. We attempted to smooth manually as best as possible with a spatula which kind of worked lol.Once finished leave to dry or put in the fridge to fully harden
After a couple of hours and a lot of cleaning lol with a lot of caution the air filled confection was taken out of the fridge and set down carefully on the cupboard top. Following the explosion/implosion of our first effort the egg was approached with caution and the protruding rubber of the balloon pierced very slightly to allow a slow and steady release of the air. And then the balloon was easy to remove from the top of the egg. At this point my sister decided to cut the egg in half using a heated knife, much to my protest but it seemed to work, so if you do this method be very very careful!!!
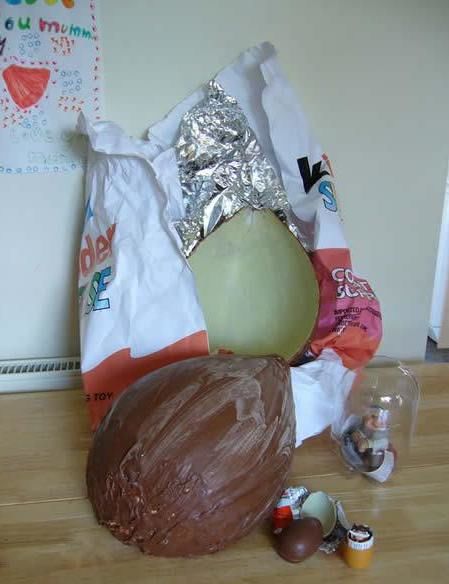
With the egg complete....pretty muchI decided to use my standard printer and laptop to blow up a kinder egg wrapper design i found onlineThen once printed lay it over some silver foil and stick together using tape. ( not my best work but was pushed for time as first attempt failedThen we just "layed the egg" (forgive the punn) in a basket placed the wrapped around and waited for the kids to distroy it lolHope you all like and vote in the comp, we added a real kinder egg in one of the pics for scaleEnjoy
Question & Answer
Question: What is the correct order of the images?
Choices:
    |
| (A) |
    |
| (B) |
    |
| (C) |
    |
| (D) |
    |
|---|
 (C) (C) |