Question ID: 1000-13525-1-4-5-6
Recipe Description
You will need:
3/4 C butter (1 1/2 sticks - I use salted)
1 C superfine white sugar (use the baker's sugar or put regular white sugar in the blender)
2 eggs
2 1/2 C unbleached all purpose flour
1 t baking powder
1/2 t salt
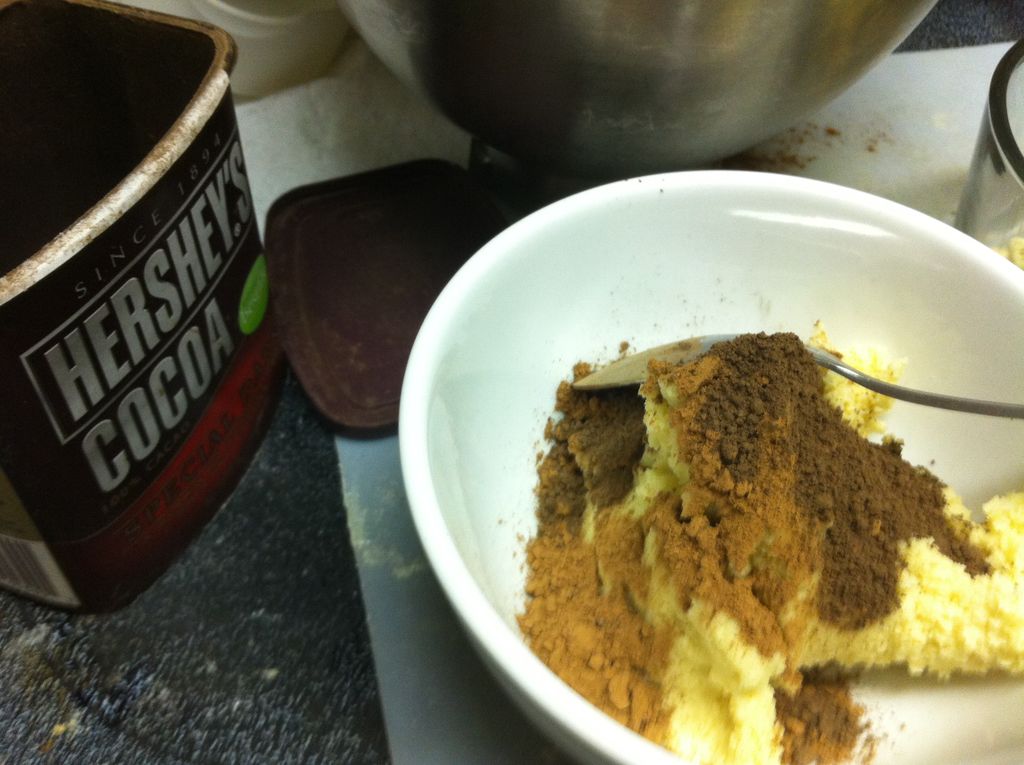
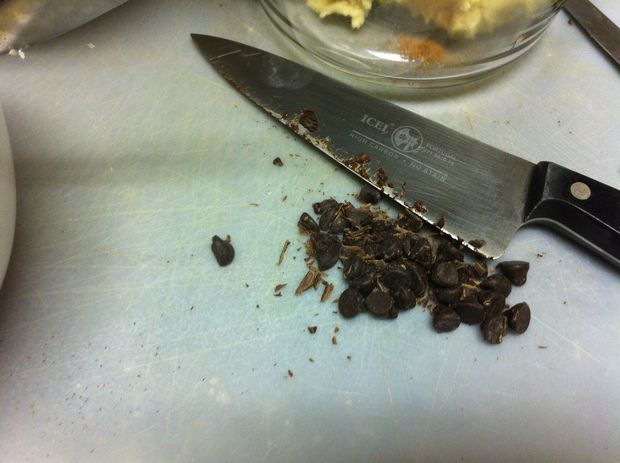
2-4 T cocoa powder and 2 T chocolate chips for the darkest dough
1 T cinnamon for the medium dough, plus 2 T almond meal (optional - for texture)
1 t vanilla extract or a few shavings of tonka bean for the light dough, plus 2 T almond meal (optional)
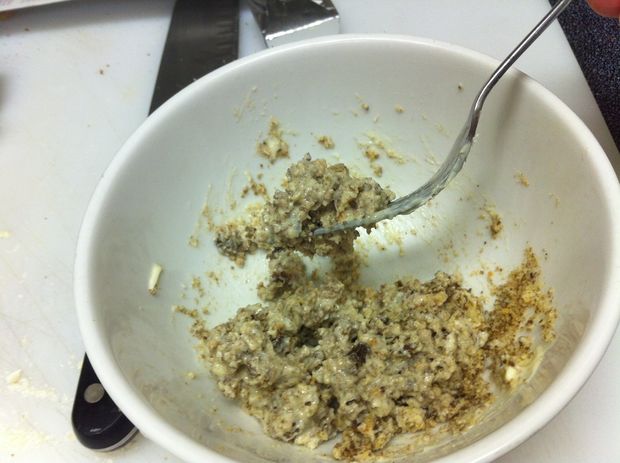
This is the brainless part if you've ever made cookies before. Cream butter with sugar. That means whip them together until they're well incorporated, fluffy, and much lighter in color. Other ingredients will mix better if the butter and sugar are properly aerated. Beat in the eggs. It'll probably look like you've ruined your dough at first; the fluffy butter and sugar will be goopy and curdled looking. Keep beating it. Eventually the eggs will emulsify and the mixture will become fluffy again.
Stir in the flour, salt, and baking powder. I don't bother to "sift them together" first like most recipes cry for. Screw that, man. My flour doesn't have lumps. Does yours? Didn't think so. Modern flour mills do wonders for smooth flour.
Anyway...
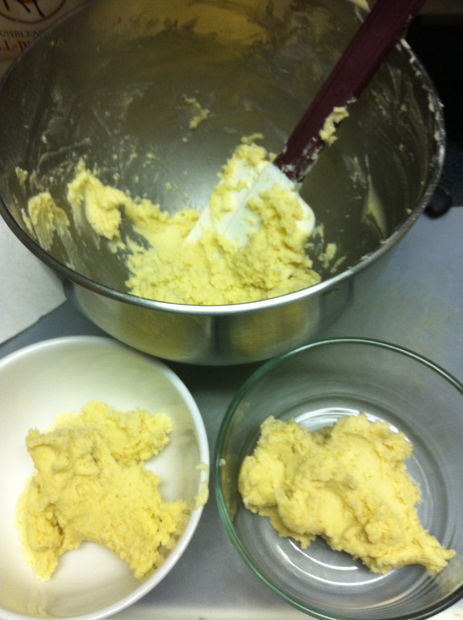
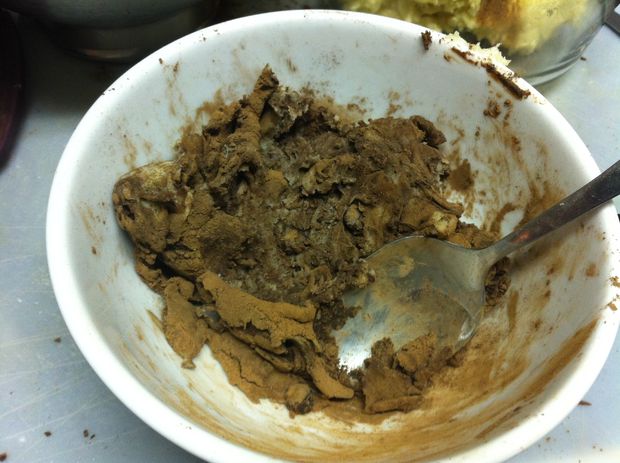
Separate the dough into three parts. You'll probably want a couple more bowls for this, unless you feel like spreading raw cookie dough all over your kitchen counters. Add some cocoa powder to one of the portions of dough. I like using two kinds of cocoa powder for color; the extra dark stuff would make it look too gray if it were used alone, so I also add the redder/browner regular cocoa powder.
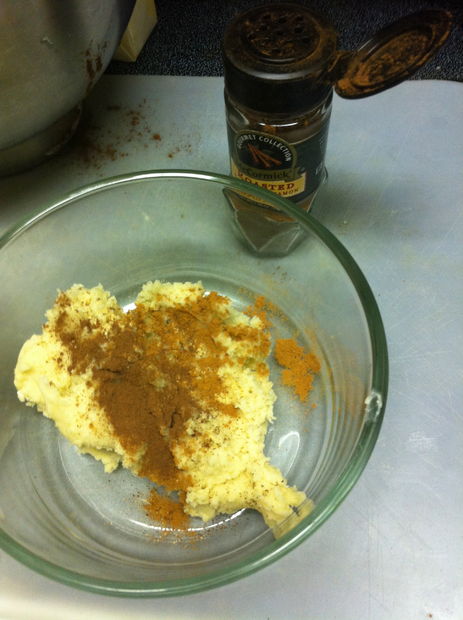
Add some cinnamon to the second portion of dough. I happened to have two kinds in my cupboard, one roasted, so I added both. I stirred in some almond meal for good measure.
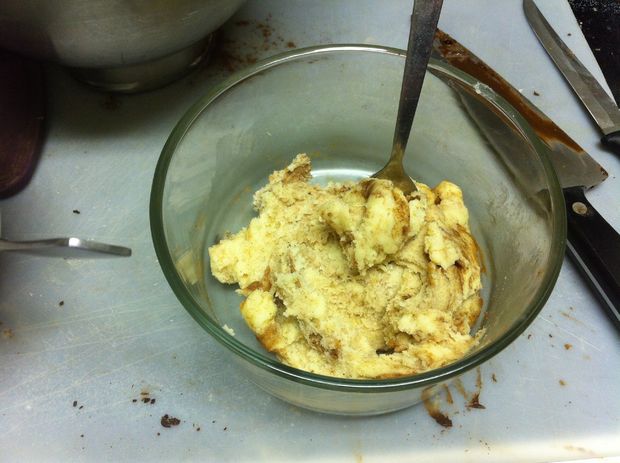
I need to order more vanilla beans. I've been almost out for awhile... I used tonka bean for this. If you're thinking of freaking out because of coumarin content in tonka beans... here. Read this: http://www.theatlantic.com/health/archive/2010/11/the-tonka-bean-an-ingredient-so-good-it-has-to-be-illegal/65616/ I shaved a little tonka bean into the light colored dough and added a little almond meal to that one, as well.
Once each portion of dough is mixed evenly, wrap them in plastic and refrigerate for an hour or so. Preheat the oven to 350 degrees F before you leave the kitchen.
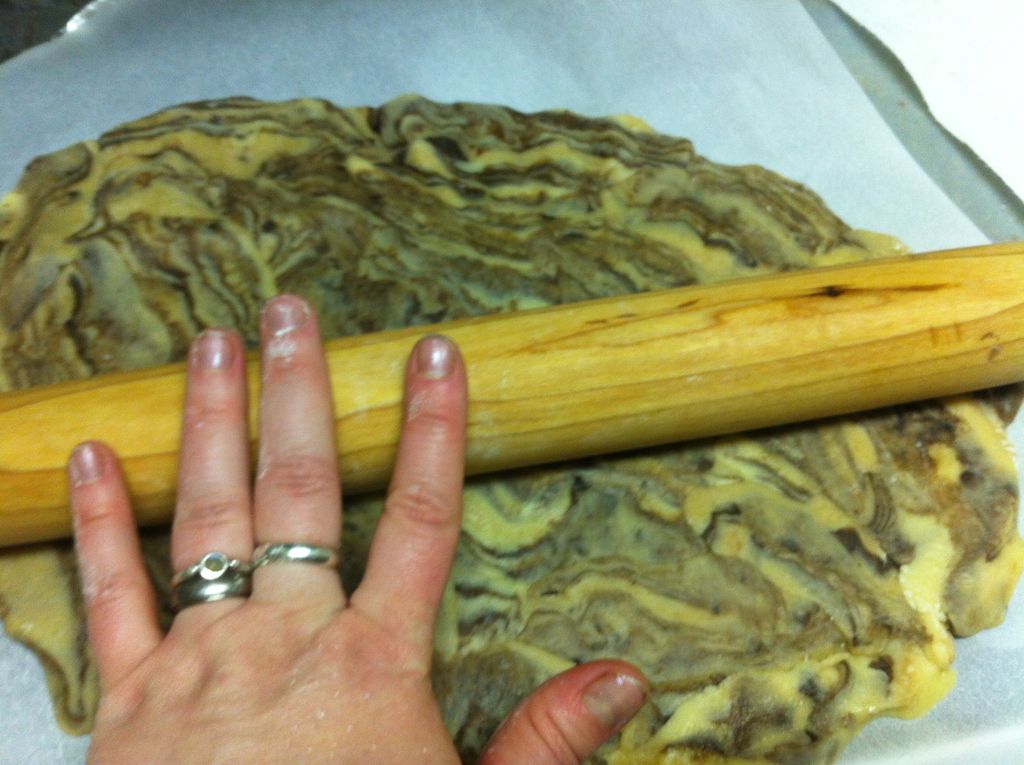
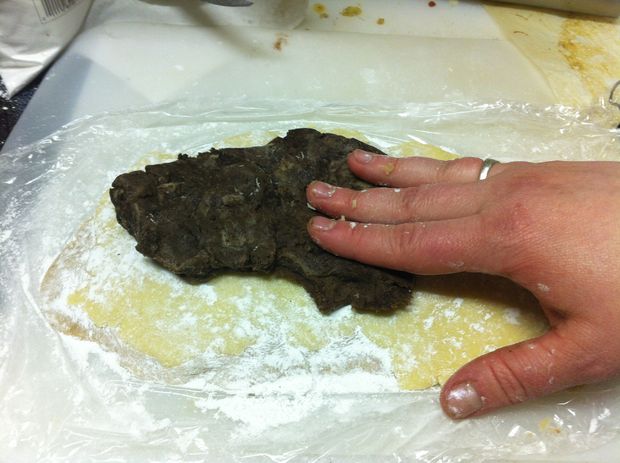
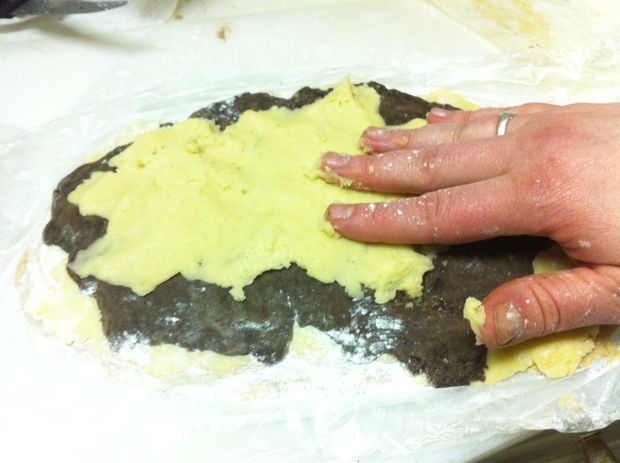
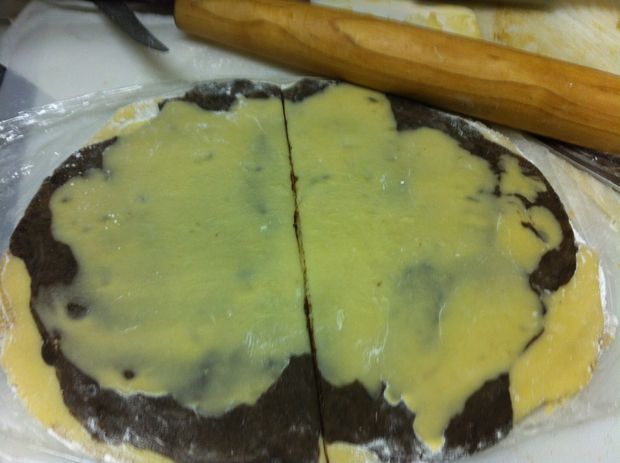
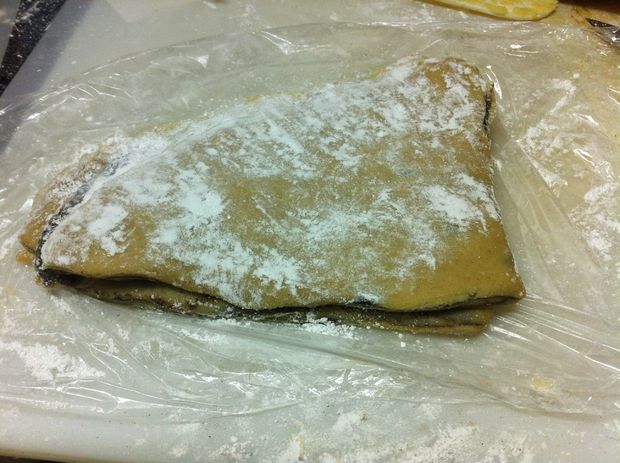
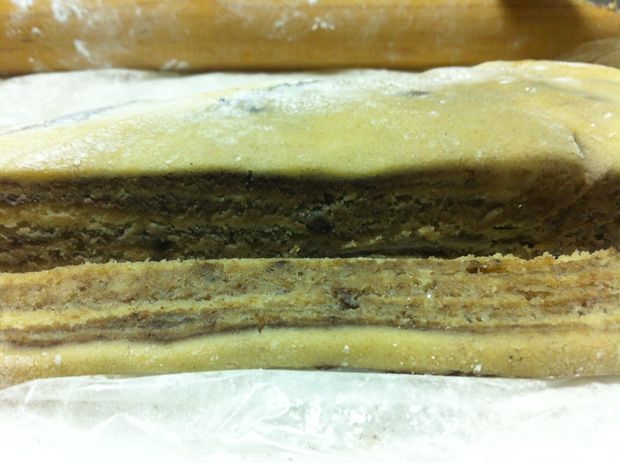
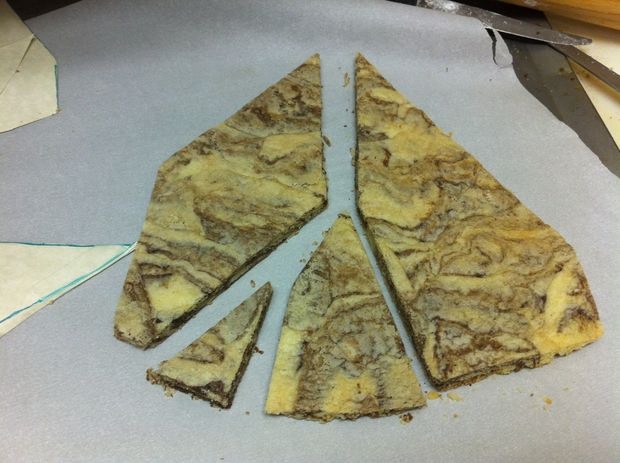
You could probably just knead the colors together to marble them... I rolled them out flat, stacked one color of dough on top of the next, then kept rolling the whole thing flat. After I had several thin layers of all the colors of dough in one slab, I sliced them and mashed the slices next to each other in a big flat cookie.
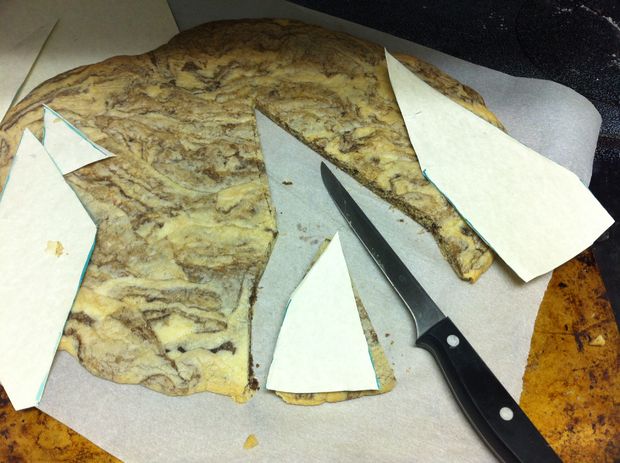
Make sure to mash the dough slices onto a piece of parchment. You'll want to bake the cookie on parchment so it's easily removable. Do not use waxed paper or aluminum foil for this.
I baked it for about 10-15 minutes at 350 degrees F. You'll want the edges to be barely golden brown, but the center to not be doughy at all. The mountain will collapse if the cookie sections aren't completely cooked. The golden brown edges won't cut very well, though, and might crumble before you can construct the thing. Ovens differ, so watch your cookie.
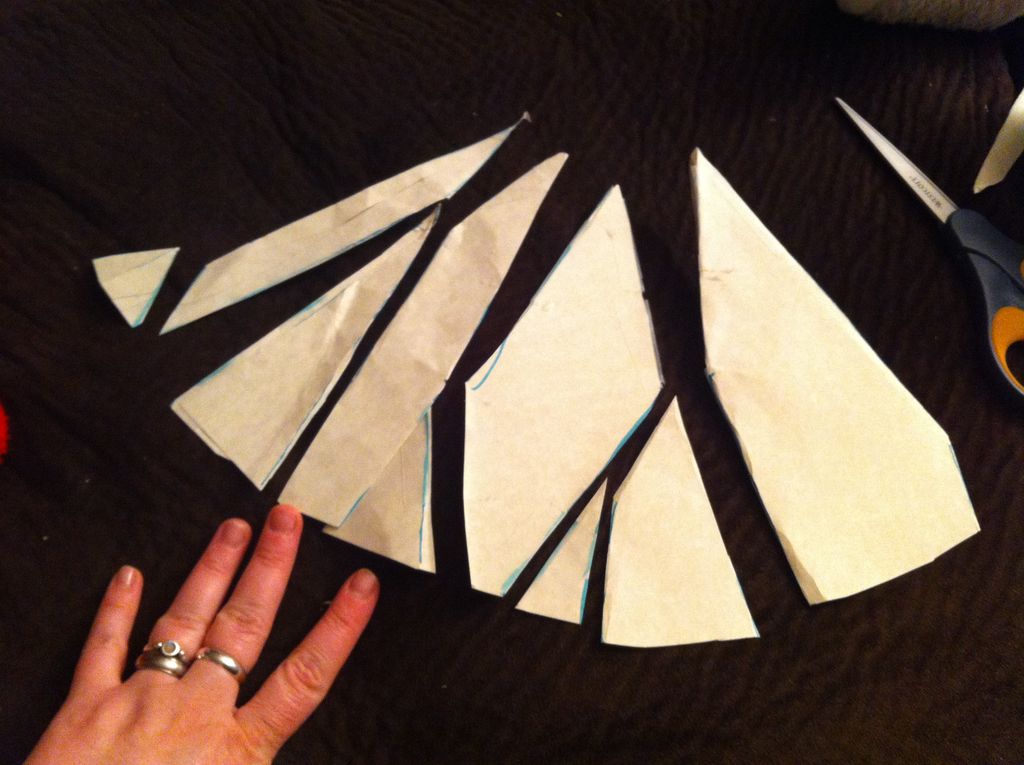
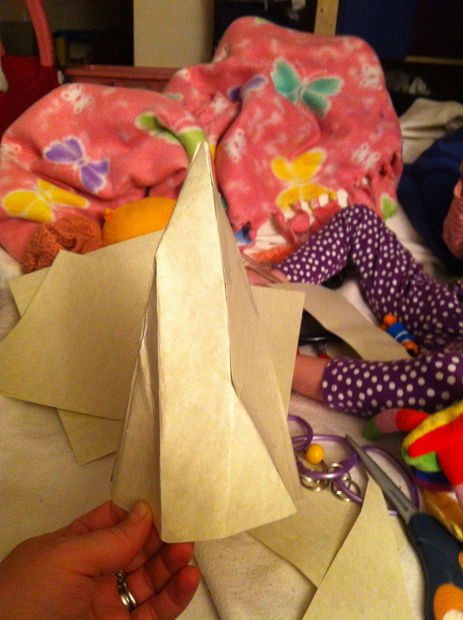
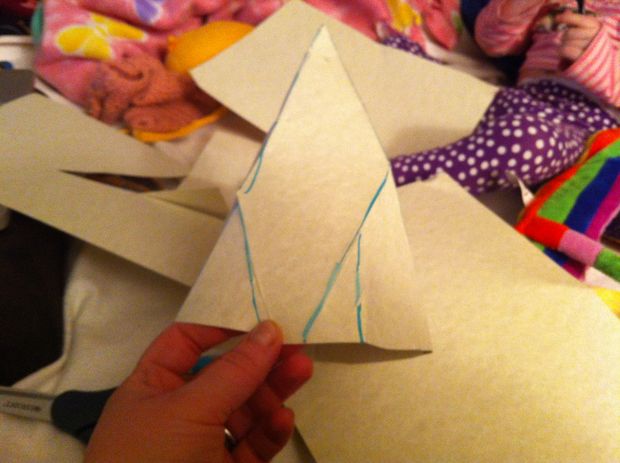
If I knew how to use a 3d mockup program, this would've been a much less clumsy process. Instead, I found some cardstock and folded and taped until it resembled a sort of polygon mountain. I made sure the folds were (mostly) straight and the sides of the mountain were (mostly) flat. I then traced along the edges and cut out each mountain piece.
I used these pieces to trace the cookie shapes so I could construct a cookie mountain with polygons.
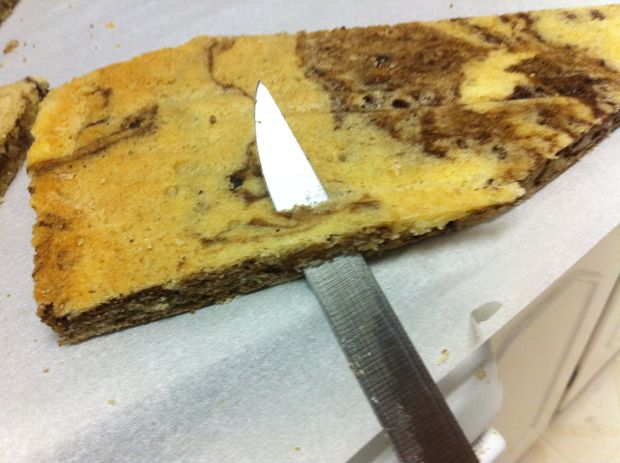
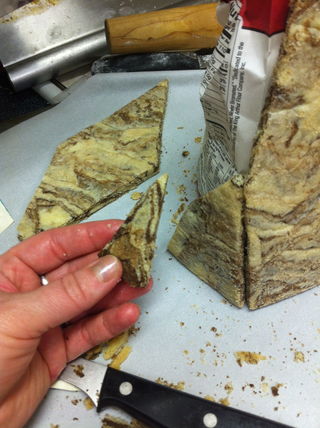
Don't try to cut the cookie pieces before you've baked the dough. Cookie dough puffs when it bakes; the pieces would be misshapen. Just use a good, sharp knife to gently cut around the paper shapes onto the warm, baked cookie.
It's fine to taste the remaining scraps of cookie, but don't eat them all. They're handy for broken mountain sections, fill in gaps, and add ledges. You'll also need a little bit to crumble for making the treasure later.

You will need:
Your cookie pieces
1 handful of chocolate chips... yes, precisely one handful.
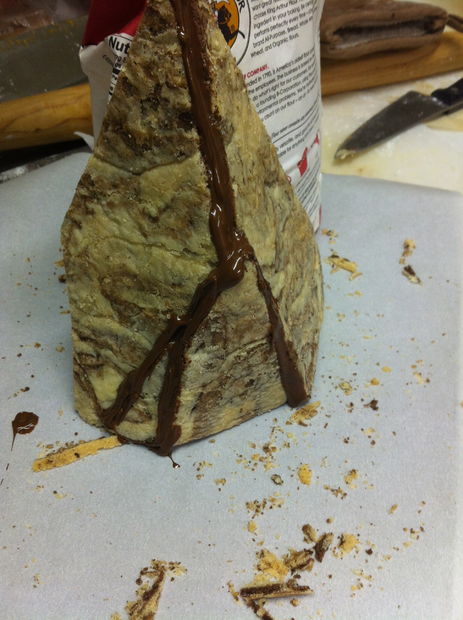
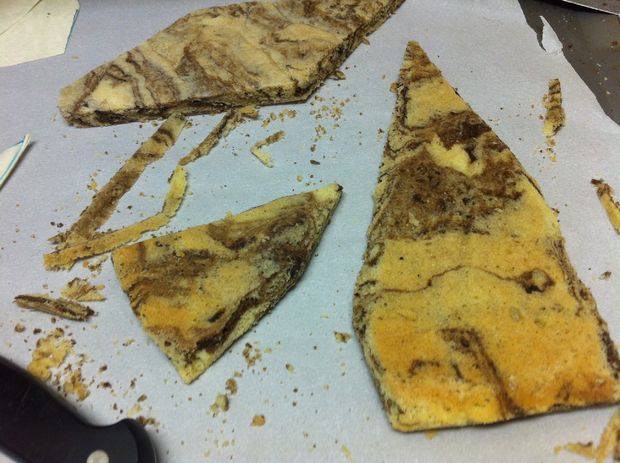
Use a sharp knife to bevel the inside edges of your cookie pieces. They don't have to be a precise angle; just slice off the corners that would otherwise meet and cause large gaps on the outside surface of the mountain. Beveling the inside edges also allows more contact area of the pieces so they adhere to each other a bit better and make the whole structure more secure.
Save those edges that you slice off, though! You'll need them in this step.
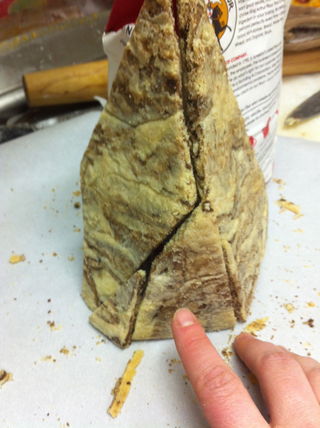
Melt the chocolate chips in a ziplock bag in the microwave; check it every 20 seconds or so. Knead the chocolate in the bag to make sure it's all smooth and melted. Snip the corner of the bag and use it to pipe a thick worm of chocolate along one of the edges of a cookie section. Did you line up your cookie pieces in order? Crap... you should do that now.
Okay... now that you have your pieces in order, grab the piece that attaches to the first cookie section with chocolate along one edge. Press them together carefully; you might want to get a bag of flour or something else that the cookie sections can lean on while you're building the structure.
You might want to set up a couple cookie pieces at a time, balancing them against the bag of flour and the assembled pieces to make sure they're in the right place before adding the chocolate to adhere them.
Once you've assembled a decent section of the mountain, you'll probably notice that the thick chocolate seams are pretty noticeable. It's okay, man. Find the thin slices of cookie from beveling the edges. They'll still work if they crumbled a bit. Place the slivers of these over the chocolate seams. The whole thing will look much more balanced now; the seams won't be and shouldn't be completely invisible, but now they'll look like they belong to the whole cookie mountain.
I assembled about half the mountain and went to bed; the thing was very secure when I checked it the next day, and I was able to finish putting it together.

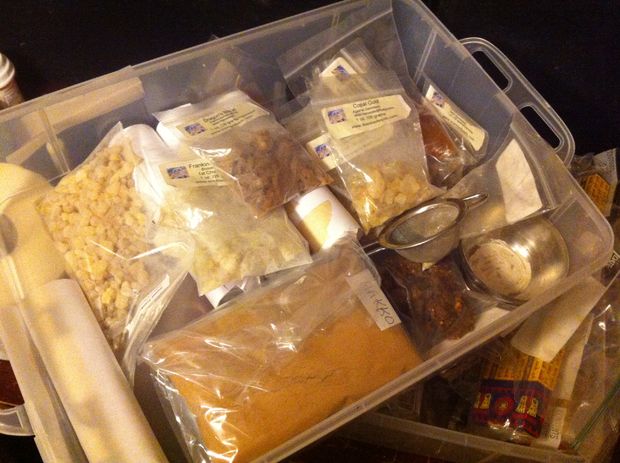
You will need:
makko powder
cinnamon or cassia powder
water
bamboo skewer (optional)
other ingredients I used (which are also optional):
ground cloves
sweet frankincense resin
ground ginger
ambergris tincture made in everclear, aged for two years (okay, I'm guessing you don't have this. don't worry about it.)
tonka bean
ambrette seeds
I think it wouldn't be as impressive without scented smoke wafting out of the mountain.
I don't trust store bought incense to not contain toxic synthetics... especially the "hand dipped" junk (as if it takes some special artisan skill to dip a blank incense stick into a vat of fragrance oil). Hand rolled for the win, man.
Of course, if you can't find makko powder, you might decide to skip this part. It's up to you, but there are alternatives (like setting up a small burner using a bit of foil over a burning coal and adding cinnamon to the foil). I tried lighting a "cinnamon" (actually cassia) stick. It didn't burn very well.
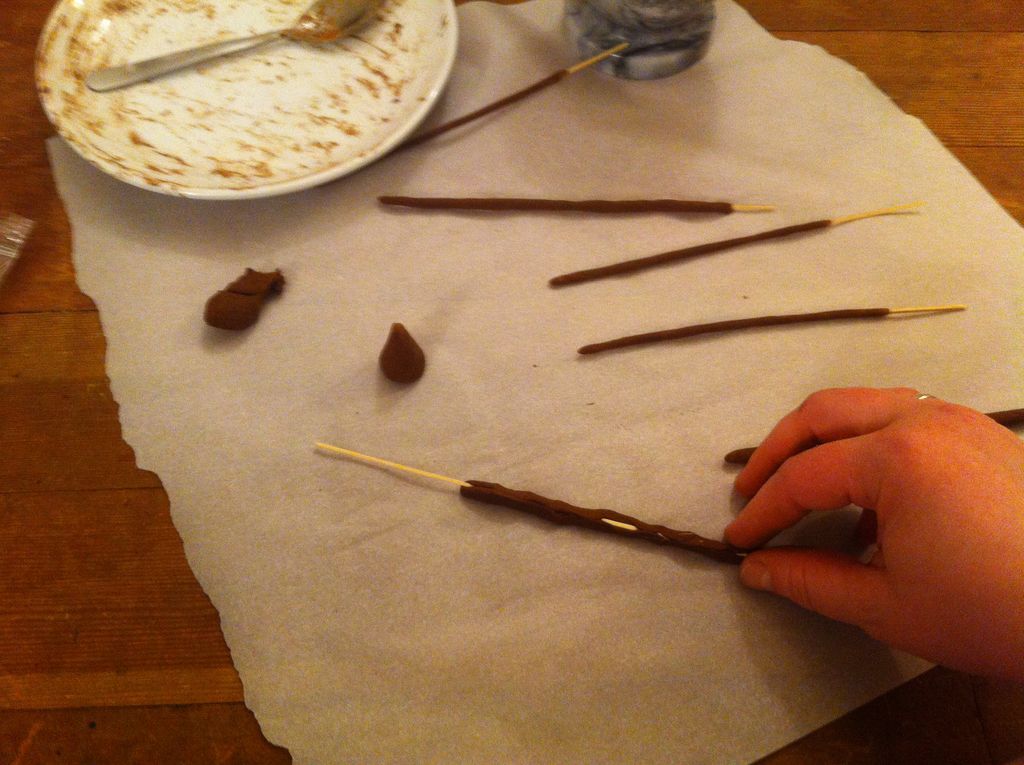
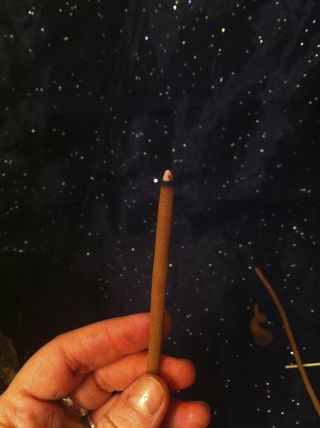
You can make either sticks or cones; you'll need bamboo for the sticks. I just used a bamboo skewer and convinced Josh to slice it into really thin slivers while I was getting into his incense supplies.
Incense making is an art. This was the first time I'd ever done it. I'm not typically a precise sort of person, especially when it comes to recipes. I'm not about to tell you exact amounts.
For this stuff, I used roughly one part spice mixture to three parts makko powder. The spice mixture was mostly cinnamon or cassia powder. The other stuff was to add depth and interest. Here are the scent notes that I made up just now. Scent is highly subjective, anyway.
Clove - deeply spicy warm, slightly earthy
Ginger - sharp spicy
Ambrette Seeds - adds a heady, vaguely musky, sensual, animal note to the blend, use in moderation or it'll make you think someone nearby needs a shower
Tonka Bean - adds an intense cherry like sweet thick buttery vanilla-esque quality - use in moderation or it'll feel like you've just sucked down 20 syrupy sweet milkshakes in a row
Sweet Frankincense - adds a mysterious (in this blend, anyway) resinous, slightly pine like but brighter than other kinds, sweet citrus note
Ambergris - subtle, like a sweeter hay smell mixed with pleasant antique books, wrapped in the smell of warm clean skin from someone near and naked enough to taste, but before anything has happened yet
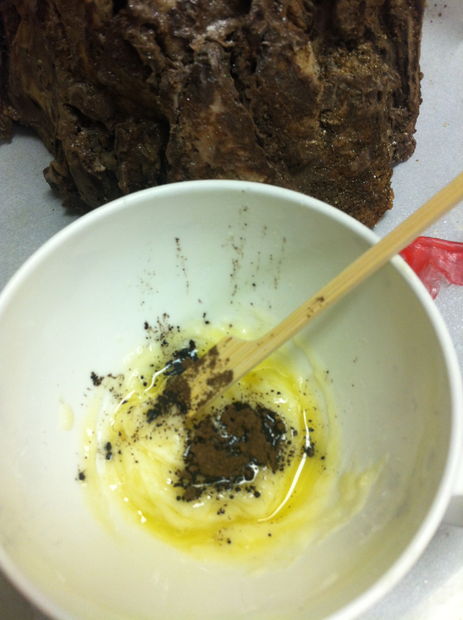
Mix the spices with the makko powder. Add ambergris tincture if you have some and want it. Add the water a little at a time. Knead the mixture for a few minutes, then shape into cones or roll into thin logs and roll the logs onto very thin bamboo slivers.
I let these dry on a piece of parchment paper. They didn't take very long, but I live in a dry climate. The cones were dry by the next morning; the sticks took a couple hours to fully dry.

There are to parts to this: the treasure and the dirt/snow on the mountain.
You will need:
white chocolate
dark chocolate
some leftover cookie crumbs
a spray bottle of water
edible luster powder (gold for the treasure, and I also got some white to add to the powdered sugar snow)
food coloring
powdered sugar
everclear or vodka, I guess... but I wouldn't want the water in the vodka to make things soggy
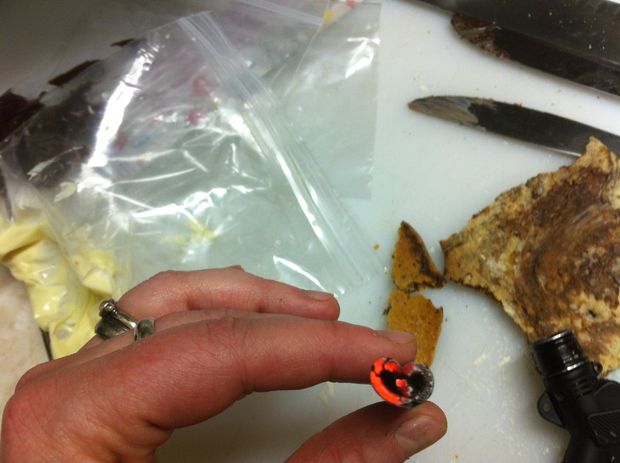
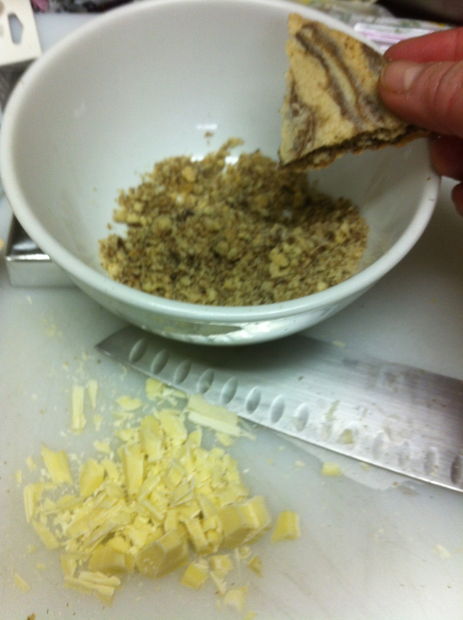
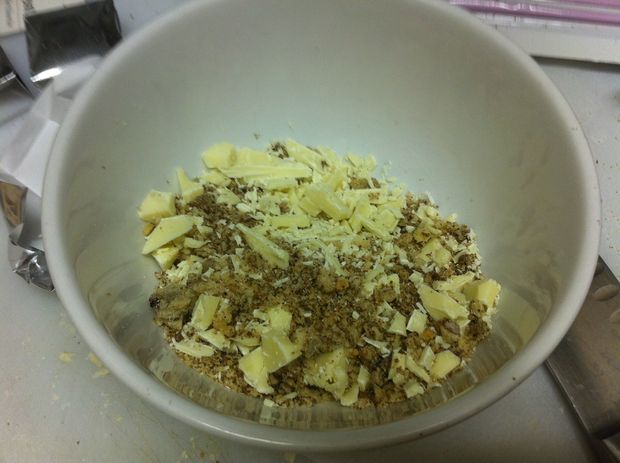
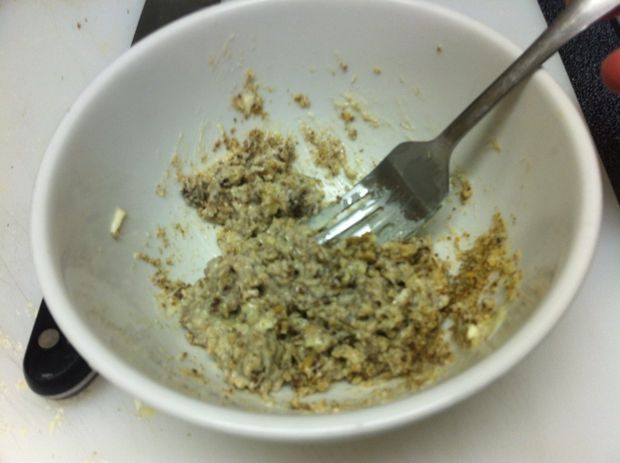
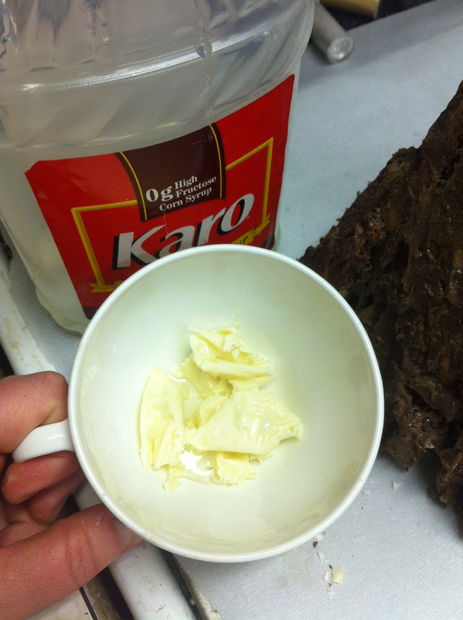
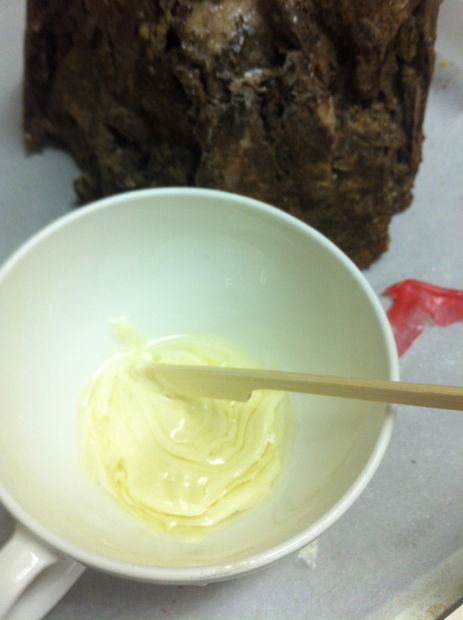
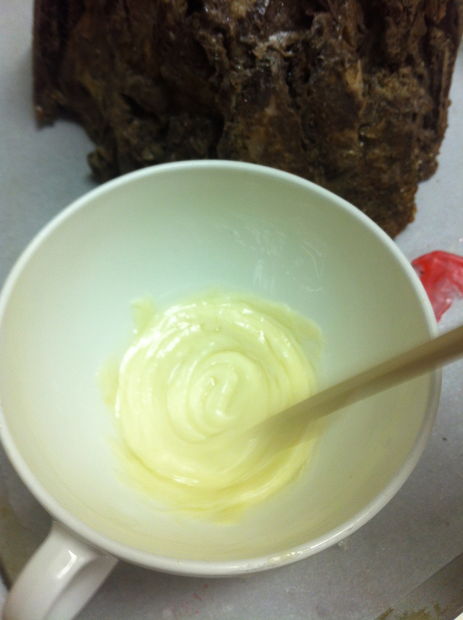
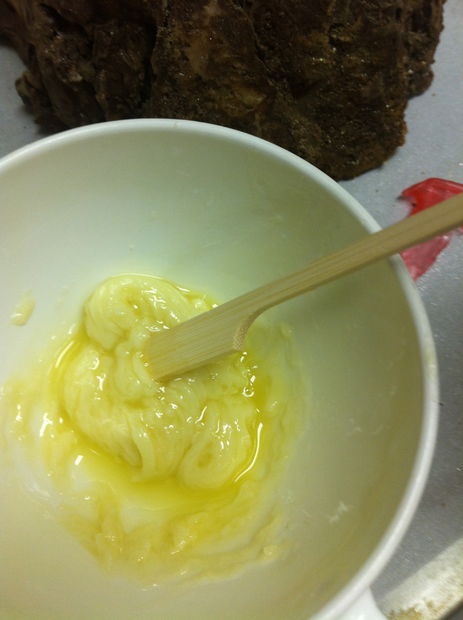
Melt some white chocolate. Mix it with some cookie crumbs... about 1 T cookie crumbs to 2 T white chocolate. Spread it out on foil and freeze it to chill it fast. Crumble it up into little tiny pieces. Mix a little everclear with food coloring. Paint the white chocolate cookie crumb bits with the tinted alcohol. Sprinkle some luster dust on them. Set the treasure crumbles aside to dry for a bit.
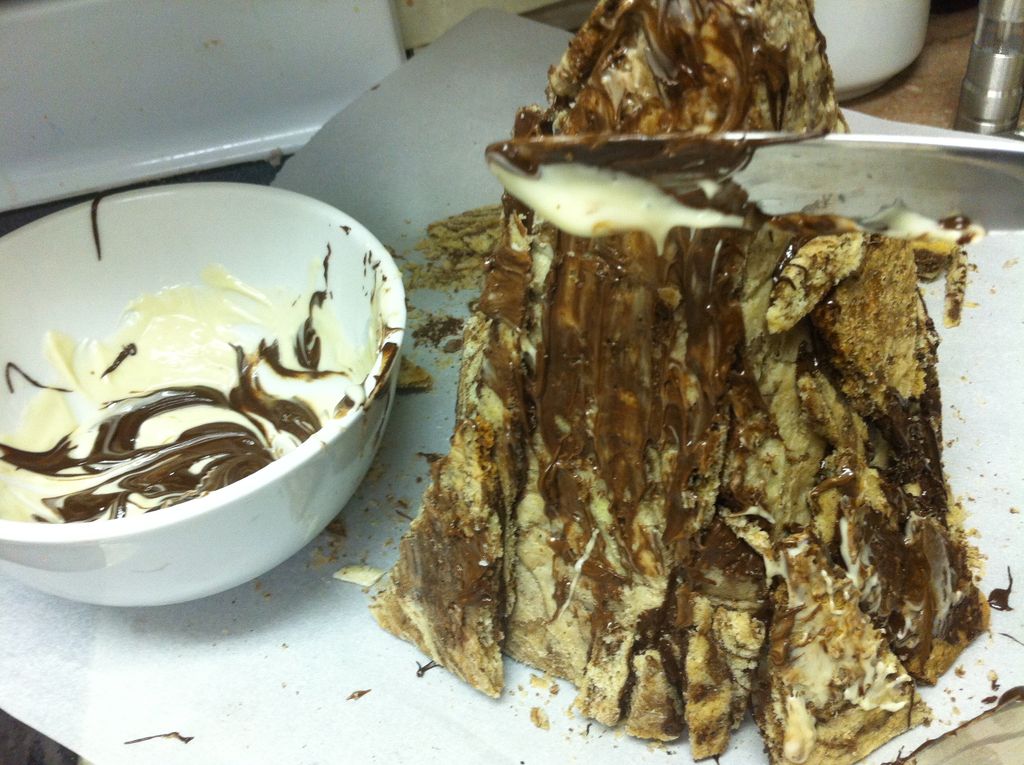
Melt some more white chocolate. Melt some dark chocolate, too... I'd say about an ounce of each. You can put them both in the same bowl AFTER they're completely melted and stirred; you don't want to mix them to a smooth consistent color. Using a butter knife or finger or whatever you have handy, smear a little dark and white chocolate on the side of the mountain. Scrape it over the sides so some cookie still shows through and the chocolate isn't very thick. Remember to leave the chocolate somewhat unmixed so there's some shade variation. Continue to do this over the entire mountain, making sure not to cover all the beautifully marbled cookie you baked.
Spray it with the water. OH NOEZ THE CHOCOLATE SEIZED! That's what you want it to do. Melted chocolate might seem wet, but it doesn't have water in it. Adding just a little water makes it clump and stiffen. It'll also force the chocolate to bloom a bit as it dries (meaning the cocoa butter isn't in stable crystal formation and some of it comes to the surface of the chocolate, making it look chalky and dry). This might look terrible on a candy bar, but it's great for the side of a mountain.
Hopefully your spray bottle had a very fine mist setting so there aren't water droplets all over your mountain now. Blot them off if there are. Take a sharp knife and carefully shave some of the excess chocolate from the sides of the mountain here and there, allowing more of the marbled cookie to show through in places.
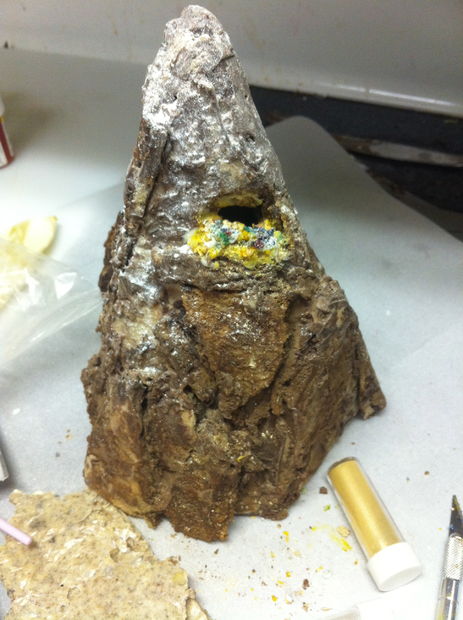
Some parts of your mountain might still look a bit too glossy. Dip a soft paintbrush in cocoa powder, and lightly brush these areas to darken and dull them. Clean your brush and dip it in powdered sugar. Dust the top of the mountain with powdered sugar to give it a snowy look. You'll probably have to touch up the powdered sugar later on, but it's good to add a base coat for now.
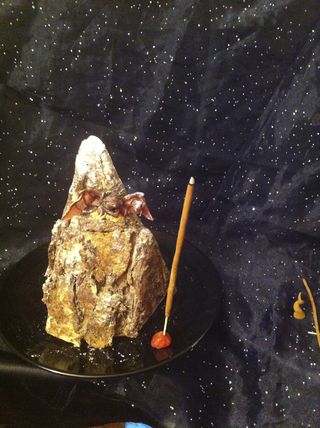
I used some melted white chocolate to attach the treasure to a small ledge on the mountain. If you didn't build one, you can make one really quick with a sliver of cookie or a glob of chocolate. I know, I know, neither the dwarves nor Smaug would've kept the treasure visible on a ledge. Yes, it's silly... but I couldn't make it work quite right with having a cutaway view of the mountain and a heap of treasure inside. Deal with it.
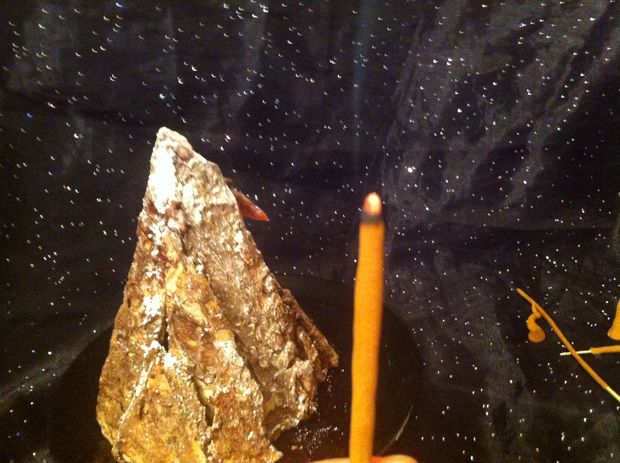
Find an xacto blade or other sharp object to poke a hole above the ledge for the dragon head to come through, especially if you want the cinnamon incense smoke to come out of his mouth.
Use the blade to attach the bits of treasure to the white chocolate on the ledge. Add some luster dust to the treasure to make it look sparkly. I decided it looked the best to have mostly yellow treasure coated with gold luster powder, and some random pieces of red, blue, green, and purple treasure to look like gems.
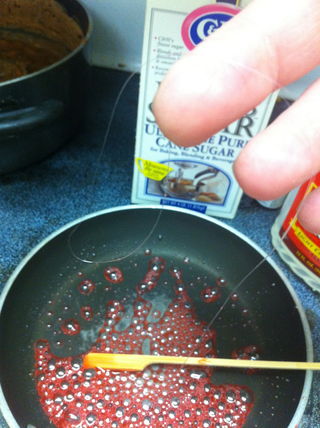
Only do this step if you're feeling drunk and/or masochistic.
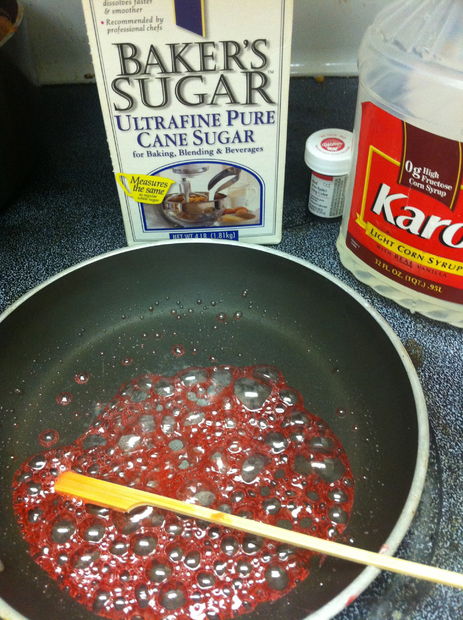
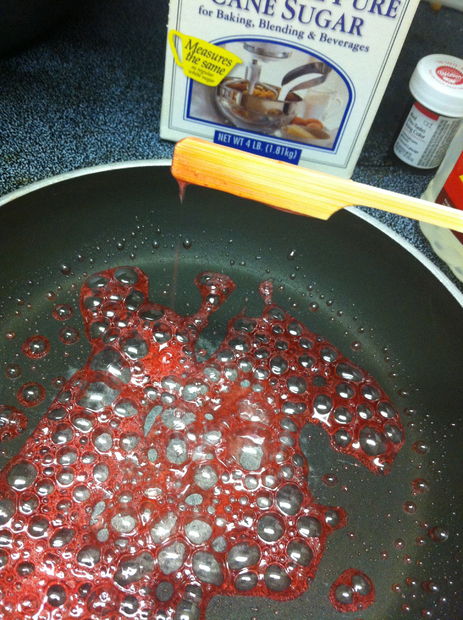
Melt two tablespoons of sugar with one tablespoon of corn syrup, one tablespoon of water, and three drops of red food coloring in a pan. Stir often. Don't use a candy thermometer for this; it's too small an amount.
Instead, use a skewer to pick up a bit of the sugar and let it fall. Once it forms a string that hardens after the sugar falls, it's ready. This isn't as hot as you'd cook sugar for hard candy and lollipops; this is a lazy way to make a clear shape in sugar that doesn't require a heat lamp or specialized training. It still takes patience and some zaps in the microwave, but because we're leaving the sugar a bit softer, it's a little more forgiving and less... shattering.
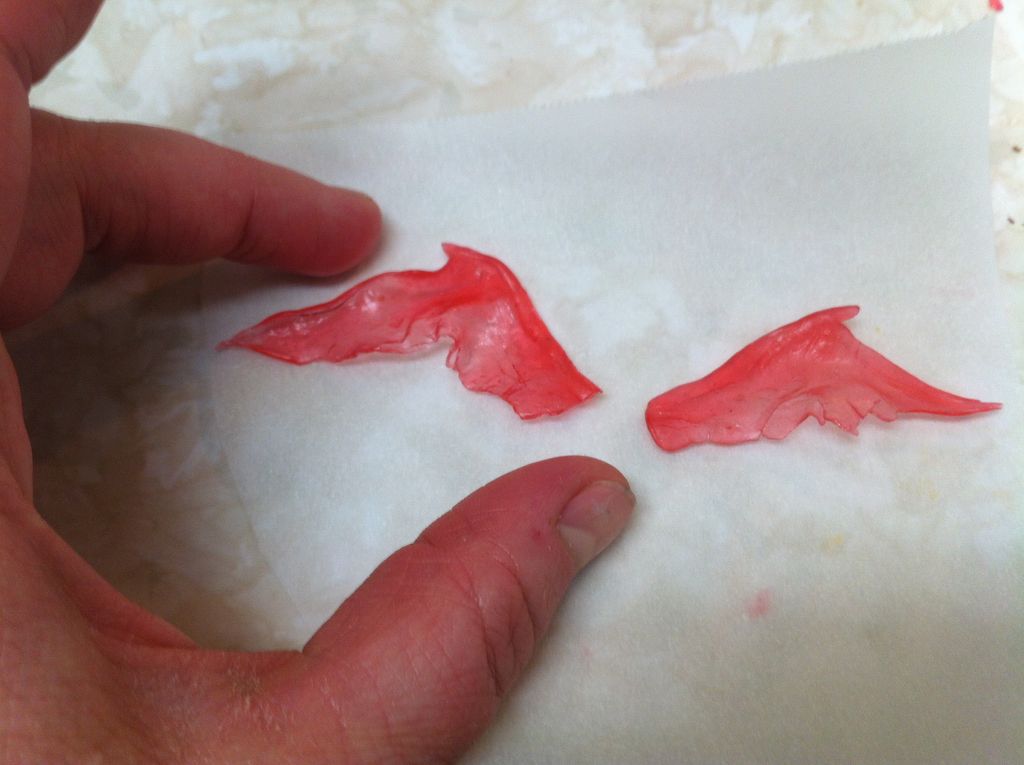
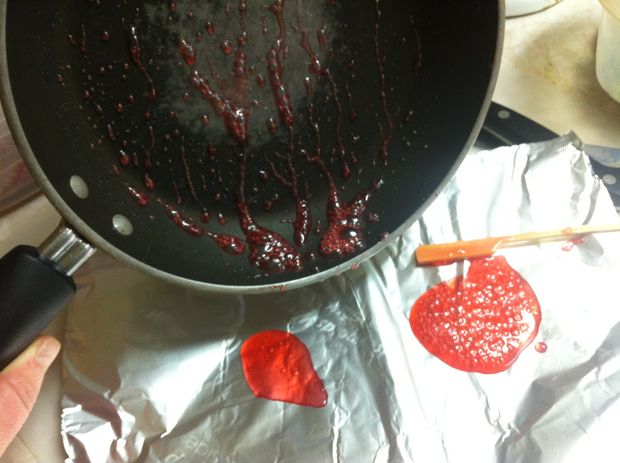
Pour the hot sugar onto some nonstick foil or parchment. Separate two globs to be the wings. Use a skewer to gently poke them into triangle shapes roughly the shape of wings. Pick up one of the globs and gently pull the edges apart - do this SLOWLY like the artisans who make dragon beard candy. If you go fast, the candy will break.
The sugar will harden as it cools. When this happens, place it on parchment and microwave it for 5 seconds - no more than that. 7 seconds left me with a bubbling pool of red sugar on my parchment.
If the wing breaks, push the pieces together (they might not stick at first) and microwave another 5 seconds, then squish them together more.
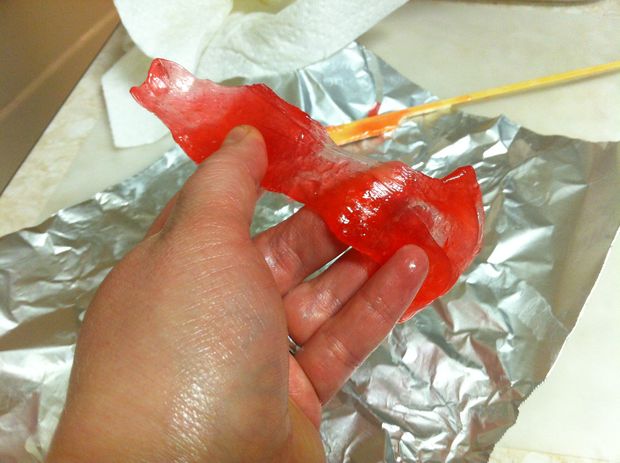
I don't know of a solid technique to explain. I just kept heating the wings, fixing what I messed up, pulling, and pinching until they were roughly the shape I wanted. I had some little scissors to cut the edges of the wings, but they kept making them shatter. I tried to keep the sugar thick on the upper part of the wing (which supports the wing and attaches to the dragon back) and pull it thin and clear for the membranes. I pinched a little hook at the angled joint in the wing support.
Chop 1/2 ounce of white chocolate and add a teaspoon of corn syrup. Melt them together and stir. Add a drop or two of glycerin if you have it.
I didn't measure and used too much corn syrup, so my dragon was a bit soft. Don't laugh.
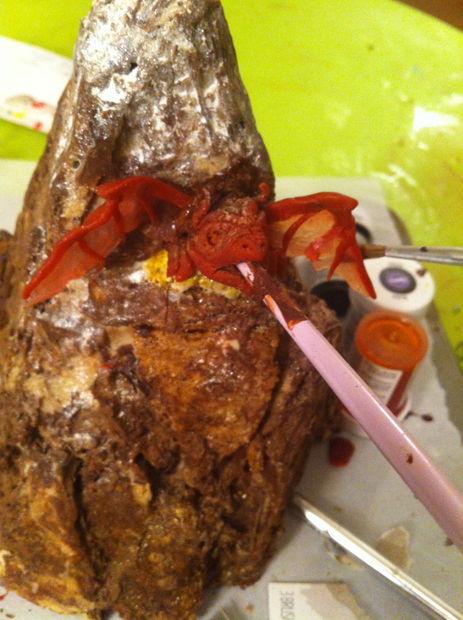
I added some cocoa powder to darken the white chocolate clay before adding red food coloring. I kept a paper towel handy to blot the excess oil that always seems to ooze from chocolate clay.
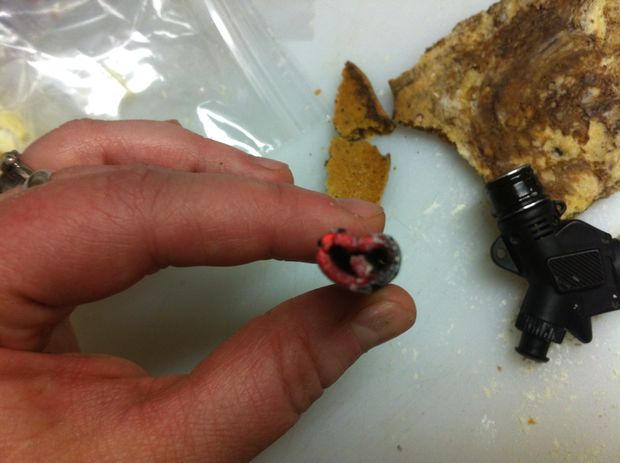
I first rolled out a couple worms and attached them to the wings. This helped make it easier to attach the wings to the mountain. I rolled two thick snakes for legs. I cut the ends into three sections for toes, then shaped them slightly (see the pictures) with a clay tool and squished them onto the treasure ledge.
I lined the hole above the treasure with chocolate clay to make a solid foundation for attaching the dragon wings, then shoved them into place.
I then took a chunk of clay, rolled it into an elongated egg shape, and sliced one end to be the dragon mouth. I shoved the round end of a paintbrush into the mouth and through the clay to make sure the dragon head and neck were a hollow passageway (for the incense smoke to pass through later). I left the dragon head on the paintbrush while sculpting it. This was partly because my clay was too soft.
For the record, I'd also like to blame the lame shape of the dragon head (too short, not reptile enough) on the too soft clay.
I put more information on the notes on these photos; look at them if you need help sculpting your dragon head.
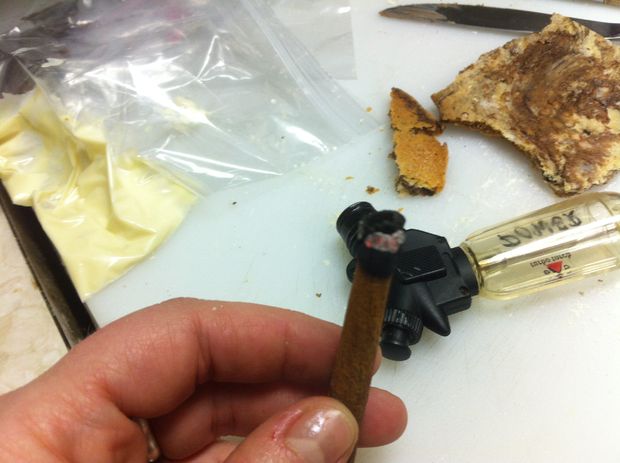
I squished the dragon head into place, still using the paintbrush to keep the hollow part open. I then diluted black food coloring with some everclear and painted the dragon head with it. I probably should've diluted it a bit more; it had been my intention for the coloring to mainly sink into the deep areas of the dragon's face, emphasizing the sculpture.
I blotted some extra food coloring off with a clean cotton swab.
I then dusted the high parts of the dragon with luster powder.
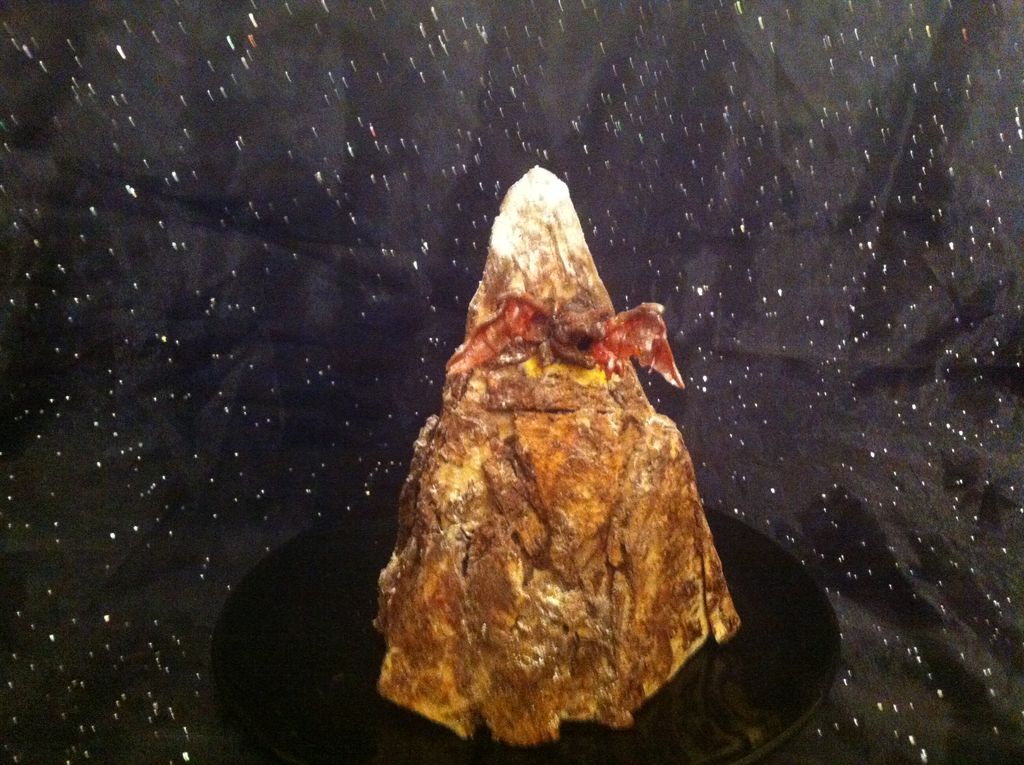
I checked the mountain for large cracks that might let incense smoke through, since I wanted most of it to come out of the dragon's mouth. I filled them with chocolate clay, then covered the red clay with melted dark chocolate. I re-dusted the mountain with cocoa powder on the bottom and powdered sugar on the top, just in the areas that had needed the chocolate clay.
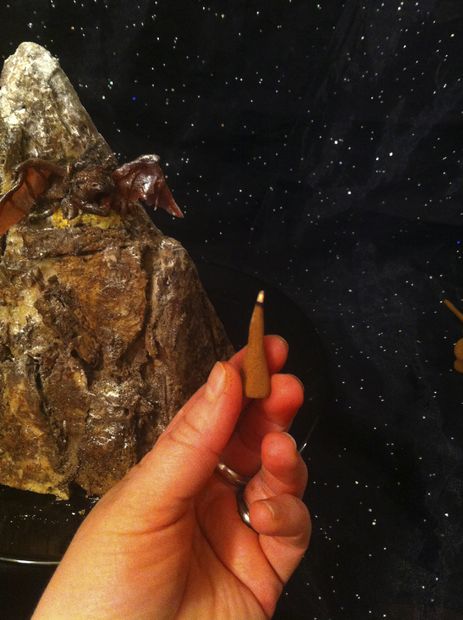
Your incense should be dry by now.
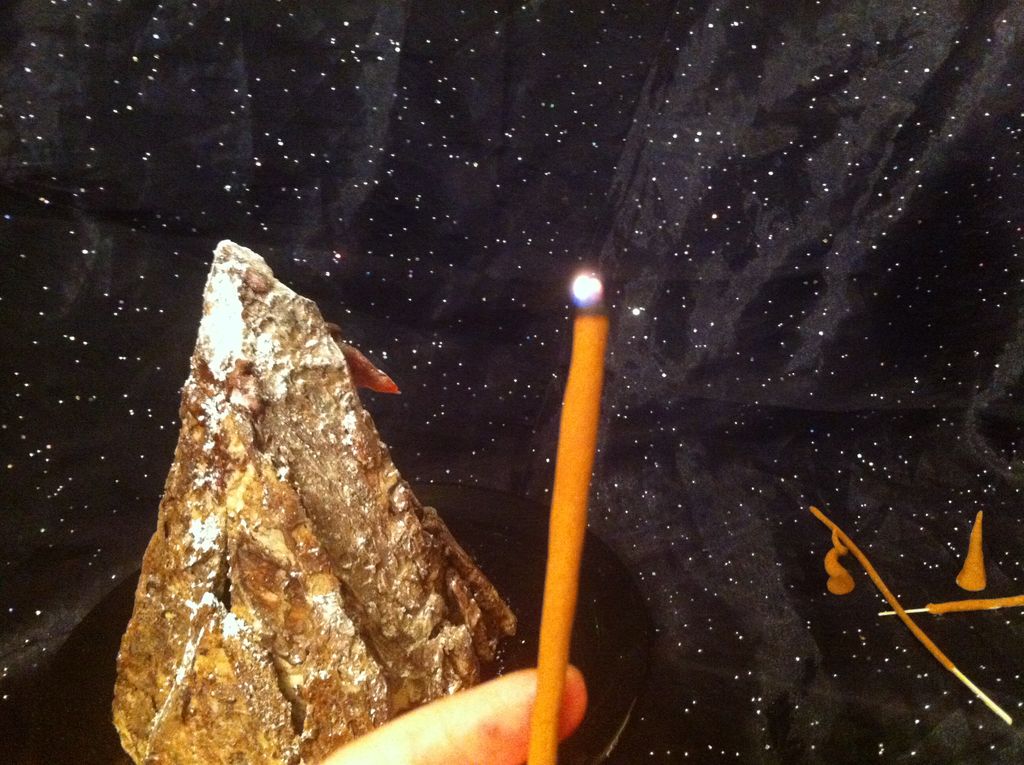
When you're ready to display/serve your lonely mountain, find your specially made cinnamon incense and a lighter. Make sure your incense sticks aren't too long to fit in the mountain. If they are, burn them until they're short enough and set the end in a piece of chocolate clay on a plate.
If you made cones, just light one and set it on the plate. Place the mountain over the lit incense and wait a few seconds. The spicy scented smoke should come wafting out of Smaug's mouth.
Burning a whole incense cone inside the mountain will lend a smokier flavor to the part of the cookie near the top of the mountain. That works for some people but not for others. Either way, it's your call as to what you prefer. My kids ate cookie from the top and the bottom of the mountain - they didn't seem to have a preference.
If you're reading this, please don't be afraid to try any of this stuff on your own - it's fun. Some parts might be a pain, but as I said in the introduction, nothing here is particularly difficult. I promise. I'd love to see pictures if you make anything using any part of this instructable. Thanks for reading!
Question & Answer
Question: Choose the best title for the missing blank to correctly complete the recipe.
Layer and Bake the Dough
Make Incense
____________
Sculpt Dragon Wings
Choices:
(A) The Cookie
(B) What You Will Need.
(C) Add Detail to the Mountain
(D) Laying Out the Materials
 (C) Add Detail to the Mountain