Question ID: 4000-12950-0-2-4-6
Recipe Description
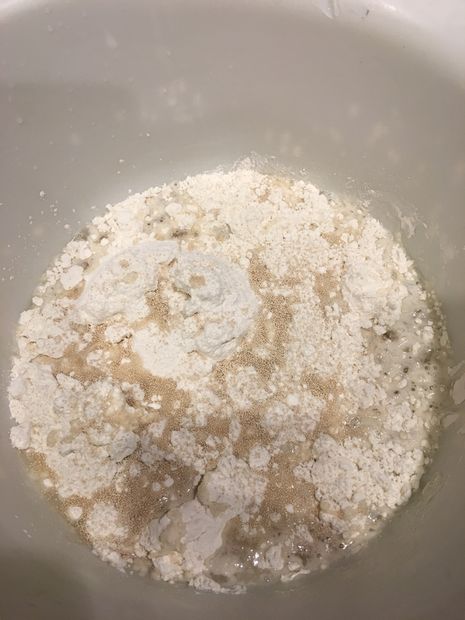
First the recipe1.75 C water 2.5 cups flour 1 teaspoon salt 1 tablespoon Olive Oil (optional) Yeast (a packet, a teaspoon, it really does not matter how much). All of these measurement are very approximate amounts. It will make a VERY wet dough. It is really only slightly thicker than pancake batter! If you question just add more water... we will make up for it in the next step.18 hours before you are ready for the bread, this is a very ballpark number. 18, 24, 12, 8... it will all come out fine. Put this gloopy mess in bowl in a plastic bag (I use grocery bags) and let sit for about 15 hours. The bag is very important as it keep the moisture in. Without it your dough will dry out. The longer it sits the more flavor it will develop. You can change this timeline to suite your taste, and your timetable.Important points:All measurements are very approximate About like thick pancake batter. The time line is very approximate
After 15 or so hours of sitting the dough is going to be very bubbly and frothy. One of the big keys here is you want to handle the dough as little as possible. You want to try and keep as many of those bubbles as you can. So you really want to fold, manipulate, and handle the dough at this point as gently as you can.Flour you counter very heavy! You will be pouring the dough onto this, and you really want to make sure there is plenty of flour down so it will not stick to the counter. If you notice I use a silicone sheet to do this step on. First it makes clean up easier, but it also allows me to just lift the side of the sheet to fold the very wet dough over.Pour the dough onto the floured surface. Use a spatula or scraper to get all the dough out of the bowl. Cover the top of the dough with a heavy layer of flour again. Spread the dough to about 1-2 inches thick. Allow the dough to rest for about 5 minutes. Important points:Flour everything heavy Pour out onto the floured surfaceIt will be ready to bake about 3 hours from this step
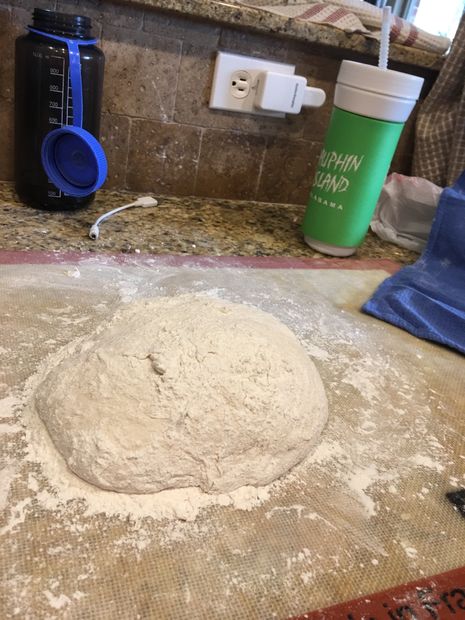
Now comes the trickiest part of the whole thing. It isn't all that hard, once you get what you are doing. I am sorry, I really tried to get a good picture of this, but nothing would come out right. You want to fold your dough over twice, similar to how you tri-fold a letter before you put it in an envelope. You want to make sure you flour it well between every fold. Fold the left side over about 1/3 of the way, then fold the right side over the top of this. You then turn the dough 90 degrees and tri-fold it again. You will want to make sure there is a good amount of flour between every fold. Depending on the dough you may even need to flour and fold it one or two more times, but really as few times as you can get away with.The whole idea here is that the dough is so wet it will not hold together. The heavy floured layers form a kind of frame that will hold the very wet dough in its place. Now you have a fairly well formed dough ball. (see the pictures as compared to the previous step.) You want to keep it as wet as possible, but need the flour so it is not just a mess you have to pour. Be sure you flour over any wet spots, and enough flour so that it holds a rough shape. It is still going to be quite wet for bread dough. Place the dough in basket with a non-terry cloth towel that has been VERY well floured (use some cornmeal or oats too if you want). This can be tricky because it will not be a piece of dough you can just pick up. Scoop it up with your hands and quickly put it on the floured towel. Place this in something that is roundish in shape, and can breath. I use these wicker baskets I bought for $1 at Dollartree. (If I could find 30 more I would buy them!) but you can use anything, a colander works great, a bowl in a pinch, or even just hang the towel in mid air! Let it rise about 2-3 hrs. A warm spot in the house (such as above the dryer) can help it rise faster. It should double or so in size… when it doubles you are ready to bake. Important points:Tri-fold like a letter, twice, to form a frameworkplace in floured non-terry cloth towel Rise in a basket
Preheat oven, with a pizza stone, to 500ºF A few min before you are ready to put the bread in the oven put a pan of water under the pizza stone to add more humidity to the oven. I usually use a disposable pie pan in the floor of the oven, and fill it up with a glass wine bottle. A wine bottle is really perfect. It isn't going to melt, and has a long thin neck to reach back to the the pie pan. When ready to bake the bread you can sprinkle cornmeal and or oatmeal on the pizza stone, but usually there is enough on the bread that you are fine.Now comes the fun part. Dump the dough onto the pizza stone. It really is quite the unceremonious affair! You just dump it form the towel to the stone as fast and gently as you can! I really loved watching my dad do this when I taught him how to do it. He managed to make a big flair about it! I generally will hold up the dough in the towel, and just dump it onto the hot pizza stone. Do note, the dough will inevitably stick to the towel. So try and keep as much of the dough off the towel as you can, but don't worry if some sticks. Now turn the oven down to 450ºF, and cook about 25 to 30 min. It is done with the top is a deep golden brown. If you want a thicker harder crust leave it at 500ºF. The bread will sound hollow when you thump it, and the internal temp should be about 205ºF (it may need to go a little higher even). Let it cool before cutting (If you are able!). If the crust gets soggy in that time you didn’t cook it long enough and the moisture from the inside was too high and make the crust soggy as it escaped. And let me just say when you think you have cooked it enough... go ahead and leave it in another 5 min. I bet you will find it better. Most of the flavor is in the crust, and you want it to be quite well done. I head it once said that you can't burn bread. So go ahead... bake it a little longer!Important points:Preheat to 500ºF Turn down to 450ºF when the bread goes inAdd some water to the oven for steam Just dump it in!Bake longer than you think
If you want to try something other than the pizza stone, or don't have a stone, a dutch oven works great! Now first you need to make sure the Dutch oven and lid can handle up to 500ºF. This is usually not as issue with the Dutch oven itself, but the handle on the top is often made of plastic. (mine was, but I replaced it with a metal knob from Home Dept, works fine). Warning!!! Be careful, the lid will be VERY hot! For some reason your brain just does not register that a lid is hot. But it is! So just leave the hot pad on the lid to help remind you. After the oven (with the Dutch oven) is heated up to 500ºF Dump your dough into the Dutch oven. At this point I will usually just dump ¼ cup of water (or so) on top of the dough and put the lid back on. This steam is very important to the crust formation of the bread.You will want to take the top off the pot in about 15-20 min to help with browning (The humidity it important to help with the spring rise, but then it will interfere with browning).The dutch oven really is the best way of doing this bread, and most other, rustic breads. It keeps it round, keeps a high humidity, holds in the heat well, and just makes a superior loaf! In fact I have multiple dutch ovens I use for nothing but making bread! There are three downsides to the dutch oven method. First clean up, you have to clean the Dutch oven. Secondly is I can only do 1-2 loaves at a time in a Dutch oven, without I can do 6-8. And lastly It can be hard to get out of the Dutch oven. I have found that if the bread won't come out you have not baked it long enough, or baked it too long with the top on. Put it back in for a few min and let the bottom dry out more. It still may not come out, but usually it will with a little coaxing. Important points:A Dutch Oven is excellent for bread baking lid on for 15 min, then off Dump the water on top of the dough before you put the lid on.
There are few things that might help with things you have seen in other bread recipes.SlashingFor the most part this dough is so wet that you don't need to slash it (cut the top when you put it in the oven). But if you end up with a fairly firm dough you may want to slash the top of the dough. I find just some scissors work best for this, but you can use a sharp knife as well. Wet (slack) doughThe big key to this is the layers of very wet, and very dry dough. Often when you cut into it you can see the layers of flour between the large holes of the dough. The wet dough is what gives it all the holes, the great crust, and soft crumb (inside). So fold in enough flour to make it stay together, but try and keep it as wet as you can.Flavor/sourdoughThe longer the rise the more flavor you will have. If you have access to sourdough starter this recipe goes great as a sourdough. Just substitute 1 cup of sourdough starter, and remove 0.5C of water and 0.5C of flour. (really, you can just do it the same and add the starter... like I say it is a very forgiving recipe!). Overall I have found 15 hours for the first rise is about right; but, I have done it much longer and shorter. 15 hours is also good for going to bed at 11, doing the forming at 2, and baking at 5 for dinner. But like I say make it at 8 if you are an early to bed type!KneadingThis recipe does not need to be kneaded. This is because the very long wet rise does all of the work normally done by the kneading. In fact if you do try and knead this dough (because you just wanted to do some extra work) it will deflate all of the bubbles and make it too dense. So just accept that you can't beat on this one, you just have to eat it!Important points:There are many options and variations on this bread... try them all!
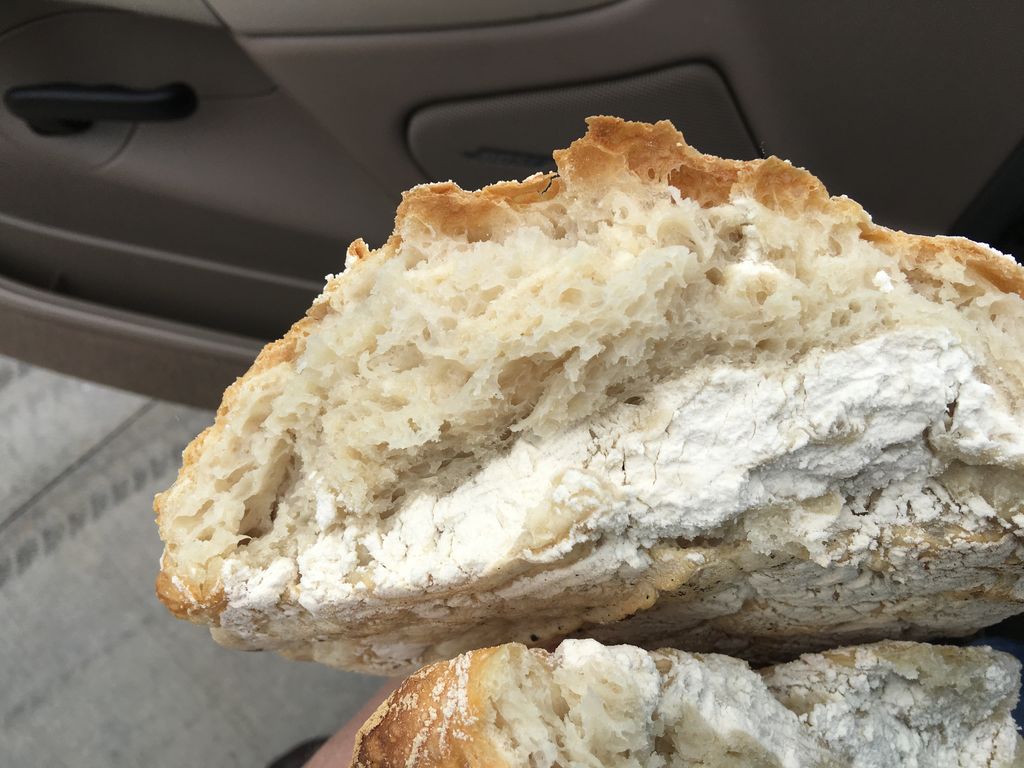
So there are some great things about this bread. Some truly amazing ones! But there is also a reason I no longer make it anymore. Plusses:Ease - This is truly one of the easiest breads you can make. There is no kneading, the measurements are rudimentary at best, the time line is very pliable, and you only put about 5 min of work spread out over a full day! Flavor - the long rise adds a lot of flavor. Rustic - This loaf looks very rustic. It looks like it came out of a back woods log cabin, you won't have to tell anyone you made it!Minuses:Flour - the flour that forms the structure will form lines through the bread. You can see when I ripped this one open it ripped along one of these flour lines, so all you see is flour in one part. While this isn't really bad, it's certainly not good either. Flavor - while this has a lot more flavor that just plain white bread, it also isn't sourdough. And I love me some sourdough!!! Mess. It really is a mess. If I don't wash my towels out quickly my wife will just throw them away rather than try and get all that flour and dough out of them! Time - while it is no problem if you have a day to make it, there is no rushing this one. Sure you may be able to cut it from 24 to 12 hours, but you are loosing something when you do. No good bread is fast... so just accept it and take the time for this one.
I do hope this does the same thing it did for me as it did for me... just got me started. This is a bread I have not made in years (I made a batch to get pictures for this tutorial, and it was kinda fun, nostalgic). It is still a great loaf of bread, but it really is just the start. So the first one is of this bread, but the rest are other breads, mostly sourdough, that I have made!Happy baking!PS here is a picture of a grilled ham and cheese I made with this bread. Other than a few spots I burned it was great!
Question & Answer
Question: What is the correct order of the images?
Choices:
    |
| (A) |
|
|
| (B) |
|
|
| (C) |
|
|
| (D) |
|
|
|---|
 (D) (D) |