Question ID: 3000-9247-0-1-2-4
Recipe Description
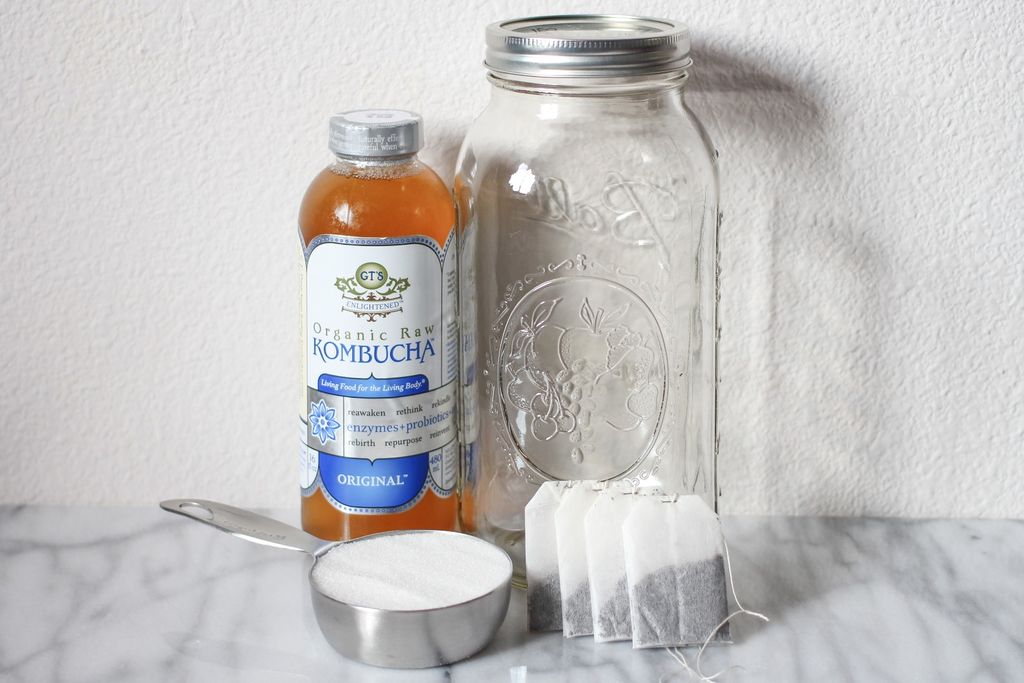
ingredients needed for the scoby building tea:7 cups water1/2 cup plain white sugar OR raw cane sugar4 tea bags OR 1 tablespoon loose leaf black tea (nothing flavored, nothing herbal)1 cup unflavored unpasteurized kombucha (I used GT's Kombucha!)Honey, stevia, agave, and other sugar substitutes do not work as well based on everything I've seen. The sugar is the food for the growing scoby, so it's important to give it something it can break down easily. Use the regular stuff first to get used to the process, and then you can start doing crazy experiments. ;)For this, I just used standard Lipton black tea bags. We really don't need anything fancy - the liquid produced by building this scoby will not be drinkable. We're gonna make kombucha vinegar! YAYAs far as choosing your store bought kombucha, it is REALLY important it is unflavored and unpasteurized. Try to grab a bottle with some little baby scoby blobs floating around. supplies:2 quart canning jar (64 oz)large saucepancoffee filtersrubber bandinstant read thermometerMake sure your jar is rated for canning and also nice and clean - pour boiling water into it to ensure there's nothing funky living on the inside! However, it's important to not use any antibacterial soaps in the cleaning as it can hinder the scoby growth or stop it completely.
Step one! Make sure your sauce pan is large enough to hold 7 cups of water and VERY clean. Put the saucepan on the stove over high heat and add the water. Bring to a boil, turn off the heat and move it to another burner. Add in 1/2 cup of sugar. Stir to dissolve.Now you'll want to place the tea bags in. Give it a good stir and then let it sit. These tea bags will stay in the water until it's cool.We need this tea to come down to room temperature - in a range of 68-75 F / 20-23 C. I use a instant read thermometer to check this. If the tea is too hot, it will kill everything in the GT's kombucha when we add that in. What I like to do is let the tea cool for an hour or so on the stove, and then pour it into the canning jar and pop it in the fridge. This lets it cool down a wee bit faster - otherwise you can be waiting for six hours or more! Just make sure to check it every 45 minutes or so - you don't want it to cool down to below room temp.
Once the tea has hit room temperature, we will remove the tea bags. If you used loose leaf tea or one of the bags busted, strain the mixture. Now you'll need to measure out one cup of your unflavored and unpasteurized kombucha. As I've said before, it's best to get the tiny scoby blobs from that bottle into your tea mixture! These will help the scoby growing process go a little easier. :)Pour the cup of kombucha in and give the mix a gentle stir.
Once the sweet tea and kombucha have become friends, you'll need to cover the jar and move it to a safe dark location where it won't be jostled. It's best if this is in a warm place (around 70 F / 21 C) - the colder it is the longer this process will take! I placed mine in a kitchen cabinet. Place a coffee filter over the mouth of the jar and secure it with a rubber band or a rogue hair tie if you have them all over the house like I do. :P
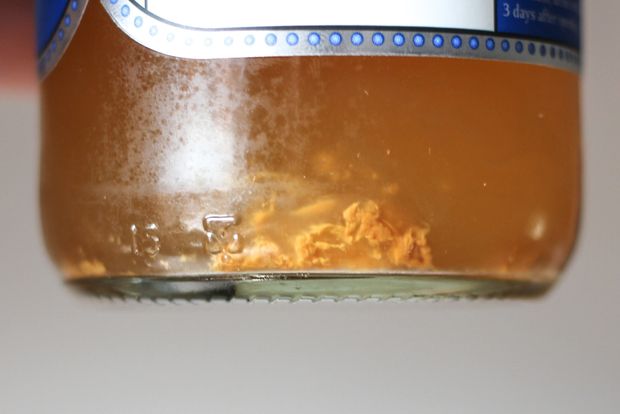
At this point, the sweet tea just needs to hang out for a bit. It can take anywhere from 1 week to a month, depending on the kombucha you used and the temperature you're storing it at. I wrote my progress down on the calendar so I could share it with you guys, so here is what I saw happen chronologically:Bubbles. The first thing that will happen is tiny bubbles appearing all around the top edge of the sweet tea. These started at day 4 for me. A shiny/slimy looking film. The bubbles will eventually get an upgrade to a film that covers the top of the sweet tea. This occurred around day 7 for me. This film will begin to look more like a clear jelly as time goes on.A kombucha-like smell. Another sign that things are going well! This started to get really strong around day 7 for me. An opaque and very thin scoby. Around day 11, the film over the top of the sweet tea had formed into something slightly opaque and paper thin! Woohoo!The scoby will continue to grow to 1/4 inch thick. From day 11 on, I just let my scoby grow. You want the scoby to be 1/4 inch thick. At day 20, it had reached that thickness, but I let it hang out until day 25 until I had enough time to make the next batch of sweet tea to brew the actual kombucha. At that point it was almost a 1/2 inch thick! :)
Pictured above: the original scoby I grew is on the left, the scoby on the right grew on top of the first scoby during my first kombucha brewing! Both are healthy even though they look totally different!As stated on the previous step, you want the scoby to be 1/4 inch thick and very opaque. You may have a few places that are a little bit transparent, but overall it should be cloudy and thick!Things that are normal in scoby growth:lot of bubblesshimmery films on the top of the sweet teabubbles forming in the opaque scoby (it will be very ugly and bumpy until you use it a few times!)strings and particulate coming from the bottom of the scoby in various colorsa strong vinegar smellscoby growing in thin layers Things that are not normal:black or green mold forming on the scoby. Toss it and try again!a cheese-like smell, or a smell like rotting meat. Now that you have a scoby, go brew some kombucha with it! Click here for my full tutorial.
Question & Answer
Question: Select the incoherent image in the following sequence of images.
Choices:
 |
 |
 |
 |
|---|---|---|---|
| (A) | (B) | (C) | (D) |
|
|---|
 |