Question ID: 3000-5183-4-5-9-11
Recipe Description
Combine the butter and sugar in a bowl and mix until smooth. Ideally, you should use a mixer but a spoon and some elbow grease will work as well.
Mix in the egg, vanilla, and milk.
Stir the salt and baking powder into the mixture and distribute evenly.
Half a cup at a time, slowly mix in the flour until you get a homogeneous dough.
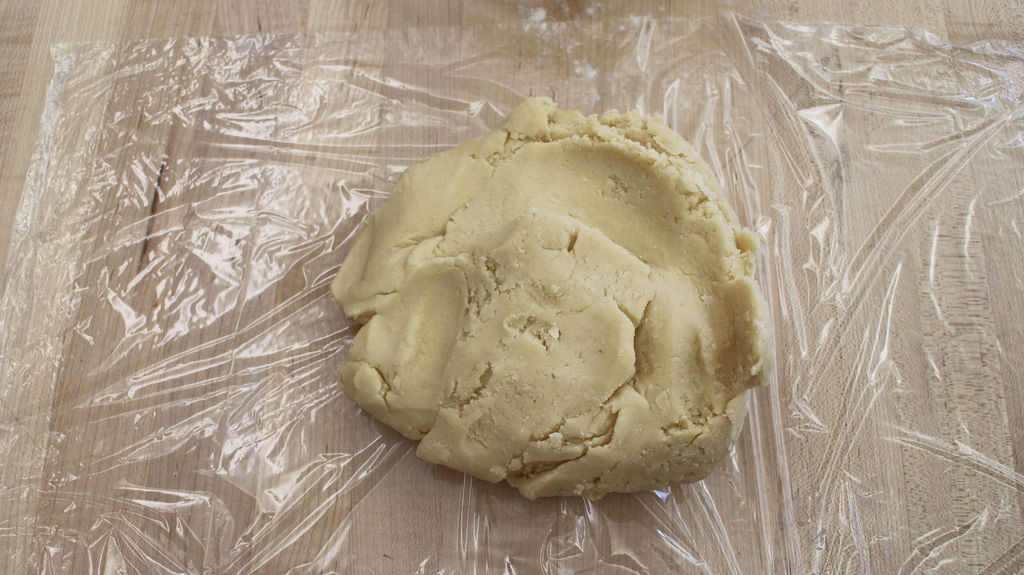
Turn the dough out onto plastic wrap and chill into the fridge for about one hour, or until firm but not hard.
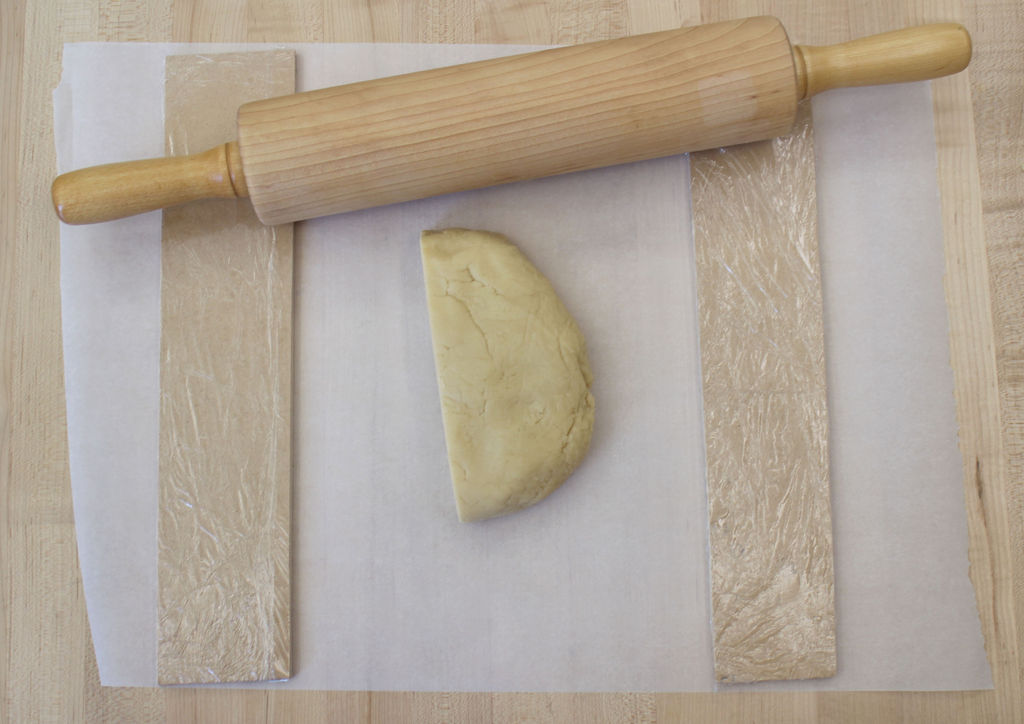
Working with half of the dough at a time, roll it out to about a 1/4" thickness. I used scraps of plywood wrapped in plastic wrap to make sure my cookies were perfectly level at 1/4" (I wanted them to be as uniform as possible for laser etching). You can do something similar with cardboard or rubber bands wrapped around the rolling pin if you don't have access to plywood.
I cut my cookies into 2 1/4" and 3" rounds for testing. I also dipped some of them into white sugar before baking, in hopes that the sugar would caramelize from the laser (it also just happens to taste good).
Bake the cookies at 375 deg F for about 10 minutes, or until the bottoms are just beginning to brown.
While the cookies are cooling, create your design for the etching. I made a layout sheet of 2" circles for my smaller cookies, and made sure that the images were centered over the circles. The circles and the images were on different layers, so I could turn the guides off when etching.
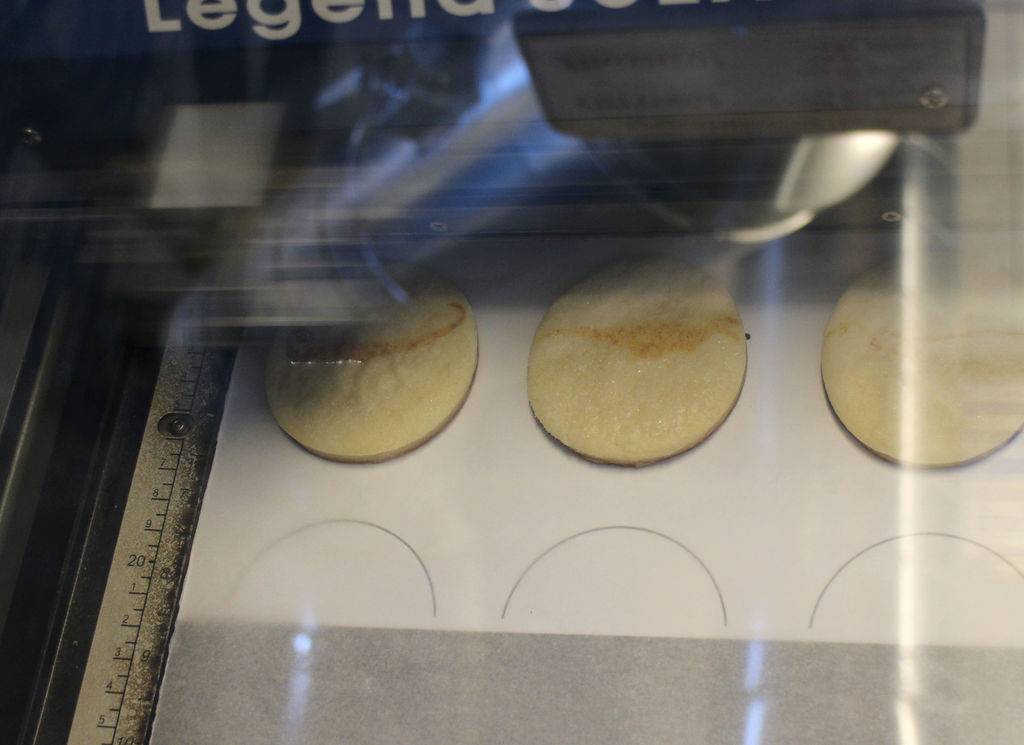
First, clean the laser cutter. I found that it smelled a little after cutting, and that wiping down the bed, the rail that the laser slides along, and the laser housing helped reduce the smell. Put down a printout of the layout sheet you created and cover it with a layer of parchment paper (you should be able to see the layout lines through the parchment paper). Place the cookies inside the guidelines and focus the laser on a cookie. Finally, etch the design using the cutter's "raster" feature.
I tried a variety of settings and found that I could never get the etching quite as dark as I wanted. In the end, I settled on speed at 100%, power at 75%, and raster settings of 400 DPI. I also experimented a bit with sugar vs no sugar on the top of the cookies. The plain cookies had better resolution, but the sugar-coated cookies tasted significantly better.
As a safety note, food that has been laser etched in the cutter I used is no longer considered "food safe" and probably shouldn't be eaten (hence "admire"). That being said, the cookies took on a bit of a chemical/burned taste which I found kind of awful. The sugar-dipped cookies had less of an aftertaste than the plain cookies. However, other people who tried them said that they barely noticed the taste. In any case, the non-etched cookies are pretty good too.
Question & Answer
Question: Select the incoherent image in the following sequence of images.
Choices:
 |
 |
 |
 |
|---|---|---|---|
| (A) | (B) | (C) | (D) |
|
|---|
 |