Question ID: 4000-4767-1-2-5-6
Recipe Description
For this project you will need:NOW:*Smooth-Sil 940 (available online at Reynold's Advanced Materials and occasionally on Amazon.com). I used the 2lb intro kit and had just enough to do the job I wanted. 1 plastic skull Ziploc (or similar) plastic tub the size of the skull you are molding. Rubber spatula for stirring (trust me, do not skimp and get crappy wooden chopsticks or plastic spoons, this crap is THICK and those will break and you will make a huge mess and regret your poor decision making skills. I know, I have been there.) Latex glovesFOR LATER:1 bag of off white candy melt (Again, Amazon.com or just about any craft or fabric store) 1 can cooking spray (I like original)*A QUICK WORD ABOUT SILICONE AND FOODI did a lot of research before I started this project because the last thing I want to do is make something that will end up hurting or killing me (major downer.) MANY SILICONES ARE HIGHLY TOXIC AND SHOULD NOT BE USED FOR FOOD PURPOSES. The Reynold's Smooth-Sil 940 is specifically manufactured to be food safe. ALWAYS CHECK YOUR PRODUCT'S MSDS BEFORE USING FOR FOOD.
BEFORE WE GET STARTED ACTUALLY MOLDING THE SKULL, WE HAVE TO CHECK FOR HOLES.The last thing you want to do after doing all this hard work is find out that you can't remove your skull from your mold because you've forgotten to fill in any spots where there are either holes into the interior of the skull, or in the case of the connection between the jaw and the rest of the skull (the 'temporo-mandibular joint' for you scientists out there.) a plastic "arch" that results in an open loop.Many plastic skulls have a gap where the jaw bone meets which, if left unfilled before you mold your skull, will fill with silicone and "lock" your skull into your mold as it cures.To fix this, and any other holes you have in your molding skull, I like to use hot glue or Sculpy clay.
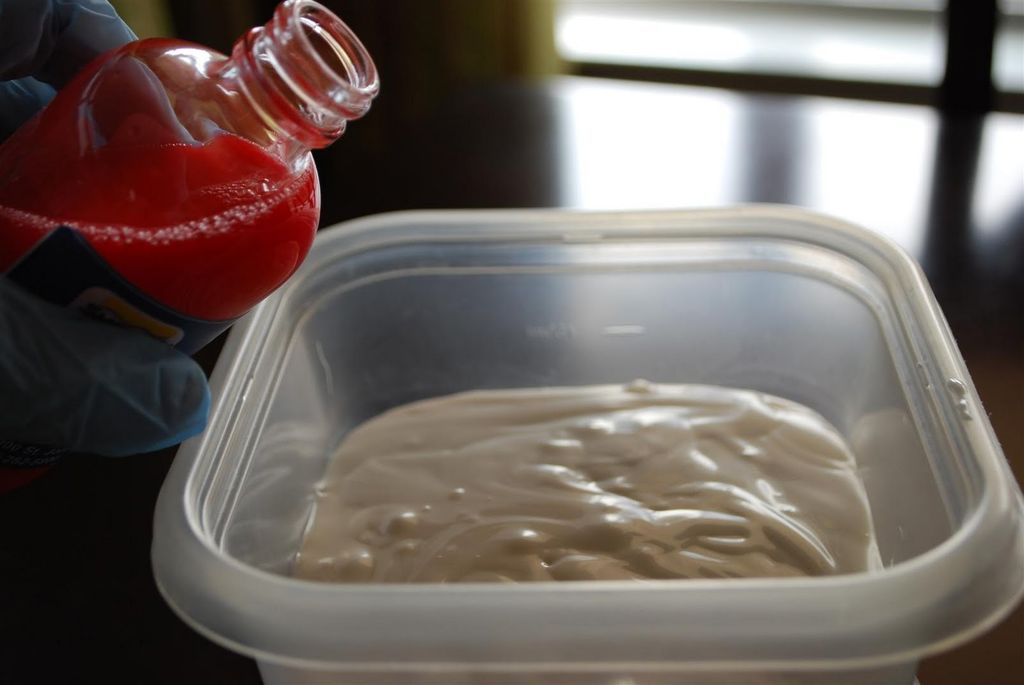
Now that our holes are filled, it's time to mix our silicone and get molding!I’m using Smooth-Sil 940 from Smooth-On which is available from one of my favorite places, Reynold’s Advanced Materials. Let me be the first to tell you…this goop sucks to work with if you're new to the whole silicone thing. It’s thicker than snot and doesn’t pour easily at all. You have to mix it by volume at a 100:10 ratio which means I also had to buy a scale. I picked up a cheap kitchen scale from Target for $19.00 and it worked like a dream.Put on your gloves...safety first, right?!?Next put your mixing tub on your scale and zero it out.Now scoop out a glop of the white compound and drop it in your mixing tub. It's like slightly runny peanut butter and does NOT POUR WELL. Use your spatula. Once you have the amount you want weighed out, you'll want to divide that weight by 10. I first started out by scooping about 50 grams into my tub. Then, I divided that by 10 and came up with 5. (Yeah, I'm a math genius!) That will be the amount of catalyst (pink stuff) you want to add.Once you add in your catalyst, it's time to mix. The goop will not want to mix at first and it'll take a bit of muscle, but if you stick with it and keep mixing, you'll end up with a smooth pink liquid with the consistency of slightly thick honey.The Reynold's Advanced Material team say it’s a good idea to have a vacuum de-gasser to help remove any bubbles from your silicone mix (they happen as you mix it...you can't help it), but because I’m doing this in my kitchen and don't have access to a de-gasser, that meant I spent 45 minutes tapping the sides of the mold after the goop was poured in the hopes that I got at least the major bubbles.
Once your silicone is good and mixed, it's time to get molding.I started by first dipping my skull into the tub and making sure I got plenty of pink silicone gooped into the eye holes and nasal cavity. You want to try to avoid trapping air in there and the easiest way is by filling them up first with silicone. Once the eyes and nose were full, I quickly tipped it back into the molding tray, trying to avoid pouring out too much in the process. I wanted a good full face mold so I made sure the silicone came up to about half way on my skull.I found that my skull, because it's hollow, had a tendency to want to float in the silicone. To combat that, I used a Gatorade bottle to help keep it submerged. (Sharp eyed observers will notice I am the proud owner of a copy of Christine McConnell’s deliciously imaginative book “Deceptive Desserts.” If you haven’t checked it out yet, you should. She’s an inspiration and certainly been motivation for me to put my own dark recipes online!)Now comes the hardest part...Waiting.
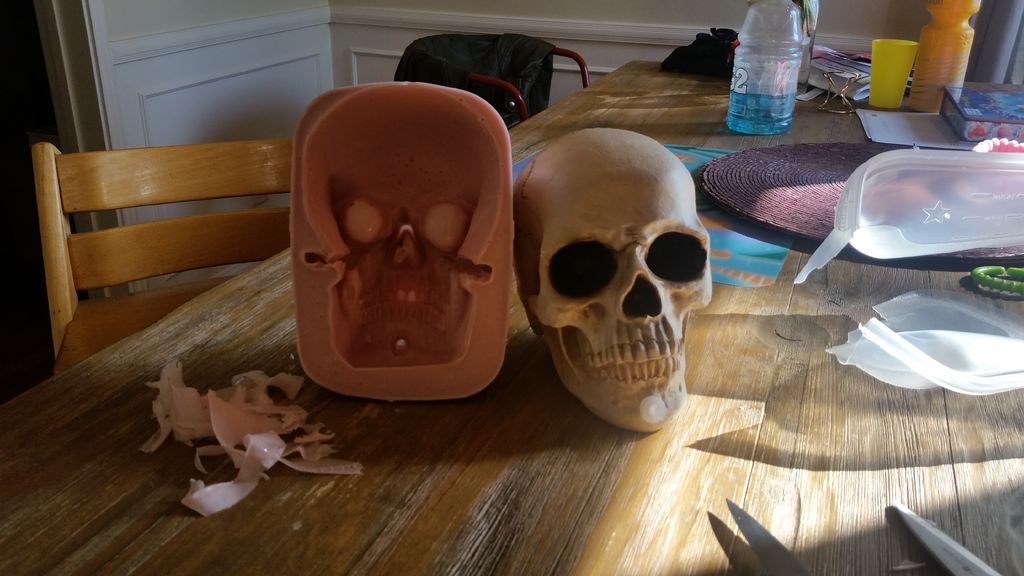
Technically you’re supposed to wait a full 24 hours beforereleasing your mold, but I’m impatient. Honestly, it’s a miracle I made it to 22 hours. Unfortunately in the process of making my mold, I had to sacrifice the Tupperware bin I used to contain all the silicone which is why there are scissors and a pile of chopped up plastic in the photo.But enough about that…how did the mold turn out!??!
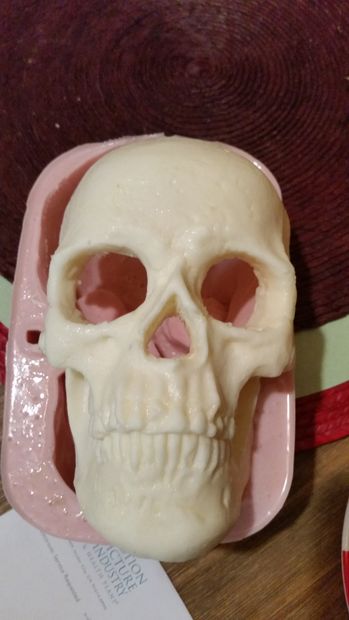
The skull popped out beautifully and I was left with a perfect copy in reverse! There were a few thin spots I did go back over and fill in with a quick touch up of silicone to ensure no leaks, but for the most part, I’d say this was a full success!So now what to do with it??? Let’s test it out!
Once I had removed my skull from the mold, it was time for a quick bath in soapy water to ensure my mold was free of any residue that might have been on the skull prior to molding.Now that it was all clean and dry, it was time to test it out!I picked up a bag of off white Wilton’s Candy Melts from Michael’s for about $2.00 (I had a coupon for 40% off. Free on the app. Get the app…it’s so worth it!).Put your candy melts into a microwave safe bowl and zap them for about 15-30 seconds at a time, stopping to stir them between each zap until they're fully melted and smooth. Don't over zap!Spray a quick shot of your cooking spray into your clean and dry mold, making sure to get all the nooks and crannies.Pour your melted candy melts into your skull and and slosh them around by tilting the mold until the entire interior is fairly evenly coated. As the candy melts cool, you can use a clean spatula (NOT YOUR SILICONE MIXING SPATULA..KISS THAT ONE GOODBYE FOR FOOD PURPOSES) to help push the candy into areas where it might not be going easily.Once you are satisfied with the candy coating, tuck the mold into the freezer and wait about 10 minutes.Once the candy again solidifies, it should easily popped out of the mold…leaving you with a perfect 1:1 scale fully edible candy melt white chocolate skull!I used a table knife to clean up a few edges and trim down a bit of the over-pour, but the result was exactly what I was hoping for! I mean, seriously…look at this thing! It’s perfect!!! And on top of that, I can make as many copies of this as I’d like!Now the question remains…perfect for what!?! You’ll just have to stay tuned for that answer! Until then…Bone Appetite!I have even more disgustingly delicious recipes available online both through Instructables.com as well as my blog , The Necro Nom-nom-nomicon. Enjoy and have a deliciously disgusting Halloween!!
Question & Answer
Question: What is the correct order of the images?
Choices:
    |
| (A) |
|
|
| (B) |
|
|
| (C) |
|
|
| (D) |
|
|
|---|
 (D) (D) |