Question ID: 1000-10093-0-3-5-8
Recipe Description
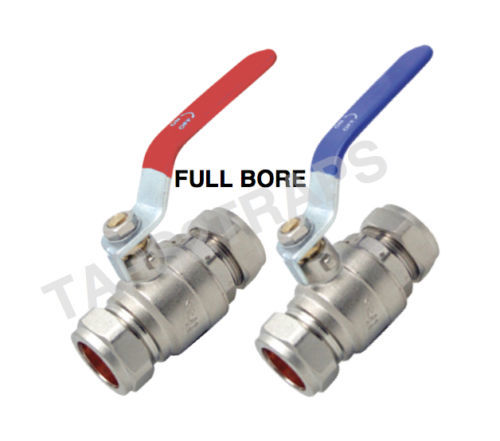
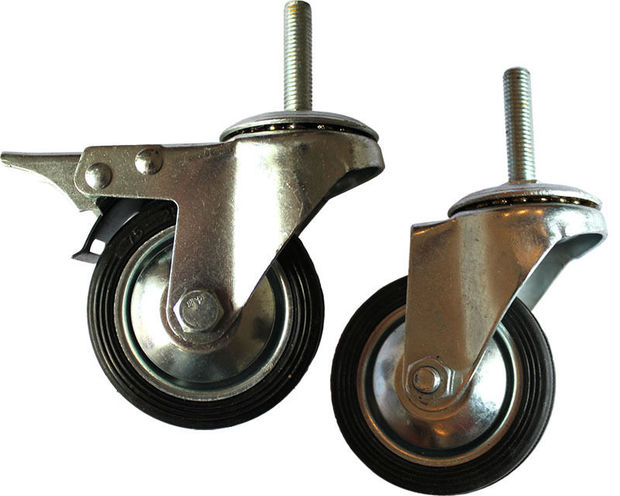
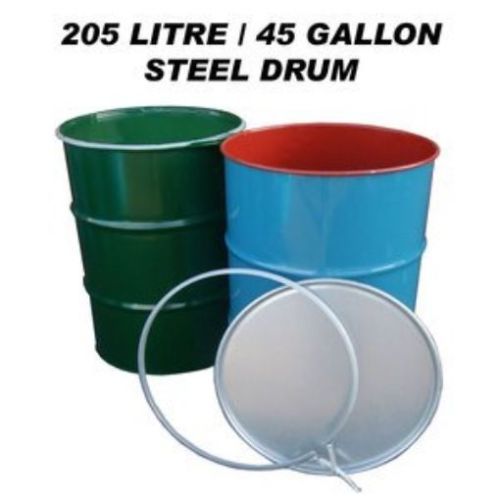
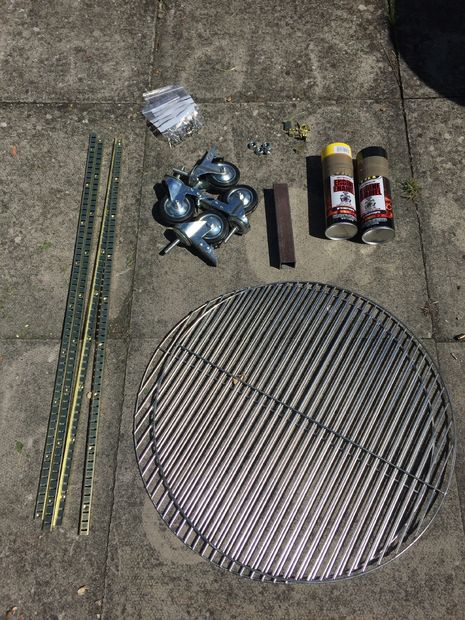
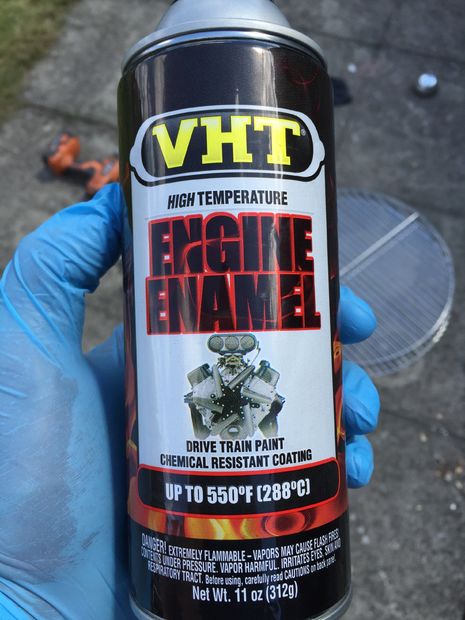
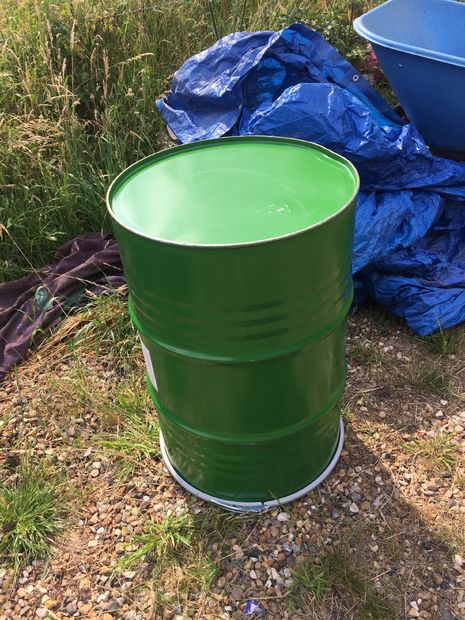
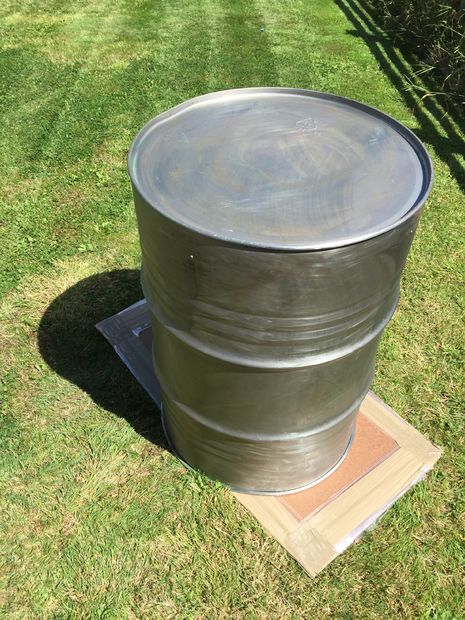
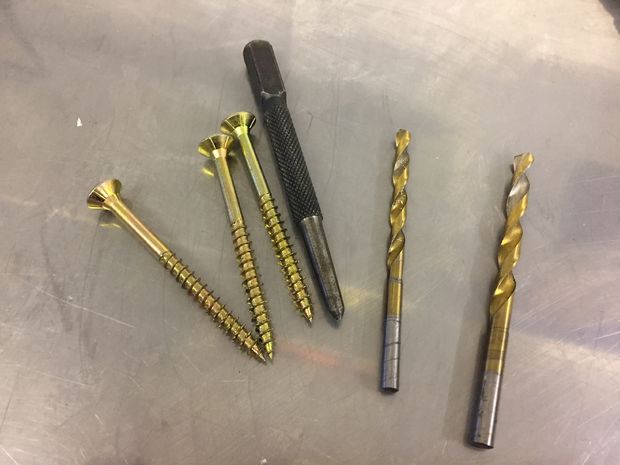
OK so here's what you need for the build:A Barrel/drumA 205 Litre/45 Gallon Steel Drum/Barrel like this one. Note, i think you probably don't want one that had nasty chemicals or oil in it (though some people say its ok as long as you give it a hot burn-out before using it). I chose one that had apple juice in it in its previous life.http://www.ebay.co.uk/itm/205-LITRE-45-GALLON-STEE...Castors (wheels) like these: http://www.ebay.co.uk/itm/Pair-of-Kart-Industrial...28mm bore copper pipe & fittings600mm of copper pipe. 2x 28mm full bore Ball valves like these: http://www.ebay.co.uk/itm/Lever-Full-Bore-Heavy-D...2x 28mm Compression Tank Connectors Brass like these ones: http://www.ebay.co.uk/itm/Compression-Tank-Connect...Steel1m of 30x30x3mm Mild Steel box section (for the base) 1m of 25x3mm steel bar 1.5m of 25x25x3mm angle bar 500mm of 15x3 mild steel tube Steel Perforated 8mm Round 1000 x 500mm Sheet like this: https://www.raygrahams.com/products/126994-steel-..HardwareM3/3mm, A2 Stainless Steel Flanged Button Head bolt and nut 4x 1m Bookcase strips and supports like these: http://www.screwfix.com/p/bookcase-supports-x-16m...2x 2.25" Stainless Steel BBQ Smoker Pit Grill Thermometer Temp Gauge like these: http://www.ebay.co.uk/itm/Anself-F-C-2-25-Stainles...Other:2x Stainless Steel Kettle BBQ Barbecue Cooking Grill fit Weber 57CM (54.5cm) like this one: http://www.ebay.co.uk/itm/STAINLESS-STEEL-KETTLE-...Paint: some engine enamel and some (cheaper) matt high temperature paint. 20mm plywood sheetTools:Hacksaw Electric jigsaw (optional for table) Drill 28 or 29mm hole saw, tin snips Welder
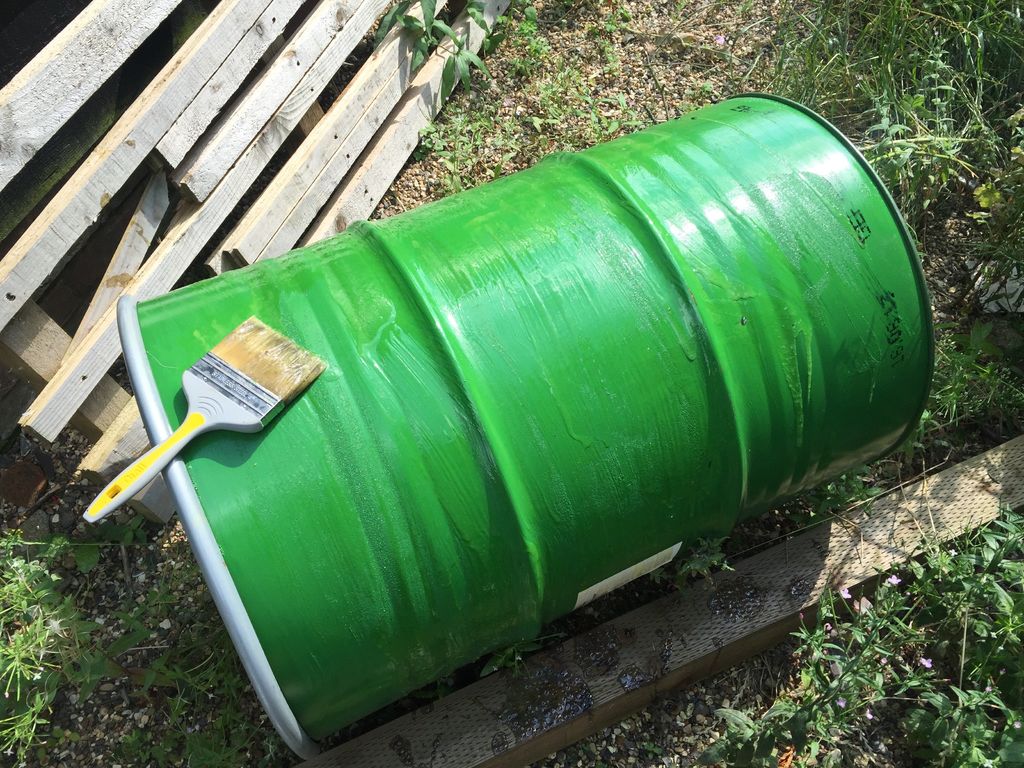
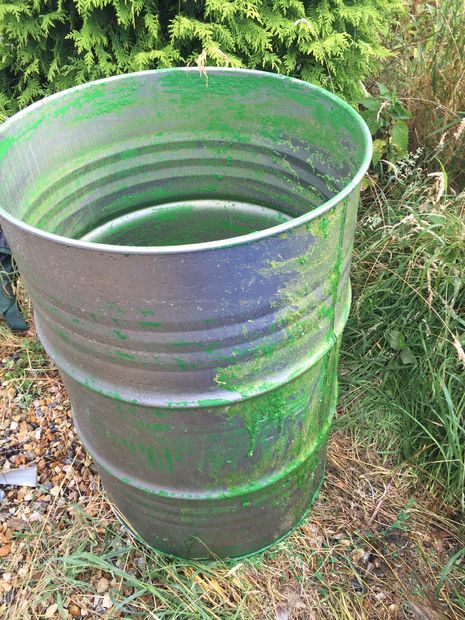
This is probably the least rewarding/ hardest work part of this build. All the paint must go! If you are lucky enough to find an unpainted barrel you will save a load of time. My tip for this is to use some hardcore paint stripper containing Dichloromethane (I think in the US they call it aviation stripper or something like that). Hard to get but worth it if you can find it. PLEASE USE IN WELL VENTILATED AREA WITH PROTECTIVE GEAR PEOPLE!! The stuff is really scary. Even the tiniest bit on your skin starts burning immediately.Apply, wait for a bit for the paint to bubble, scrape, repeat (for ever). Have patience, it will be worth it.Once all the old paint has been scraped off, give it a good wash and dry.Get some 600 or 800 grade sandpaper and prepare the surface for paint (not really sure if that helped as the finish was still rubbish)Spray with the engine enamel paint

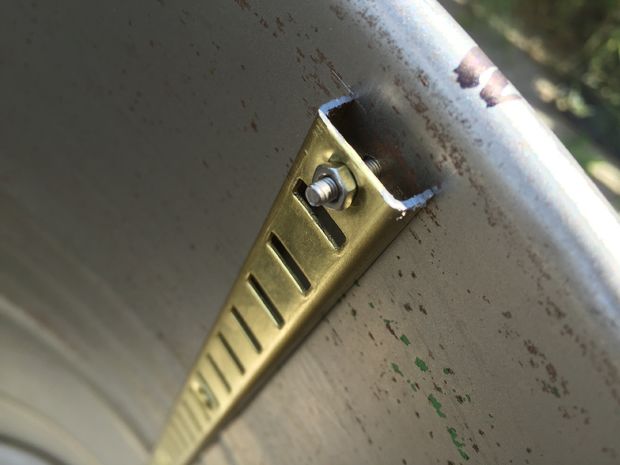
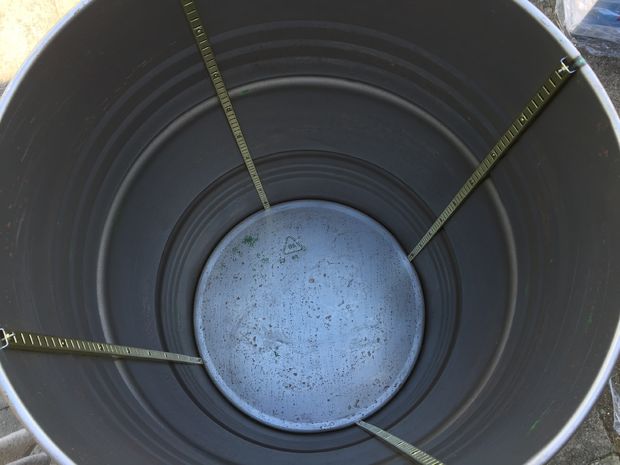
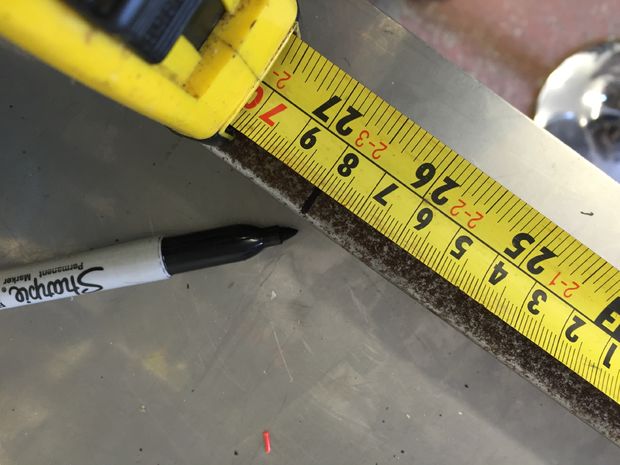
Measure the circumference of the oil barrel and divide into quarters. I used a bit of string to do this. Im sure there are others.On each quarter mark, measure 2cm from the rim and mark with a pen. Centre punch on the mark and drill a 3mm holeBolt the top hole of a shelf rail losely and let it swing vertical. Mark out the remaining holes with a pen then mark and drill.Repeat for the other 3 rails.DONEThe shelves will let you adjust the height of everything later on (neat idea stolen from one of the other Instructables).At this point its probably worth mounting the thermometers too. You want them at the bottom and the top of the area you'll mainly be cooking your food. Make sure you are (1) far enough away from the fire box (2) you leave yourself plenty of room to place the shelf where you can fit in some immense pork shoulders or brontosaurus ribs. Thats the name of the game after all.
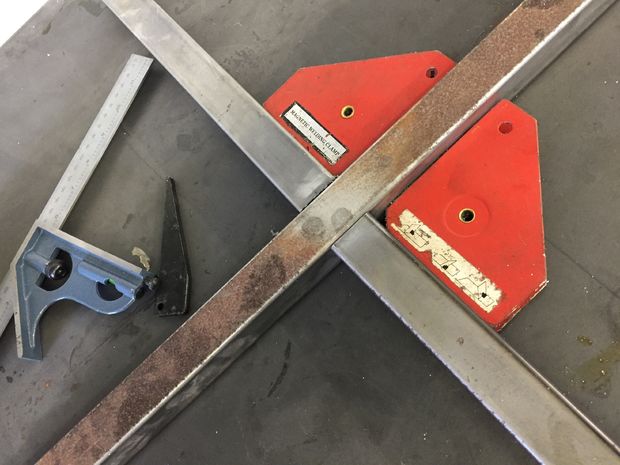
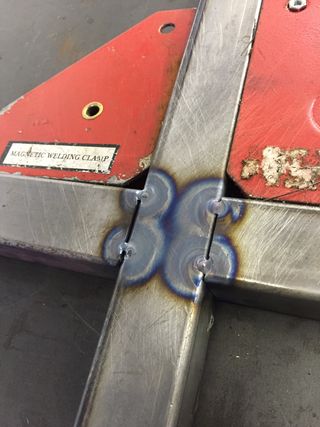
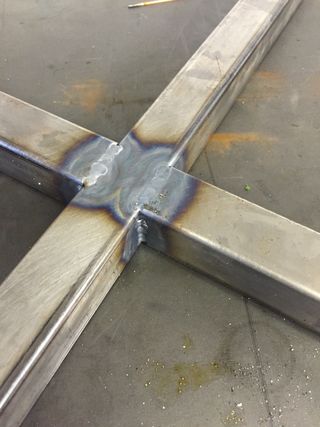
This next step is optional as you don't really need the base. If you can, if recommend doing it as (1) its really practical being able to move the smoker around easily even when hot and (2) it will prevent it rusting if you leave it out every now and again.Cut 1 length of the 30x30 box section to 67cmCut 2 pieces of the same box section to 32cmUse a right-angle welding clamp and tack the pieces into place as shown and ensure still aligned with a set-squareWeld-up both sides. I think I used about 70amps here but its not critical. Just use the recommended settings for mild steel.Drill 10mm holes at 1cm from each end of the base (for the casters).Drill a 10mm hole directly in the centre.SprayBolt on the wheelsDONE
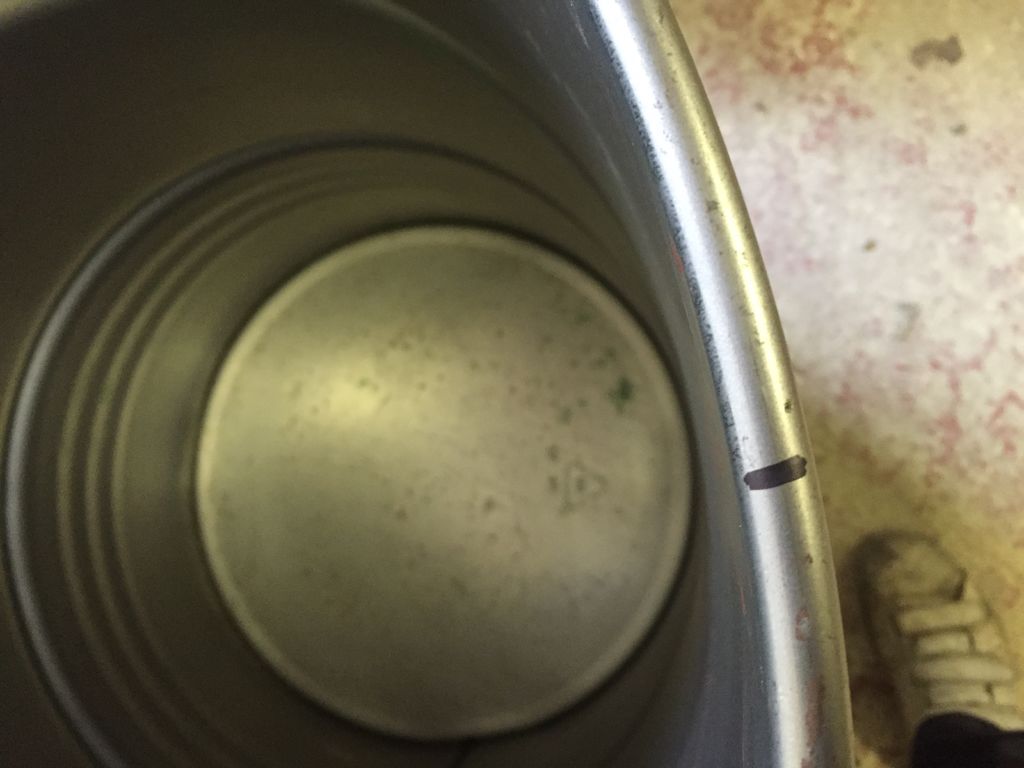
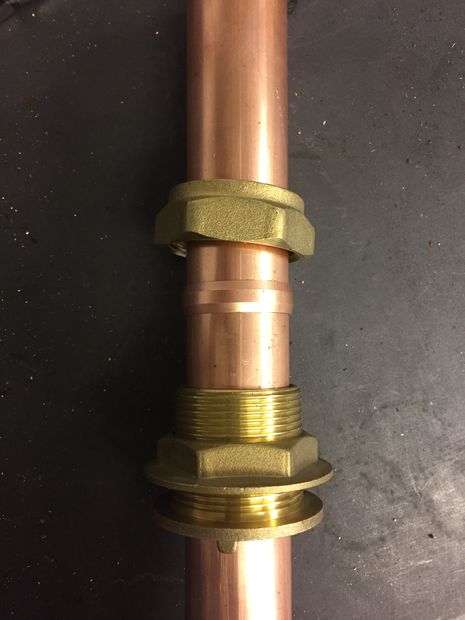
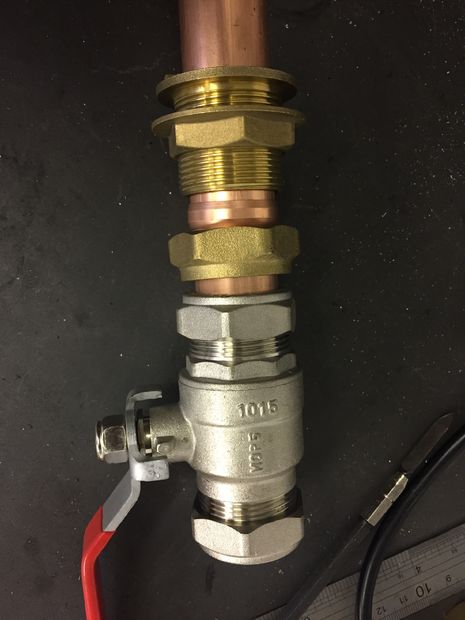
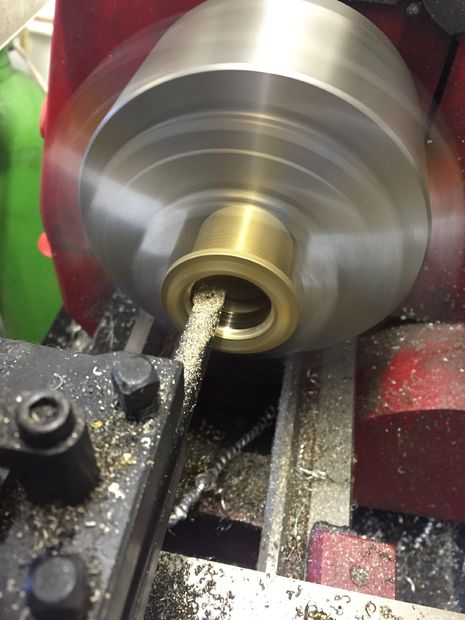
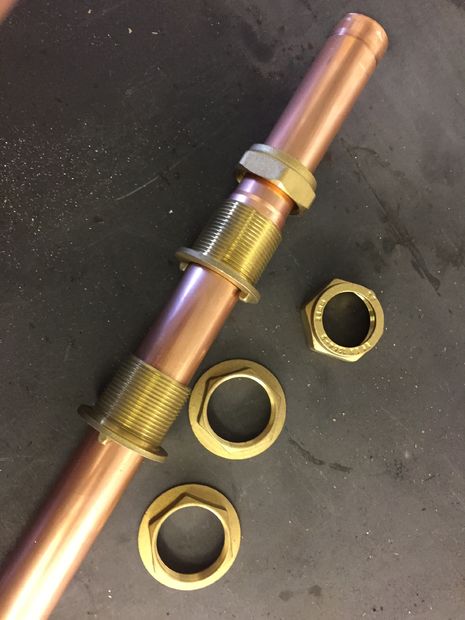
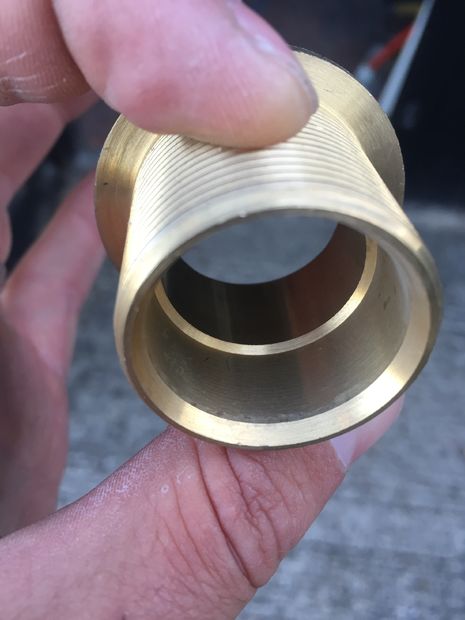
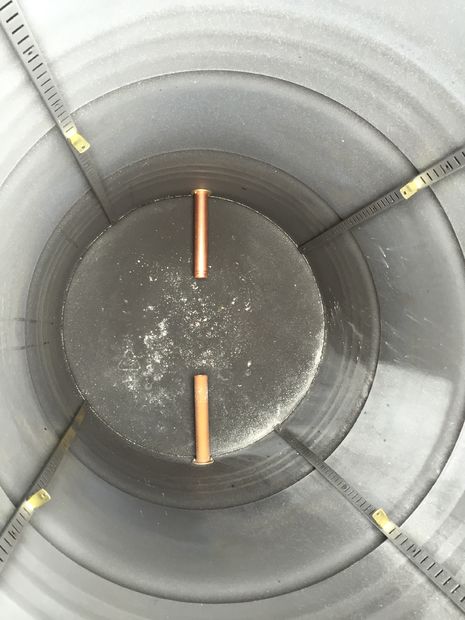
This step is really easy apart from removing the lip on the inside of the tank connector. We want to do this to get the air intake pipe to go underneath the fire box for a more even burn. Not sure of how much difference this really makes but worth it if you can. I used a lathe to remove the lip. You can probably get away with a rotary tool like a Dremel too but be careful not to butcher the fit further up the fitting where the airtight seal is made with the brass olive.Anyways, heres how I did it:take apart the tank connector.Chuck the large bit in the lathe and skim off the lip with a boring bar. I used an indexable carbide tipped one but as its brass HSS would be just fine too.Cut the copper pip in half to 2x 300mm lengthsCut a 29mm hole in the side of the barrelAssemble Ball Valve, Tank connector and valve on the barrel as shown and tighten up with some big spanners.DONE
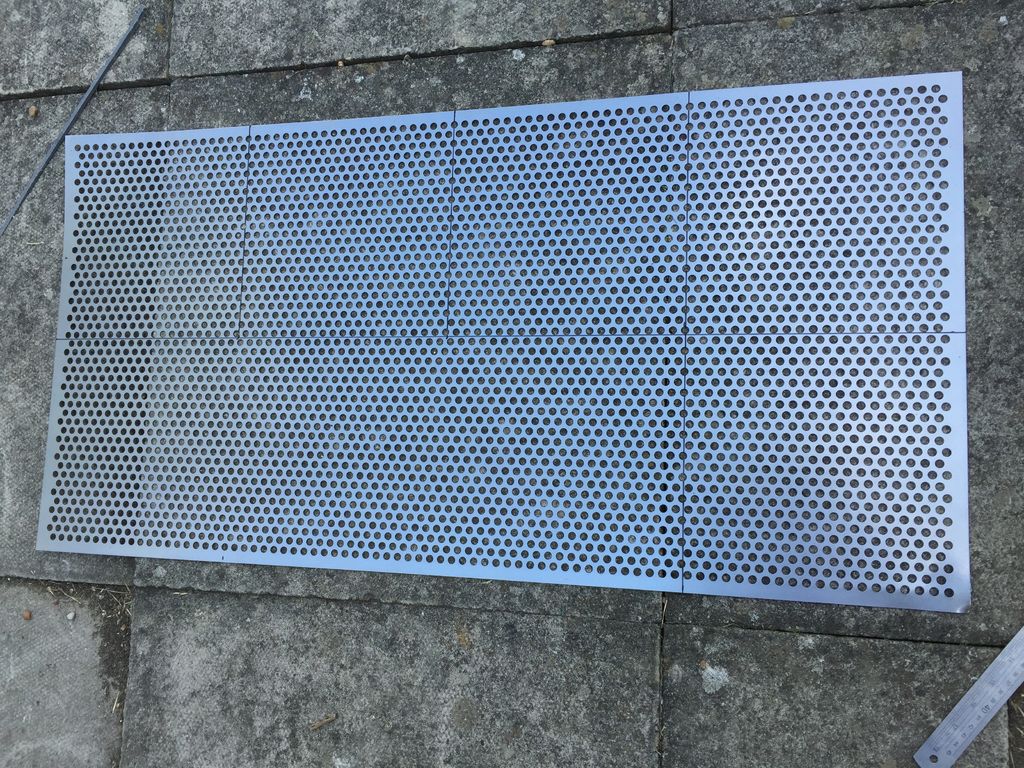
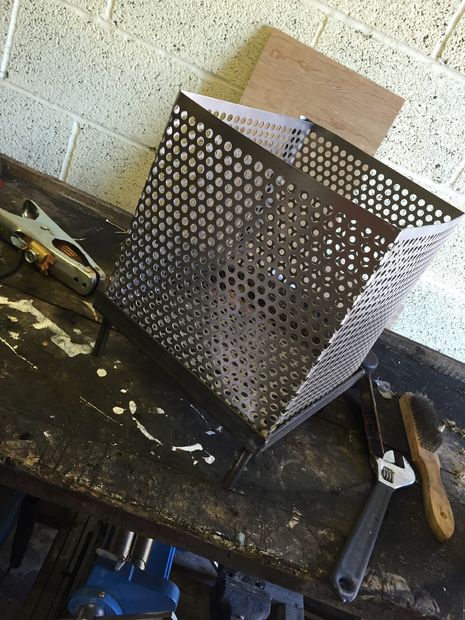
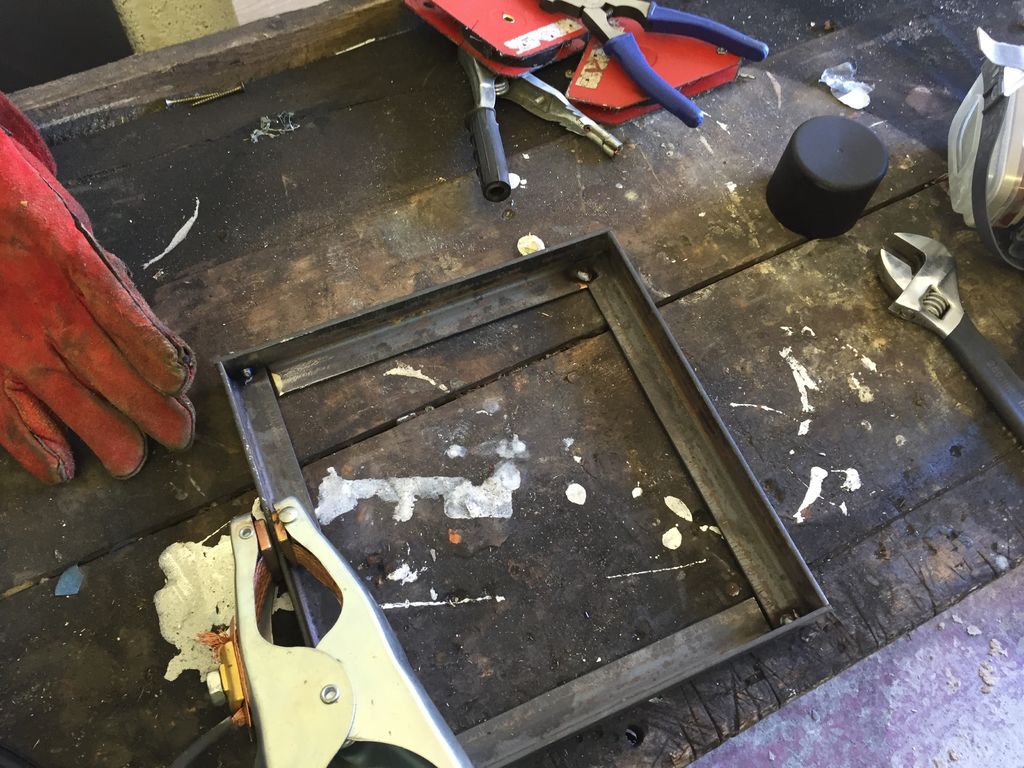
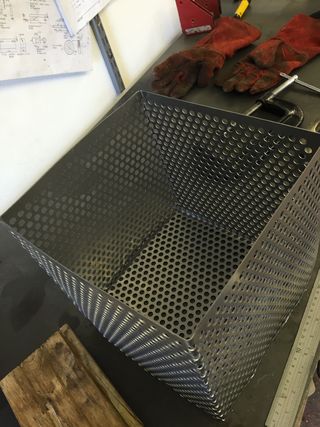
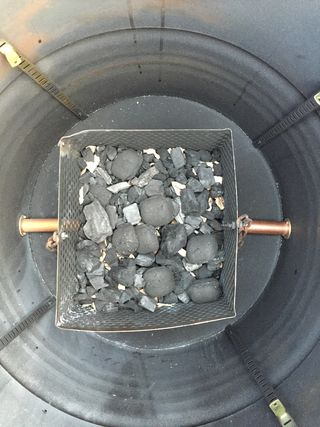
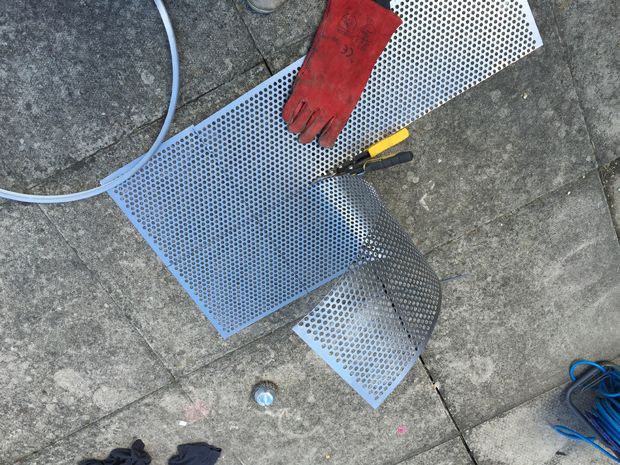
This is probably the trickiest step and I'm not sure if there isn't some easier way to do it. Its my original design and having done 5 successful 12hr+ smokes now so I can say it works perfectly! If you don't want to weld, take a look at some of the builds that use 'expanded metal' from Wickes etc. This stuff is easy to bend and you can just join it by twisting wire together too. I was also thinking if you couldn't just use some sort of bucket BBQ in there too. Anyway, to make my firebox this is what I did:take the perforated sheet and mark out 5 x 250x250mm squares as shown. Take the tin snips and cut round the outline. WEAR GLOVES or your hands will end up looking like you've had a fight with a cat Bend the sheet into a cube shape by clamping it down onto a surface with a bit of wood and a G-clamp. A metal brake would get you a cleaner bend here (as you can see in the finished product).The base:Cut 4 pieces of the 30x30 angle bar to 27cmCur the mitre to 30mm as shown in the photo. I just did that with a hacksaw Tack and weld Cut 4x 70mm lengths of the 15mm pipe and weld on in the corners Place the cage from the previous step into the base and spot weld into place as necessary to make it rigid and secured in place. Take the chain and bolt onto the side as shown.DONE
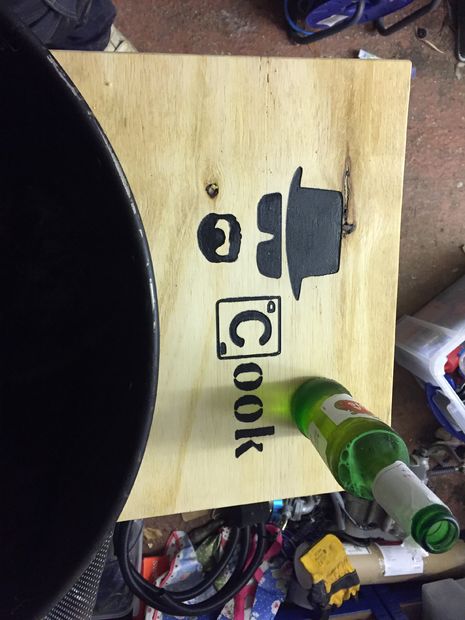
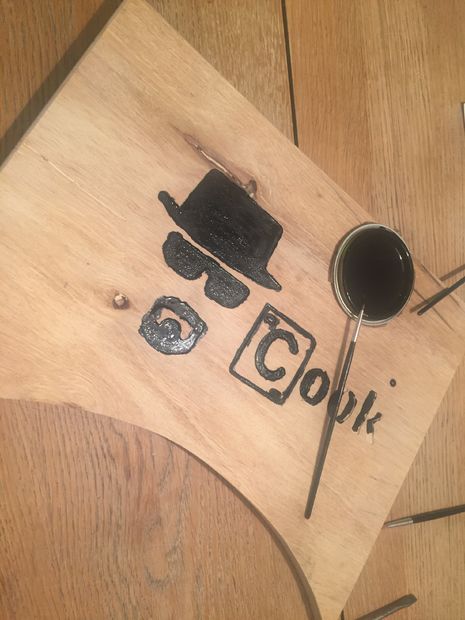
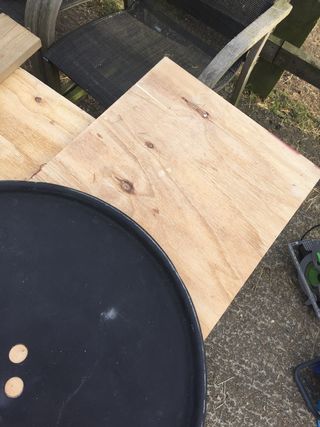
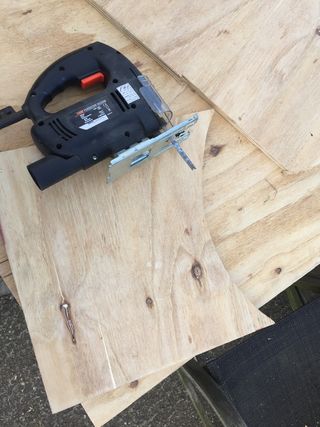
This step is optional and actually i didn't have it the first time I used the smoker. Immediately i wished there was somewhere to place the beer/utensils/thermometer etc so made this.Cut a bit of the plywood to 40x30cmTake the lid of the barrel and mark round it on the wood. This is not 100% ideal as the rim is a bit bigger than the body of the barrel but its close enough.Cut out the semicircle with the Jigsaw and sand the edges etcTOTALLY OPTIONAL: Deck out with some sweet graphics. I used a CNC router to engrave the shapes as a 1mm deep pocket tool path using a 3mm carbide 2-flute end mill. Once the pocket is engraved, paint it with black outdoor gloss paint (don't worry too much about being precise at the edges). Once dry, sand over the top and it will look crisp at the edges with the overpaint removed. once done, varnish over the top with some outdoor varnish.Mount the table on the barrel.Choose a height near the rim (e.g. 10cm down from the top) and punch+drill a 6mm hole.Screw through the hole into a pre-drilled pilot hole in the table.Level the table (measure the same height from the top some way further around) and punch + drill + screw two more screws. This should hold the table up in position while you make the support but i wouldn't put any weight on it yet.The the 20mm flat bar and bend a support as shown. Sorry i can't provide any angles etc as this was done totally by trial and error. Once the support is on, the table IS RIGID. really solid.DONE

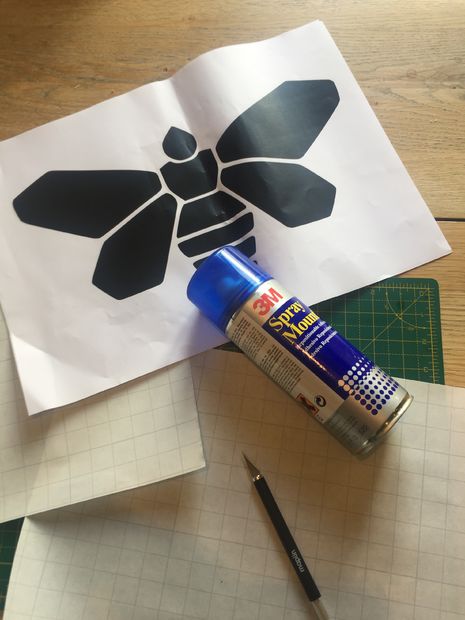
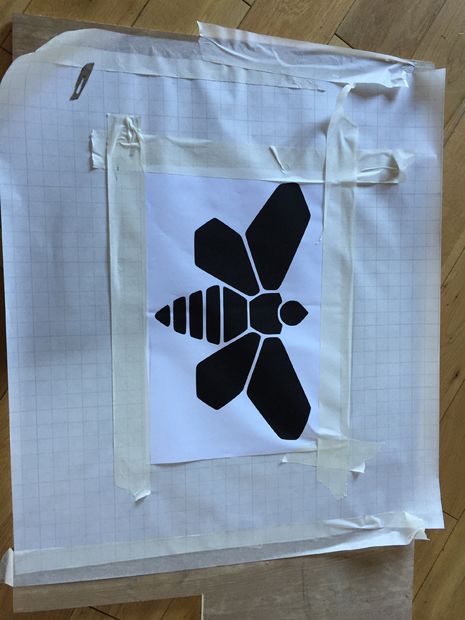
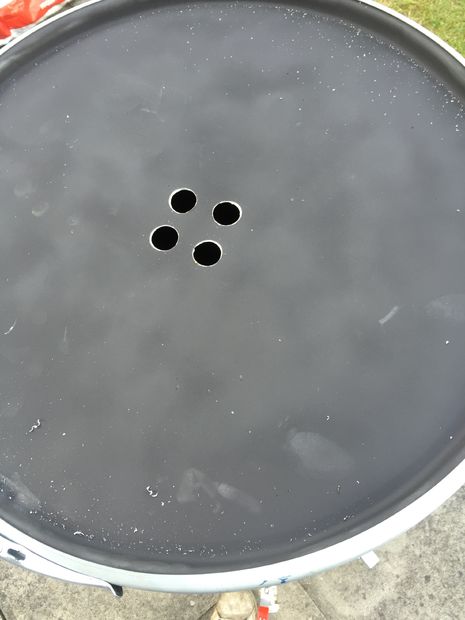
Decorate the barrel. Here I used the Breaking Bad Golden Moth company Methylamine barrel logo (included in the accompanying files for this instructable)Printed the logo out on A3 paperGlued the paper onto some Frisket low tack masking film and cut around with a scalpelStuck the film onto the barrel and sprayed.The result wasn't really that great at all. Main problem is that the barrel is round and the film flat. I had real trouble getting it to stick flat (actually it was impossible). I'd say there has to be a better way of doing this (maybe someone else has an instructable out there).last thing to do is drill some holes in the top. I think these were 20mm. You really don't want more than this.
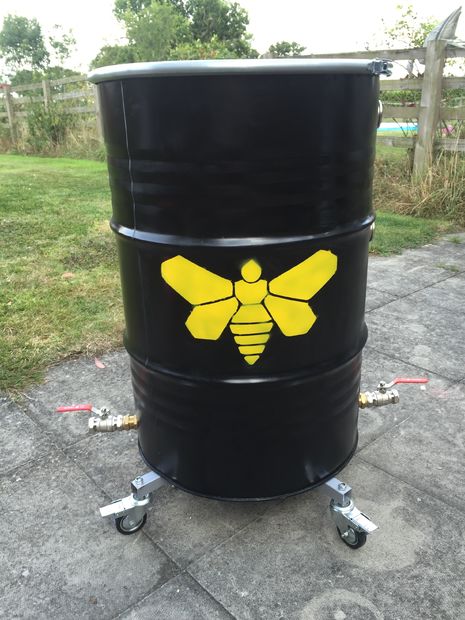
This was a very fun build and works really, really well. The temperature stays quite steady when set and the coal easily lasts for 14hrs when using briquets (lump wood charcoal less).I have cooked meat 10kg at a time and fed 40+ people at a party. The smoker is a good conversation piece and nice place to gather round a drink beers.What I'd do differently next time:As I mentioned, the fire box while it works really well, was expensive in terms of material and time to make. Id probably go with some sort of expanded metal thing/a modded cheap BBQ from the supermarket.The paint finish isn't great + the enamel was quite expensive. For the final cost of the rattle cans i probably could have had the thing professionally powder-coated and looking much sharper.My next mod for this was an electronic temperature controller using a throttle body from a car to adjust the air flow. I will write this up in its own instructable.Thanks for reading,P
Question & Answer
Question: Choose the best title for the missing blank to correctly complete the recipe.
____________
Build the Base (optional)
Make the Fire Box
Conclusion
Choices:
(A) Stuff You'll Need
(B) to and FAQ
(C) Open Existing Loop
(D) Rotate and Bend More
 (A) Stuff You'll Need