Question ID: 4000-8333-0-1-2-3
Recipe Description
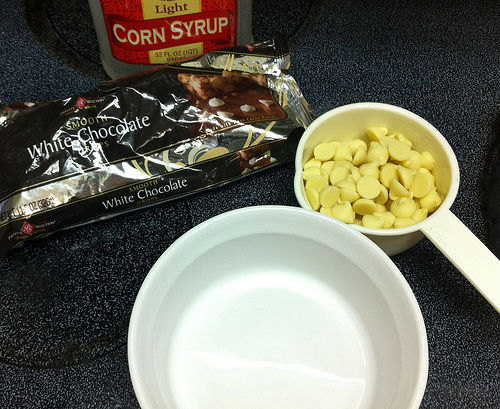
Make sure you're using actual white chocolate chips, rather than the white candy chips. If you're not sure, read the ingredients. Real white chocolate has cocoa butter. The crappy chips have hydrogenated vegetable oil (ick).
Melt 3/4 C white chocolate chips with 2 1/2 T light corn syrup. Stir until smooth, then let it cool. Knead until smooth and pliable, adding a tiny bit of powdered sugar or cornstarch if it's too greasy. Don't overuse the cornstarch or it'll taste powdery.
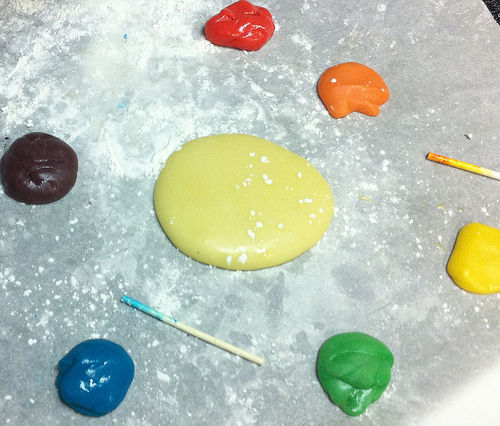
If you want to color some of the chocolate clay, separate those portions.
Add a little food coloring to each ball of chocolate clay. You might want to first mix it in with a stick before kneading it so you don't get food coloring stains on your hands.
Choose two or more colors and slice, roll, or assemble them in whatever way you want to make the pattern for the first type of "fabric" square. Repeat until you've used all the colors.
The red and orange pattern was made by layering three flattened colors, rolling them up into a log, slicing the log, and arranging those roll slices along with leftover scraps to form a loose, swirly pattern. Note the white corn starch in the red and orange squares; this is why I recommend you be VERY sparing with the cornstarch. If it sticks to your fingers, it'll stick to the quilt and be less likely to fall apart, even if the quilt is stretched slightly over the stuffing.
The yellow piece was covered with tiny orange balls of clay and rolled flat to make dots.
The green and blue were made by placing thin strips of the various colors next to each other and rolling flat.
The purple squares are a looser swirl pattern than the red/orange.
Roll the clay fabric flat. Slice it into squares roughly the same size.
Roll a piece of the uncolored white chocolate clay flat, and slice a rectangle; this will be roughly the size of your finished dessert. Arrange colored squares on this white clay, leaving a border of white around the edges.
I would recommend brushing a little bit of corn syrup on the white clay to help the colored squares adhere better. Press them gently together in place.
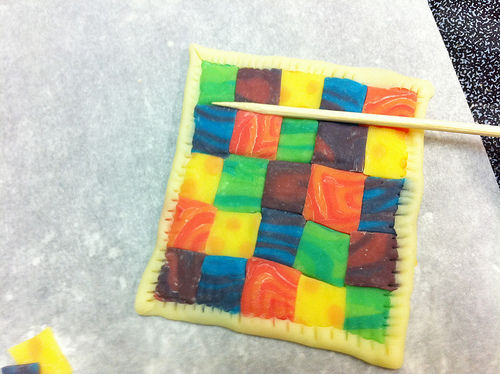
Take one edge of white chocolate and fold it up over the edge of the colored squares. Press gently, then press "stitches" into the clay with a wooden skewer.
Press the side of the skewer along the edges of the colored squares, making a gentle indentation to hold them down and squish them together. "Stitch" the colored squares together by pressing little holes along the border with the wooden skewer.
You have now quilted chocolate. Your chocolate quilt would be lovely on a frosted brownie, cupcake, or dill pickle (okay, maybe not the last one).
I can't add notes to my photos, so:
Photo 1. Arrange squares, notice I used a little too much cornstarch on the red/orange squares
Photo 2. Fold the edge of the border over to barely overlap onto the colored squares
Photo 3. Stitching the edges down using a wooden skewer; notice the wavy edges on the sides. You can even these up by pressing in with the side of the wooden skewer before stitching them
Photo 4. Pressing down on the borders of the colored squares, helping them stick and making the raised, "quilted" effect
Photo 5. Stitch the borders of the colored squares by poking little indentations with the point of the skewer after pressing all the edges down
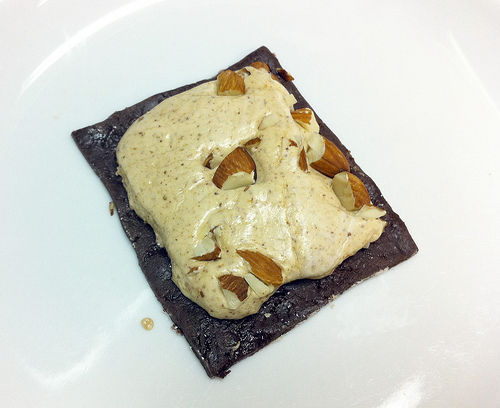
In this case, I completed my quilted dessert with a semisweet chocolate clay bottom and almond nougat filling.
Stay tuned for an instructable with more details on almond nougat, or follow this recipe on Chow.com for peanut butter nougat, substituting almond butter for the peanut.
I made the semisweet chocolate clay the same way I made the white, but I wasn't as careful about kneading until smooth because it was the bottom of the dessert. I cut the rectangle slightly smaller than the top quilt, and cut a piece of almond nougat smaller than the bottom piece. The quilt would've looked better and less puffy if I'd used less almond nougat, but... then it wouldn't have had as much almond nougat in it. :)
After placing the colored quilt on top of the nougat, I pressed down at the intersections of the squares with a wooden skewer in order to anchor it a bit more. I added little cupcake decorations at the corners for fun, but it'd be just as good without sprinkles.
I was going to make several more quilts, but my 3 year old discovered that the clay I was using was edible, and it didn't last long after that.
Thanks for reading! I hope you try your own chocolate quilt.
Photo notes:
Photo 1. Finished dessert with lots of almond nougat (note how the excessive stuffing made the quilt bulge out and burst its "seams." Cupcake pearls placed at corners of colored squares, chocolate clay as the base of the quilted dessert.
Photo 2. Semisweet chocolate chips and corn syrup in the unwashed bowl I'd used to make the white chocolate clay; yes, I'm messy like that.
Photo 3. Melted chocolate and corn syrup, not as smooth as it could be; if this was for the top of the dessert, I'd have heated it a little more to make sure it was all melted and stir a lot to make it smooth.
Photo 4. Rough, slightly sticky semisweet chocolate clay; this is good enough because it's for the bottom of the dessert and kids were starting to get into stuff by this point, so I had to hurry.
Photo 5. Lovely almond butter nougat with chopped almonds on top. This would make a fabulous almond version of a knockoff Snickers bar. I used the recipe from chow.com but added a little bit more salt and used smooth almond butter instead of crunchy peanut butter.
Photo 6. Overly generous layer of almond nougat on the chocolate clay base
Photo 7. Quilt top resting on the puffy filling; it bulged out enough that the colored squares loosened.
Photo 8. Pressing down on the corners between the squares with the blunt end of the skewer to emphasize the quilted effect
Photo 9. Cupcake pearls
Photo 10. Cupcake pearls
Photo 11. Finished dessert
Photo 12. Cutaway bite, plenty of almond nougat inside
Question & Answer
Question: What is the correct order of the images?
Choices:
    |
| (A) |
|
|
| (B) |
|
|
| (C) |
|
|
| (D) |
|
|
|---|
 (B) (B) |