Question ID: 4000-11790-1-2-3-5
Recipe Description
To design the mold we first need to design the cup. I’m adding some screenshots to show my process on Rhinoceros. I’m sure there are many ways you can make this. I’m attaching also the Rhino files (version 4.0) so you can see the lines/volumes generated.Design a profile that will be REVOLVED around the center axis. As the cup will look like a wrapped chocolate I already added the horizontal separations. It know looks like chocolate bars and not squares.For the vertical separations I designed a curved I liked and then extruded or Rail along a curve.After I have one vertical separation I made a center array of 12.Finally I made a Boolean difference between my Cup from 1st step and the 12 separation barsCup is ready (you can probably send it out to shapeways for about $60 and have a ceramic version!)
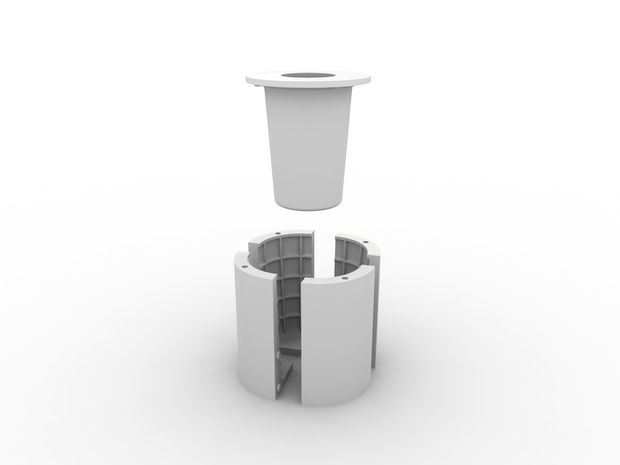
This was one of my first molds and it probably has some flaws. Feel free to give some advice in the comments section. The mold is made out of 5 parts. 4 of them are identical and make the outside surface of the cup, we will call this the female mold. The final part is the “plunger”: hence male mold.The 4 female molds snap with each through the side “pins”. Since we will be pushing the mold from the top I used an elastic rubber band to hold them tight. You can probably use any kind of rope or string to wrap it tight.Once your files are ready (or download mine) print the parts. At Pier 9 we have a bunch of Objet Connex 500 which print multiple materials. For the male mold I used Vero White but for the female molds I tried a different mix of Vero Black and Tango. I was hoping to get a little flex on the female parts but that didn’t happen.Now that you have your parts, wash them several times. I don’t know if these materials are food safe when they are in contact with food. I suppose they are since the melted chocolate is not super hot and after this experiment I’m still alive and feel great. If you know of any complications please let me know.
On this step I will show what not to do. I first bought Nestle Toll House chocolate chips to melt. I used the microwave to heat it and stir it regularly. I poured it directly to the mold, squeezed the top part and put it on the fridge to cool down. Demolding the chocolate was really painful and I accidentally broke a few chocolate pieces.My lessons learned:-spray PAM (cooking oil) on mold for an easy demold-temper chocolate before pouring into the mold. This will prevent to bloom, characterized by white color on the surface. Also, once it is ready to eat it will prevent from melting on contact with your fingers. I also heard tempered chocolate will shrink slightly when cooled and it will potentially slip out from the mold easily.
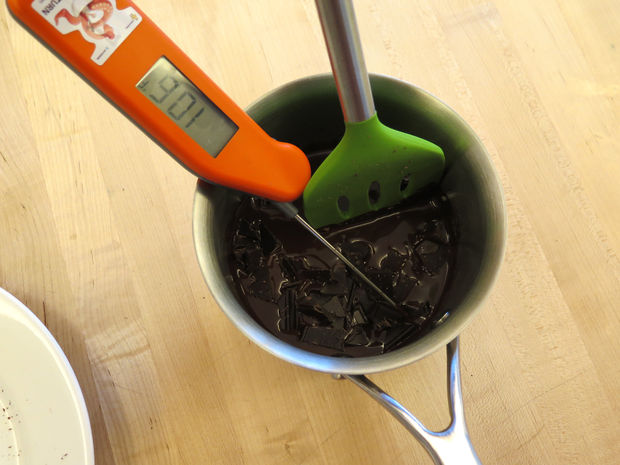
There is a great instructable on how to temper chocolate that I used as a guideline. I highly recommend it.Now lets get our hands dirty:Chop the chocolate and put in ¾ of it into the small saucepan (we will be using the rest of the chocolate in a few minutes)Fill up the big saucepan with an inch or two of waterRest the small saucepan inside the big one making sure it is not floatingBring the water to a simmer (do not boil)Grab a silicone spatula and stir continuouslyOnce it is almost melted put in a thermometer and bring the dark chocolate to 118 F (or 112 F for milk chocolate).Remove the saucepan with chocolate from the heat and put in the rest ¼ of the chopped chocolate.Stir until is smooth and the temperature reaches 89 F (or 86 F for Milk Chocolate). If the temperature of your chocolate drops too low, just SLOWLY reheat it over the bain-marie until it reaches 89 F (86 F for Milk Chocolate).Your chocolate is ready to pour into the mold.
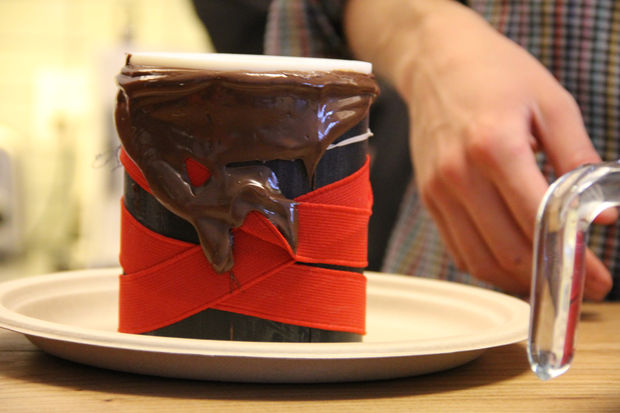
Put in a light spray of PAM (cooking oil) into the 5 part mold and let it sit for a minute. The oil will serve as our our demolder material.Snap together the 4 part female mold and wrap around with a rubber band/ropePour the tempered chocolate inside the female moldGrab the plunger and push down. The melted chocolate will squeeze up. Hopefully if the amount of chocolate was calculated correctly you will see some of the chocolate coming out from the top edge.Leave the mold to cool down for a couple of hours. You can put it in the fridge to speed up the process.
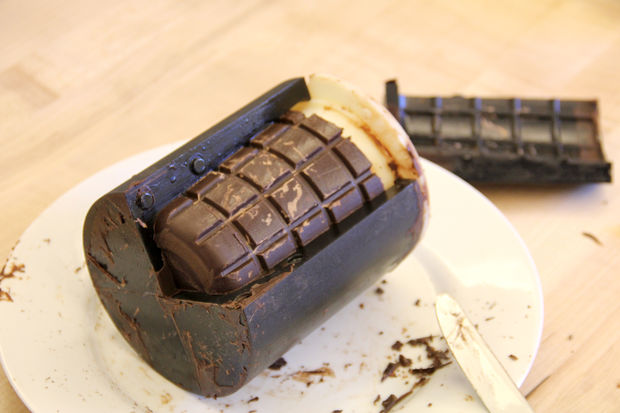
After the mold is cooled you are ready to take the mold apart and eat the chocolate. You first need to take the male mold. Carefully use a knife to slide it in the edge of the mold. With the knife inside rotate the mold so you can do a whole turn. My mold got really stuck so after a while I saw that one of the female molds was loosing out and was able to take it easily apart.Some takeways:From the photos you can also see that I ran short of chocolate and needed one more bar.Unmolding was still a big issue. For next mold I will increase the draft angle of the male mold so I can pull it apart easily.Surface finish on the chocolate was smooth but still had some snowy effect. I believe I put in way to much PAM cooking oil.Enjoy your chocolate cup!
Question & Answer
Question: What is the correct order of the images?
Choices:
    |
| (A) |
    |
| (B) |
    |
| (C) |
    |
| (D) |
    |
|---|
 (A) (A) |