Question ID: 1000-13846-0-1-3-4
Recipe Description
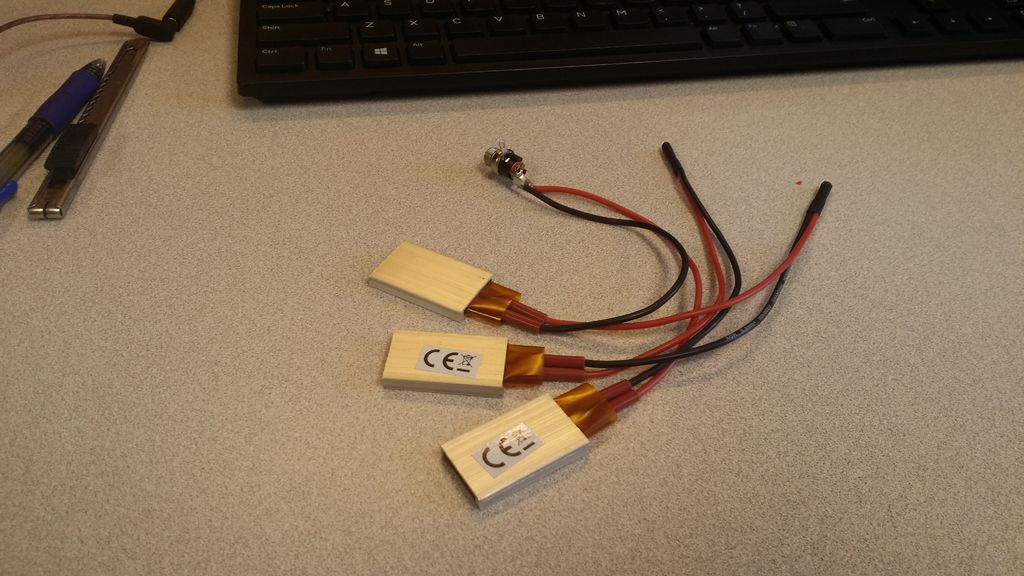
First thing first, you need to have a makineta to work with. You may have one already, I didn't. Therefore I bought one from eBay for around 10$ shipped, I opted for the 1cup version.This is the one that I have: https://rover.ebay.com/rover/1/711-53200-19255-0/1...Next, you will need some heat elements: http://www.banggood.com/3pcs-ACDC-50W-220V-Air-Con...I know, I know, it says 220V in the title, disregard this. It is 12V version, just go into the description. I used all three elements.Next, thermal grease: http://www.banggood.com/35g-Grey-Thermal-Paste-Gre...In addition, pair of XT60 connectors: http://www.banggood.com/One-Pair-Male-Female-XT60-...You will need two types of epoxy, that can withstand high temperatures, these are the ones that I've used,Two components and the "putty" type:https://rover.ebay.com/rover/1/711-53200-19255-0/1...https://rover.ebay.com/rover/1/711-53200-19255-0/1...I assume you have a scrap heat shrink tubing. If not, this one will last you a lifetime:http://www.banggood.com/Soloop-328pcs-21-Polyolefi...Batteries, we will talk about batteries a little laterFinally, you will need some kind of insulated base to house the heat elements and provide base for the makineta. I used a tree branch that I've found. Any thick enough wood will work.Tools needed:Soldering IronDremel tool - highly recommendedFiles and sanding paperPress drill - highly recommended
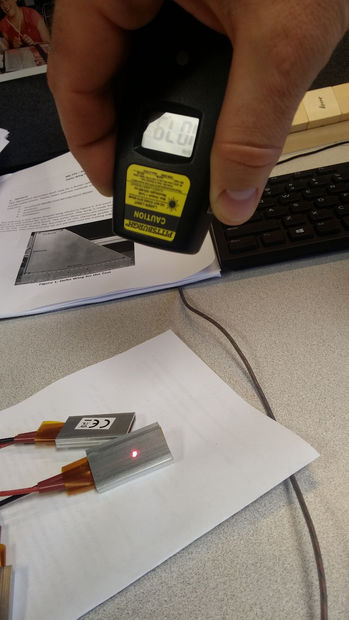
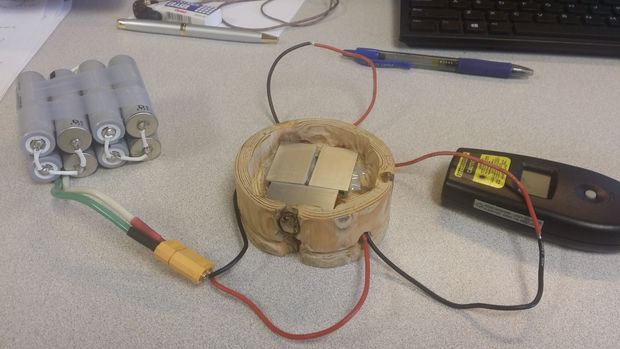
First you have to decide how the heat elements will be wired.I did a quick side wiring, once in parallel - shared voltage, split current, and once in series - shared current, split voltage. And connected a 12v battery. In series won. It heated much faster, eventually that is what I wanted.Finally I did a check as to what temperature these elements go, it went beyond 100degC (212degF), which is important if you want to boil water :)In picture, the thermometer is in degC


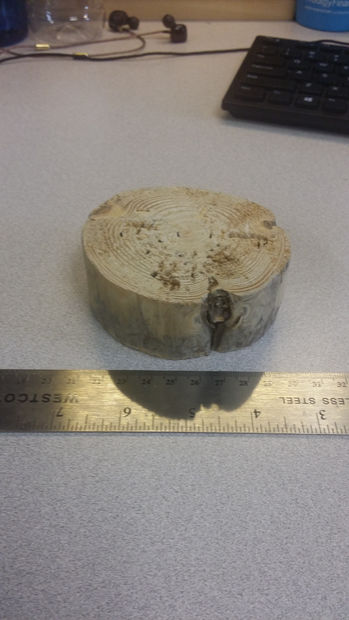
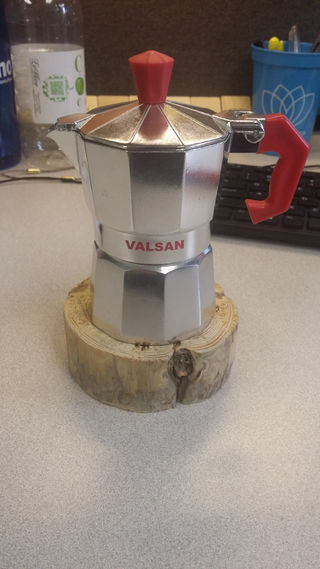
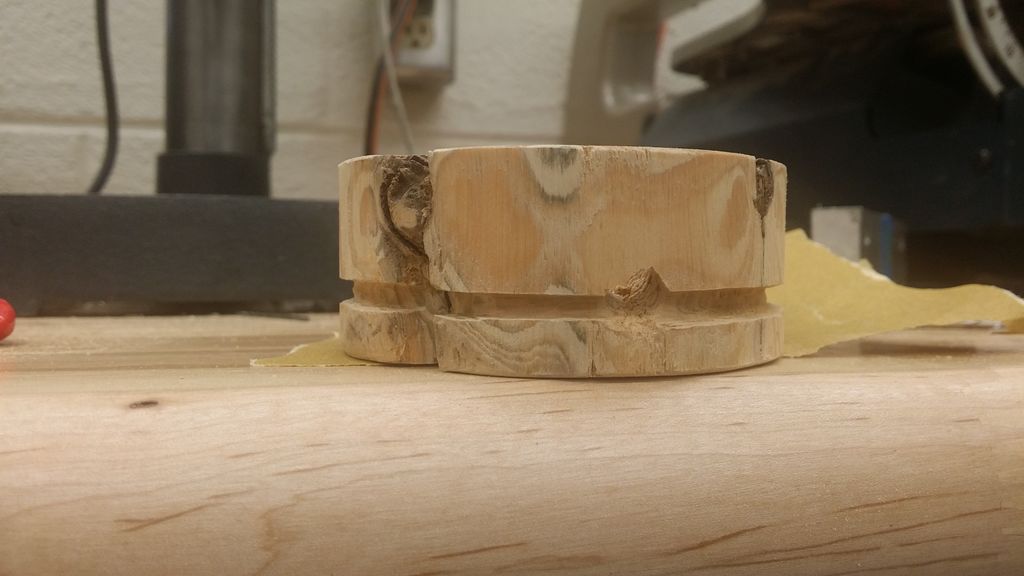
In this part we will create a fit between the wood base and the moka pot.I was lucky enough to have access to press drill. With end drill bit and the dimensions of your pot, it is really a simple task. Other option is to use router bit on your dremel tool or a router if you have one.The pictures really tell the whole story. One thing to note is that the resultant cavity has to be flat in order not to stress the heat elements and to have horizontal fit for the pot.Once you have your cavity, dry fit the heat elements and finally drill the holes for the wires to come out.
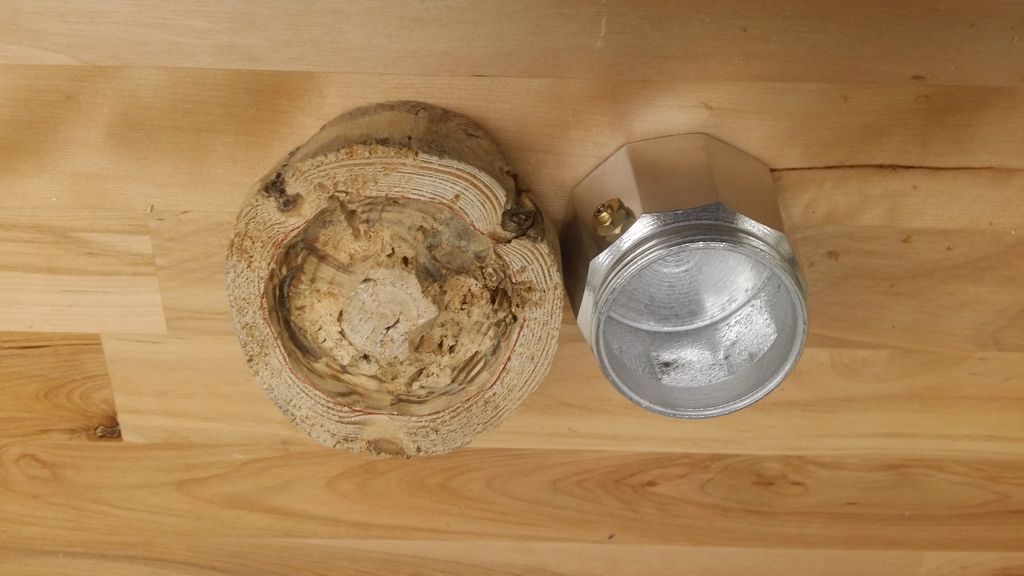
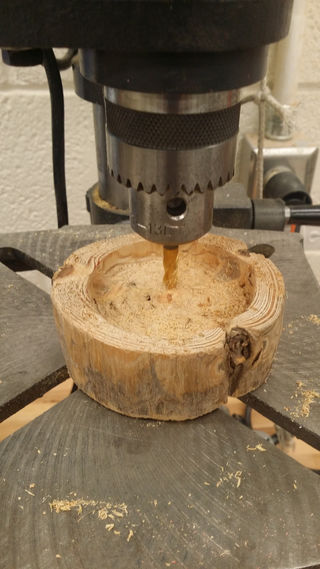
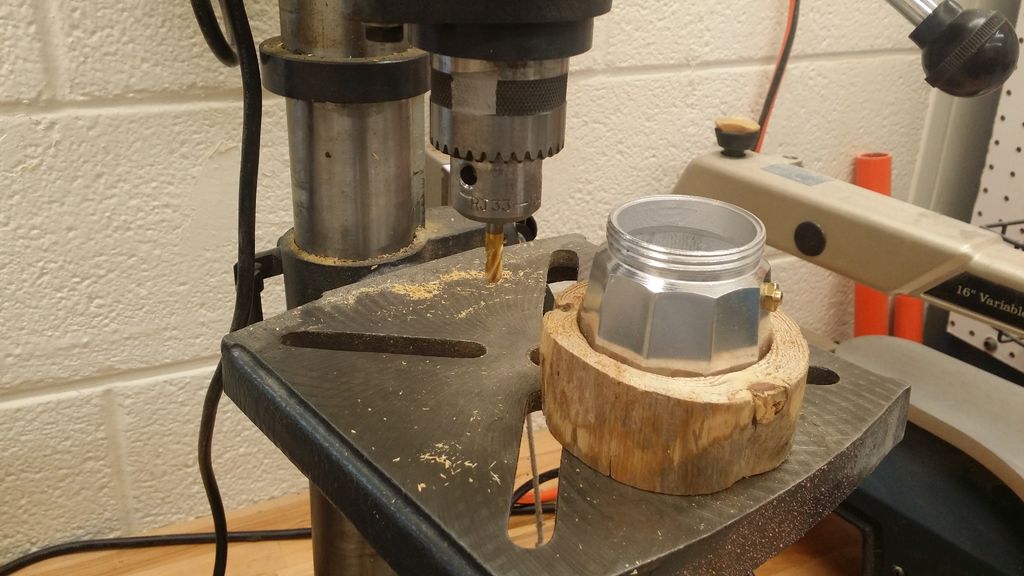
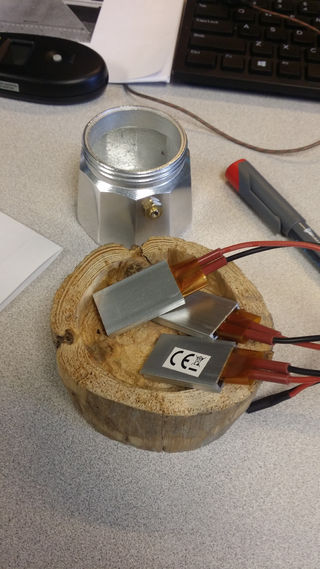


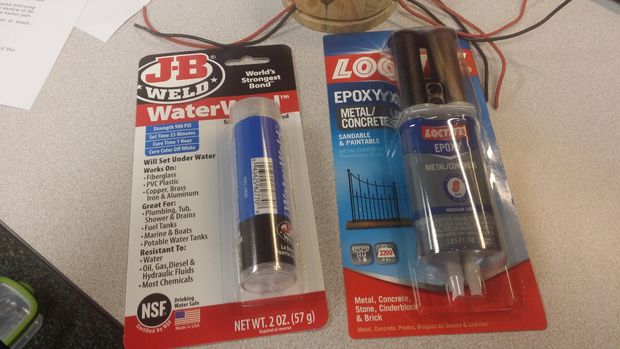
Next step is to cut the channels to bury the wires from the element.I did it with cut-off dremel wheel. Once the cutting is done, we will glue in the elements. The exact epoxy brand doesn't matter, I'm just showing what I have used. Just make sure it withstands higher temperatures, the one in the picture holds up to 300degF. Two component epoxy was used to glue the elements to the base.After it had cured, I quickly checked for connectivity and functionality, just to make sure everything is still working.Next, trim the wires, heat shrink the solder joints and solder in the battery connector.The connector is held in place by "putty" type epoxy (the JB weld) I find this type is much better at fixing pieces in place than the two component one.
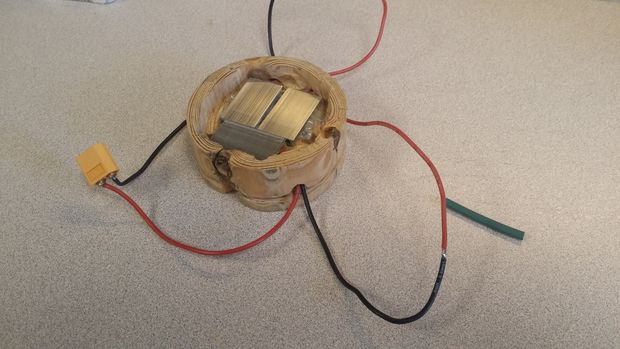
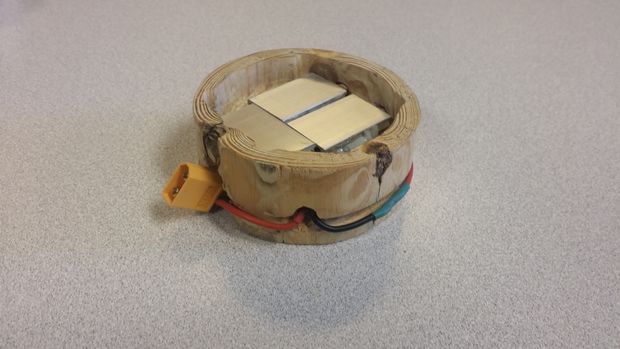
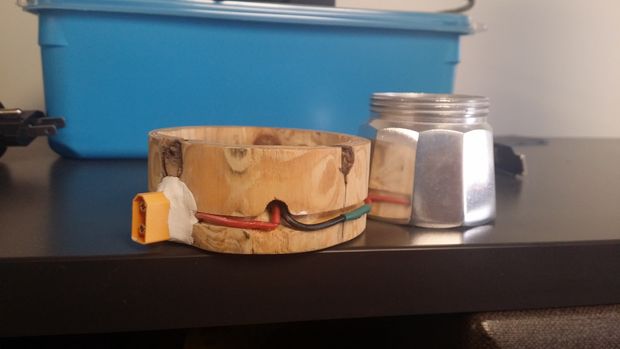


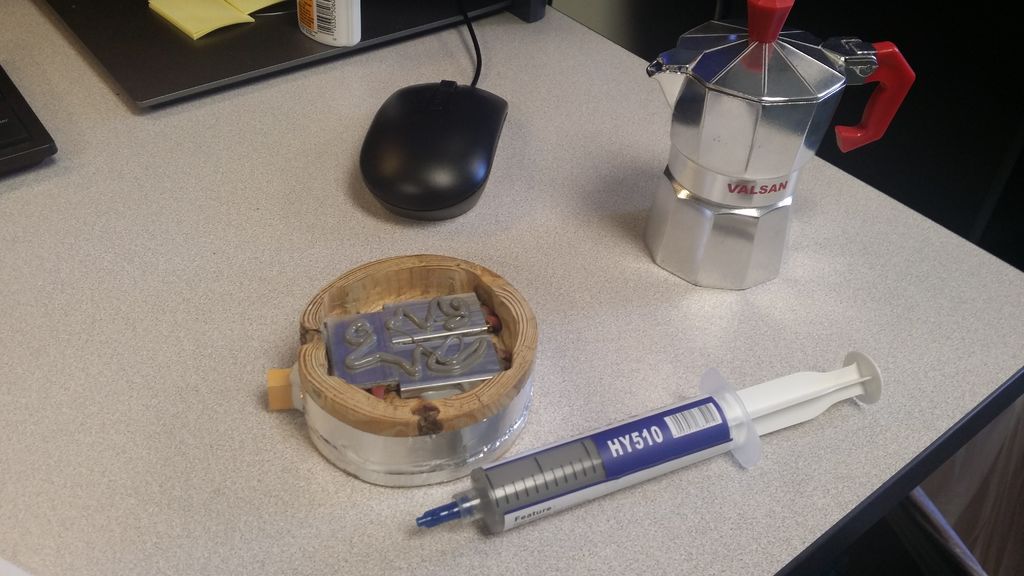
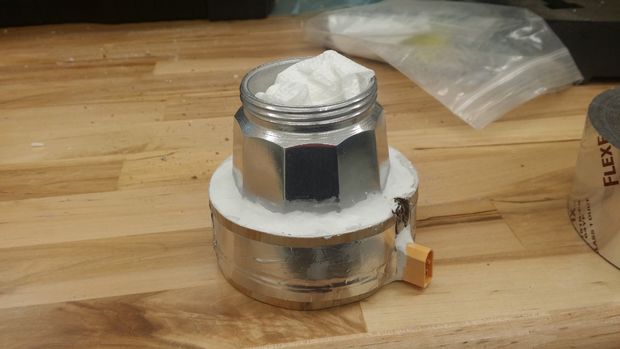
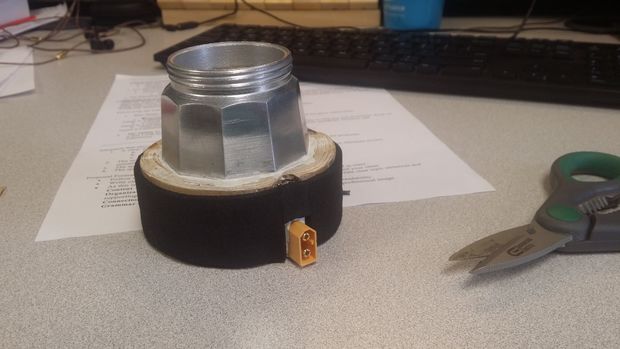
Once all the wires are tucked away in the channels, add some tape to hold them in place.Now apply the thermal grease to the elements and put on the makineta base. The grease will make the heating process more efficient.Once you are happy with the orientation, apply our "putty" epoxy on the perimeter, this will hold it firmly in place.After it has dried out, file the excess, clean up.I applied some foam adhesive tape all around to hide the metallic film. It looks much better
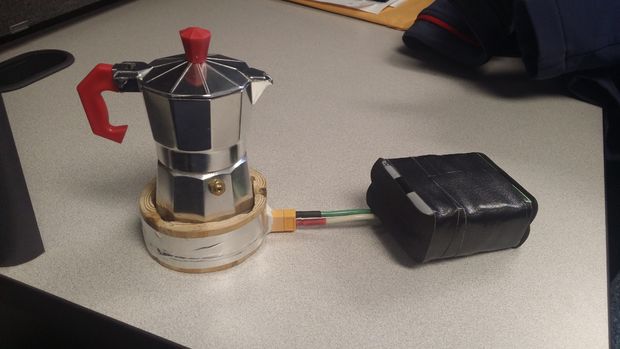


Initially when I started this project, I wanted to use this battery, just because I had it around with no use:https://rover.ebay.com/rover/1/711-53200-19255-0/1...It did not work, it just cannot support the current needed.Then, I went with 3s LiPo to get around 12V with higher currents support. It was really weak, took forever to boil.Next I assembled 5s battery out of 18650 cells. It was better but still not what I was looking for.I wanted to go higher, but I don't have any means to charge bigger batteries.So, finally I assembled two 4s batteries out of 18650 cells, and did an additional harness to connect them in series to the pot. This configuration does the magic at around 5 min.If you want to go this way, you will probably need more XT connectors:http://www.banggood.com/10X-XT60-Male-Female-Bulle...Or here:https://rover.ebay.com/rover/1/711-53200-19255-0/1...If you have a 8s battery, you are certainly welcome to use it.
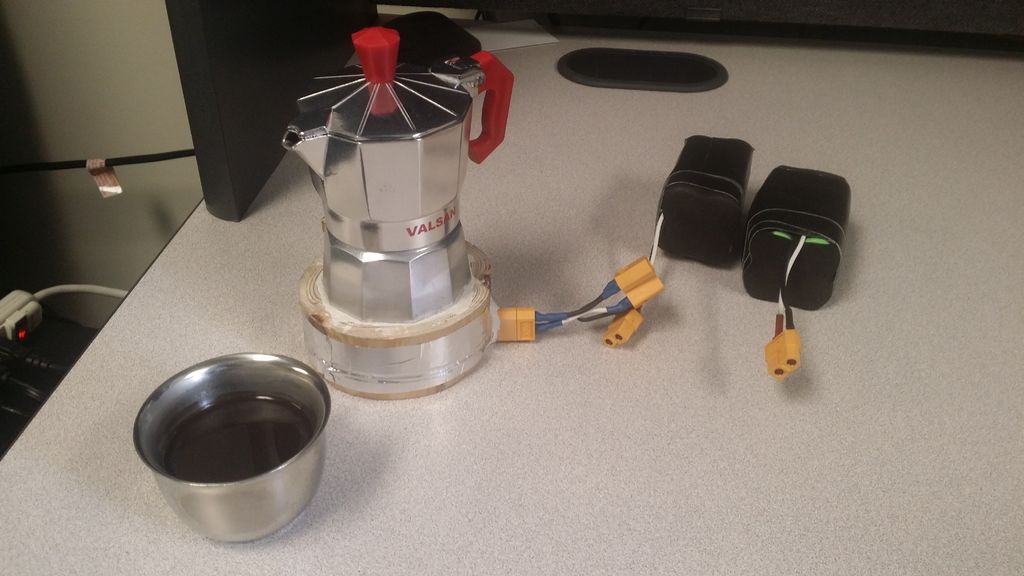

I was extremely happy with the outcome! It really is what I was looking for.I consider this a concept proof. I was already thinking bigger, for example this heat element:http://www.banggood.com/12V-60W-180C-Aluminum-PTC-...Can support bigger pot, maybe make it a buddies pot :)I will definitely make a v2 of this one.Enjoy!Dani
Question & Answer
Question: Choose the best title for the missing blank to correctly complete the recipe.
The Things You Will Need
Parallel or in Series?
Cut Channels for the Wire, Glue in the Heat Elements, Trim the Wires, Add Connector
____________
Choices:
(A) Place in Your Moka Pot, Putty Around, File Flat and "decorate"
(B) The Perfect Pokemon Go Snack! Pokeball Rice Krispie Treats!
(C) Shape the Patties
(D) Prepare the Grill
 (A) Place in Your Moka Pot, Putty Around, File Flat and "decorate"