Question ID: 4000-5554-1-2-3-4
Recipe Description
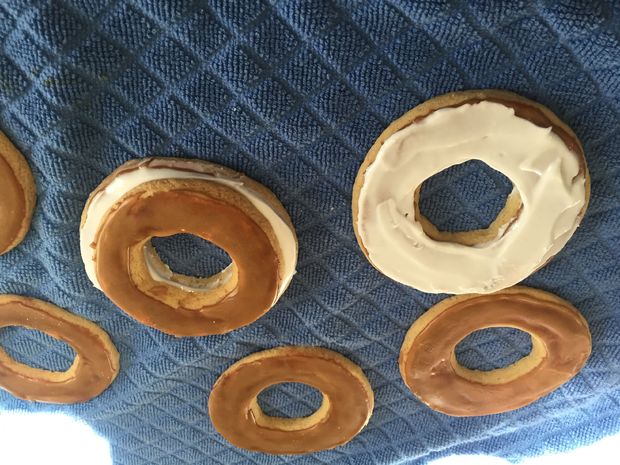
Making a decent tasting cookie is the most important part of this project for me. If the cookie stinks no one wants to eat it and it ruins the gift no matter how nicely it is decorated. Any roll out cookie recipe will work for these and I am including the basic recipe I use without any flavor embellishments. During the holidays I will add some spices and other flavors for interesting combinations.Ingredients:1 Cup Butter softened at room temperature1 Cup Sugar 1 Large Egg2 tsp Vanilla extracta Pinch of fine Sea Salt3 Cups Flour (plus additional flour for rolling process)**A stand mixer will make the process much easier though I have done it by hand, it just takes more time and muscle. In a large bowl, or mixer bowl, cream the butter and sugar. Mix in the egg, salt and vanilla (or other flavors) till thoroughly integrated. Add flour in 1/2 a cup at a time until it is all mixed together. By the end the dough will be stiff and may need to have the last of the flour added mixing by hand. ****DO NOT CHILL**** If you need to put the dough in the fridge and come back to it later it will need to come back to room temp before it will be workable.At this point you might want to pre-heat your oven to 375 degrees F.Dust a level surface with a light coating of flour and roll out a portion of the dough to approx. 1/8" thick. For this project I used round cookie cutters but I also have one that used snowflake cutters. Each display cookie will need 3 round cookies; 1 large and 2 med. Using a large circle cookie cutter with fluted edges cut your base cookie. I then used a smaller cutter to hollow the center and create a ring. Do the same for half of the medium cookies, leaving the other half full. You will see why I needed to do this when we assemble the cookies. As you can see in my pictures I also made some other shapes while making the bases for my pictures. The snowmen and trees were used in the display of the cookies and I wish I had thought to take a picture of the finished display but it was so hectic before our party that it totally slipped my mind.When all your dough has been shaped and placed on baking sheets (I like to use parchment paper but it is not a necessity) place the sheets in the oven for 12-14 min. They should just start to brown on the edges. remove the cookies and let cool on a wire rack.
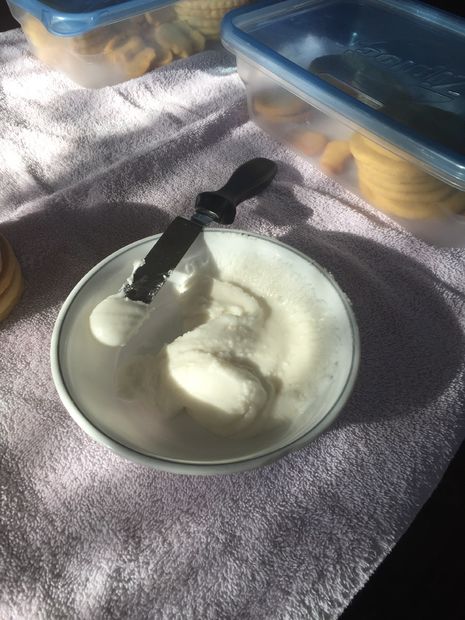
While your cookies are cooling is a great time to make the icing. These cookies use royal icing so that it will dry to the touch and also hold the cookies together like glue.This you will definitely want to have a stand mixer for.1 lb. Confectioners' Sugar5-6 tablespoons Water (not cold)I do not like the flavor meringue powder gives the icing and since I did not need it to be super stiff icing, I chose to omit the meringue powder all together. In your stand mixer add the confectioners sugar and slowly add the water one tablespoon at a time till all the sugar is mixed (you might not need all the water). it should not be runny but more of a thick creamy texture. beat in mixer for about 10 min or until the icing holds its shape when the beaters are removed.
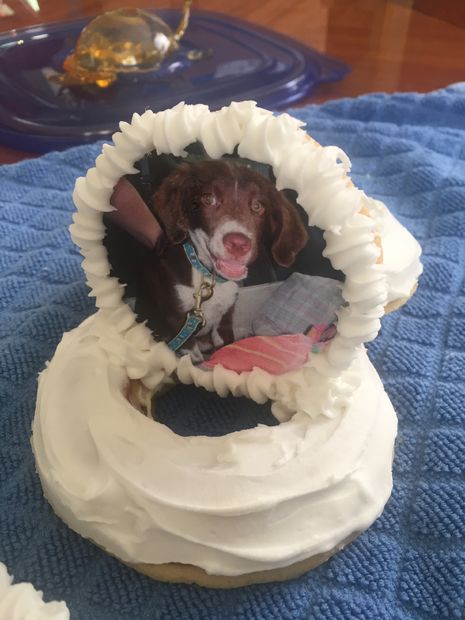
At first I was going to try a wood grain pattern so I started with a brown icing, till I realized that I would never be able to finish all the cookies if I took that much time on each stand. So I went with the white snow look.Stack the large and the medium cookies with the centers cut out using some icing to "glue" them together. Cover the stacked bases with the white icing and let is set for an hour or so.
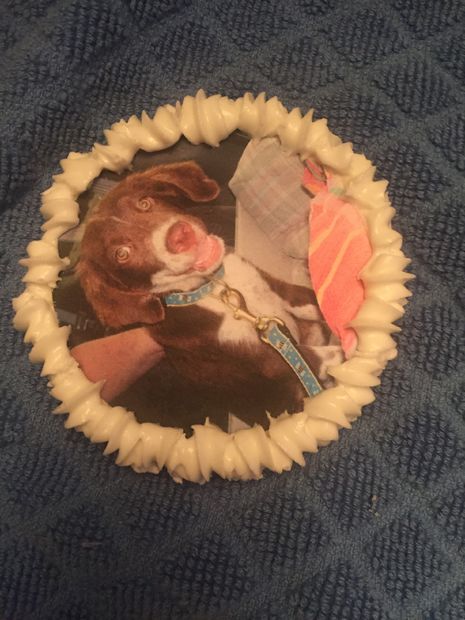
On the whole medium cookies that have been iced with a plain white background add the edible images. I have a printer using edible ink specific to making edible images but you can order custom images from suppliers on Etsy if you only need them for a specific occasion. Water down a small amount (1 Tablespoon) of icing to use as a glue for the wafer paper images after they have been cut to the right shape. you want the cookie to be sticky to the touch but now wet. If the icing is wet the wafer paper might start to break down or it can curl up at the edges. Once the image has been glued, using a piping bag with your choice of tip (I chose a star tip) make a shell border or other border of your choice around the edge of the image. For a shell border you want to use a light pressure at the beginning of the pipe and drag as you let off the pressure on the bag. Let the icing set till you can touch the border without the icing collapsing.
Using some of the remaining icing secure the image cookies to the base. It won't take long for the icing to set secure enough that you can fill in the remaining empty space with icing creating a nice snow mound for your images. Please ask any questions and I will try to answer them as best I can. Thank you and Enjoy!
Question & Answer
Question: What is the correct order of the images?
Choices:
    |
| (A) |
|
|
| (B) |
|
|
| (C) |
|
|
| (D) |
|
|
|---|
 (B) (B) |