Question ID: 4000-9911-2-4-5-7
Recipe Description
Your favorite brand of dessert gelatin in your favorite flavors (1 small box makes about 5-6 eggs).One packet of unflavored gelatin for each small box of flavored gelatin. (You will see the results of not having the right ratio of unflavored gelatin later in this Instructable- I swear that was intentional just to show what happens and was not a result of being distracted by a silly kitchen helper)Container to hold and add still liquid gelatin. (I used a generic condiment squeeze bottle dispenser, but "flavor injectors" used in cooking also work well)Scotch tapeSmall screw (or other egg opening device- screws seem to work best and will be explained in a later step)Many paper towels (depending on the skill of the kitchen helper) and newspapers to contain spillageBowlsSaucepan Optional:Huge appetite for eating tons of eggs (or use the eggs for another tasty Easter treat), a patient spouse who lets you make a mess, Pretty Princess kitchen helper (as seen in some of the steps). Spirits for adultification of eggs.Also optional is a hot glue gun with glue sticks.
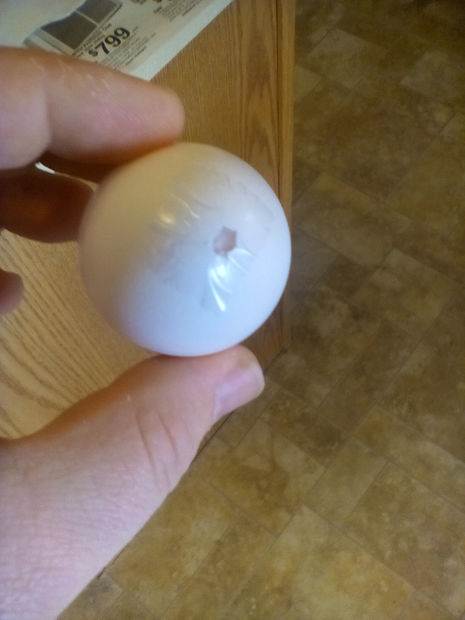
You will need empty eggshells- one empty shell for each final egg treat.Use the screw to apply pressure to the pointy end of the egg. Slowly turn the screw back and forth while gently increasing your pressure on the egg. You should feel the screw "bite" into the egg after a few seconds.Thread the screw about halfway into the egg, then back the screw out.Repeat this step on the opposite side of the egg.Note: Using a screw is preferred to a nail or needle because it allows you to control the breakage. Tapping with a nail or other device can over crack the egg and lead to messy hands and frustrated kitchen helpers. Choose the size of your screw to match closely with the size of your desired fill bottle or injector. If you are not using the kitchen helper, then a flavor injector and smaller screw work best. These ultimately lead to less leakage. An older kitchen helper might be able to manipulate the flavor injector better. Smaller holes lead to better Jell-O eggs.
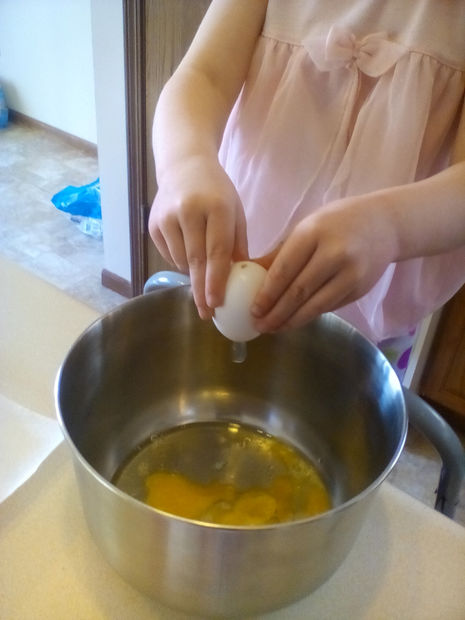
You will want to do this step right after the previous with each egg and repeat these two steps until you have the correct number of eggs. Your other option is to keep your kitchen helper engaged enough to blow the eggs out as you operate the screw from the previous step.To blow the egg empty:1-- Place the side of the egg that you put the second hole in to your mouth (the first side will have leaked a little and raw egg in your mouth is gross to some people)2-- Form a tight seal on the egg with your lips.3-- Blow hard. It is helpful to have a container bowl under your egg to catch the insides. Blowing will be easy at first as the egg-white leaves the egg in a rush. You will feel a sudden change in egg pressure as you reach the yolk; just keep blowing and it will come out. Your kitchen helper will likely comment that it looks like the egg is "peeing" while you do this step. You will likely hear that comment for each egg your kitchen helper does not get to blow out themselves- it is important to keep your kitchen helper engaged to avoid funny comments. You can not afford to giggle during this crucial step.
Once your eggs are blown out you will want to clean them up from the inside out. This is not a suitable job for kitchen helpers as it involves very hot water!Fill a large bowl with water as hot as you can stand. Submerge each egg into the bowl allowing it to fill with the hot water. Enjoy watching the bubbles come out of the egg.The membrane inside the shell is likely going to cause you some grief here. Sometimes the membrane will prevent water from entering the egg. You will know this is happening if you see no bubbles coming from the egg and if the egg is floating at the top of the hot water. Use the screw from the egg cracking step or your finger to push the membrane open.Allow the eggs to soak in the hot water for several minutes.Note: This is the first year I bothered to was the inside of the eggs. I have never gotten ill from this project, but my kitchen helper was a little grossed out about the idea, so I improvised this step. Floating egg shells are very fun to play with for both grown-ups and kitchen helpers.
If your kitchen helper's lungs were not strong enough to blow out the egg insides, this is the chance for redemption.Blow all the water out of the egg. Try to aim for the bowl you had them soaking in. This is highly dependent on the skill of the kitchen helper. You may need to perform a clean up of your area after this step.Place the eggs on a drying cloth or paper towel as you blow the water out. Allow the eggs to fully dry before continuing.Seal the smallest opening (screw hole) in the egg with scotch tape. This will hold your Jell-O in place. The optional hot glue works better than tape, but it takes a lot longer to complete this otherwise fast paced project.
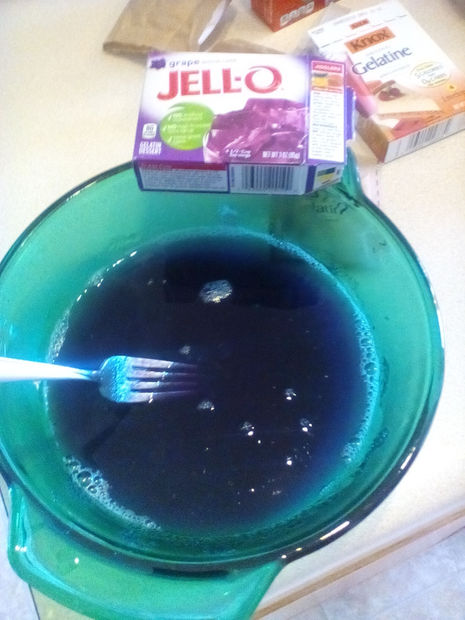
Prepare the gelatin according to package instructions.Note: Almost every packaged instruction for Finger Jell-O or "Jigglers" includes the use of unflavored gelatin. Please do not be distracted by your kitchen helper or else you might accidentally not add enough unflavored gelatin to your mixture. (Double the steps below for large packets of flavored gelatin)1- Boil 1 cup of water. 2- Add small packet of flavored gelatin mix to boiling water and allow to dissolve completely.3- Mix 1/3 cup cool water with one packet of unflavored gelatin.
Once your gelatin is mixed, you will need to work quickly to fill your eggs. 1- Place the open end of the egg op top of your condiment dispenser.2- Flip over the condiment dispenser and give it a gentle squeeze.3- Egg is full when liquid gelatin mixture overflows the top of the egg.Note: This is the step that some adults prefer to add a spirit or two. Be certain to keep those eggs away from kitchen helpers.Other note: You will know pretty quickly if your tape seals are holding. Allow the first egg to sit a moment to make certain that you are taping the bottom holes well enough. Leaks will occur. My kitchen helper learned all about leaking eggs. If you choose to use the hot glue, you will not have issues with this bottom leakage.
Place your filled up eggs in the refrigerator. Allow them to cool and firm up for at least two hours. This is a great time to use up some of your eggs. Note: I wish I had scheduled a nap time for the kitchen helper. I am sure that nobody needs an Instructable to explain why. Place some of the extra gelatin mixture in the refrigerator (in a shallow container). This will firm up very quickly and give your kitchen helper something to enjoy while the waiting game is played.
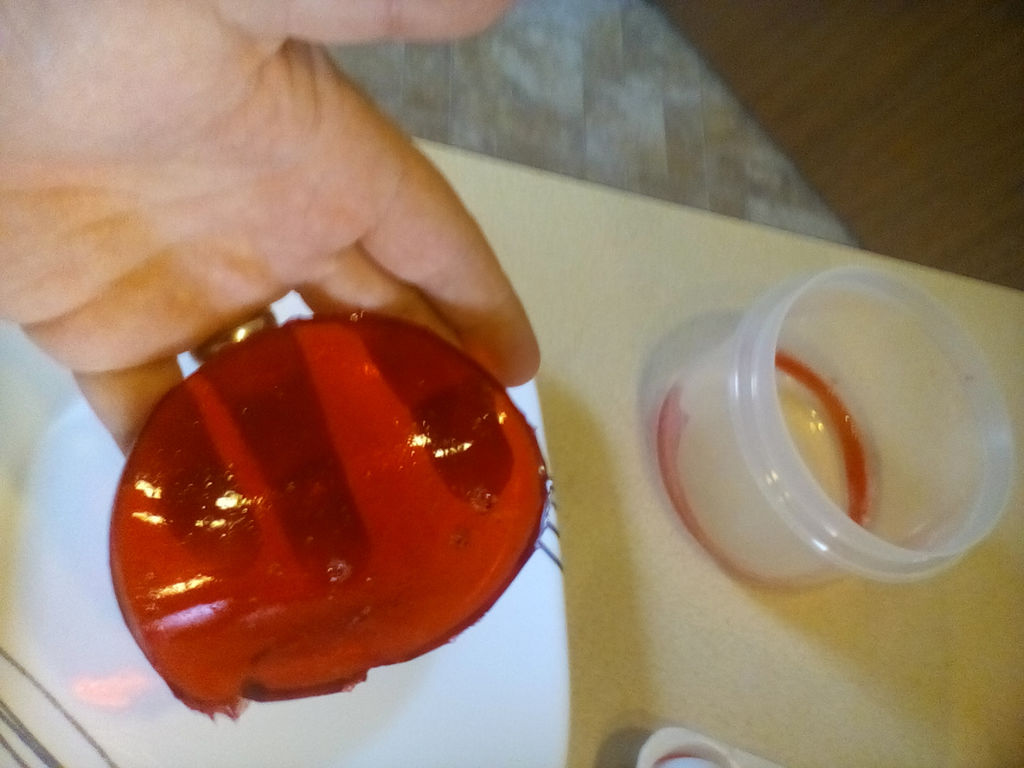
Once the two hours are up, you may begin enjoying the eggs. These eggs do not peel as easily as a hard boiled egg; expect small shell pieces.I attempted a similar project with chocolate. The baker's chocolate was setting too quickly for me to fill the eggs and my condiment dispenser kept clogging. I would welcome a companion guide for anyone able to figure out how to make a chocolate egg inside a real egg shell work.The eggs taste great!
Question & Answer
Question: What is the correct order of the images?
Choices:
    |
| (A) |
|
|
| (B) |
|
|
| (C) |
|
|
| (D) |
|
|
|---|
 (C) (C) |