Question ID: 2000-2417-3-4-6-8
Recipe Description
Some materials got a different distribuitor or product along different places.Chocolate bar or chips for temperingSpatulaBowlChocolate coloring oilInfrared termometherFood Grade siliconeLaceClear Vinyl box or similiarConfetti papperKitchen scissors.3D design software3D printer or serviceKitchenTotal average time= +~3 days.
I usually like to design with Autodesk software, there you can get some good options for example, some of them are free:Autodesk 123D designAutodesk TinkercadFor this proyect these software are very complete and useful, there are some tips to design:Considerate how much chocolate you want to prepare, not everyone can eat a lot or too little.Try to avoid texts, it's very easy to have bubbles trapped, if you want it, don't make large texts, and big letters.Considerate maxium area for the 3d printing areaYou are making a mold, so you need a point where to dismould.Export as .STL is the most common 3D printing format.
Iit's not necessary you get a 3d printer, since there are a lot of services worldwide and it's somehow not so expensive, you can check for help at:3D HUBSIf you like my model you can get it at:330 Chocolate heartYou want something different? Take a look at:ThingiverseMy print got a little mistake but the way it goes, it still works for my proyect.
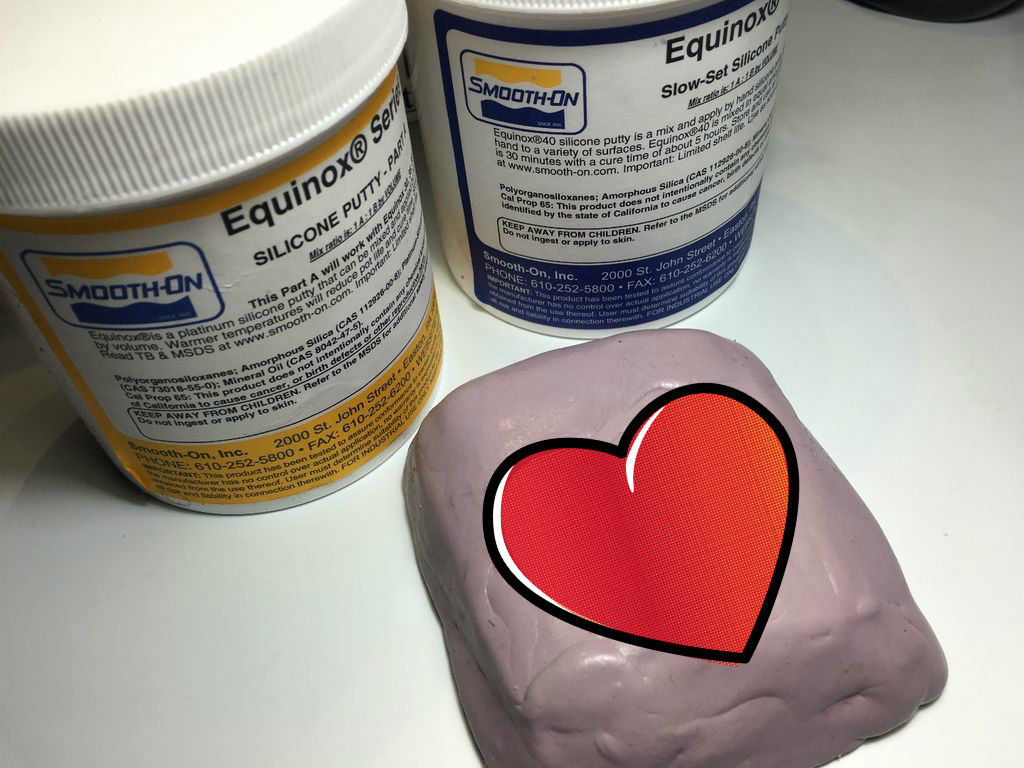
Usually food grade silicone are sold in 2 components that you mix (Part A & Part B). It has a wide of presentations, from liquid, putty, clay, etc. Smooth On is a very acceptable company and has distribuitors worldwide. Ask your vendor wich one fits for you. I usually like slow mixes and the most flexible ones.NOT ALL THE FOOD GRADE SILICONE GOT THE SAME INSTRUCIONS, PLEASE READ THEM. At this point, once you make your mould, let it cure, wich can take a day long. Don't hurry.
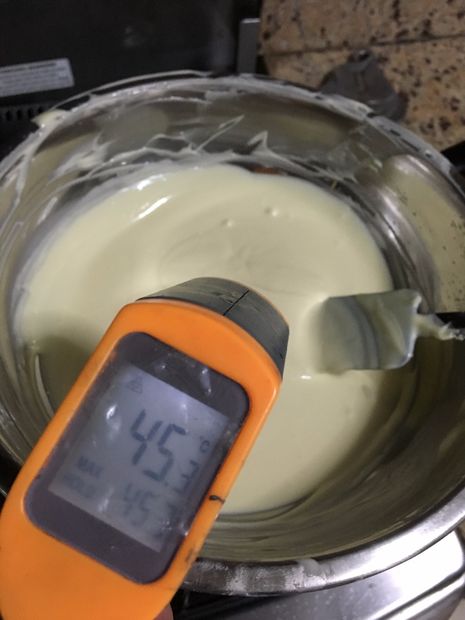
Chocolate is food, so we need to prepare it, the process we cook the chocolate it's called tempering, wich involves the most accurate temperature as possible. You must first melt it, then seed it and finally maintain in that order, mixing all the time.You can use the following table for temperatures:Dark Chocolate:Melt: 45 C / 117FSeed: 28 C / 82.4 FMaintain: 30 C / 86 FMilk Chocolate:Melt: 44 C / 111.2 FSeed: 27 C / 80.6 FMaintain: 29 C / 84.2 FWhite Chocolate:Melt: 43 C / 109.4 FSeed: 26 C / 78.8 FMaintain: 28 C / 82.4 F
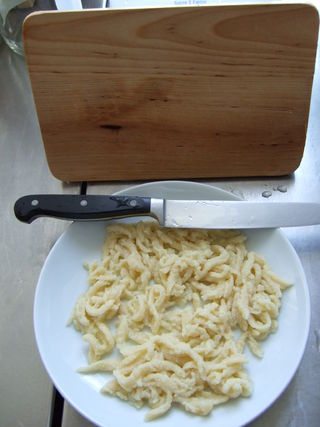
Once you got the tempered chocolate you can pour in the mould, then let it cool.Atfer some time then you can remove the chocolate with the design you made.At this point it's better to have a flexible filament for easier unmoulding, hard ones work too, but it can be complicated to remove specially on complex designs.Did your chocolate broke or something similiar? Don't worry you can temper it again.
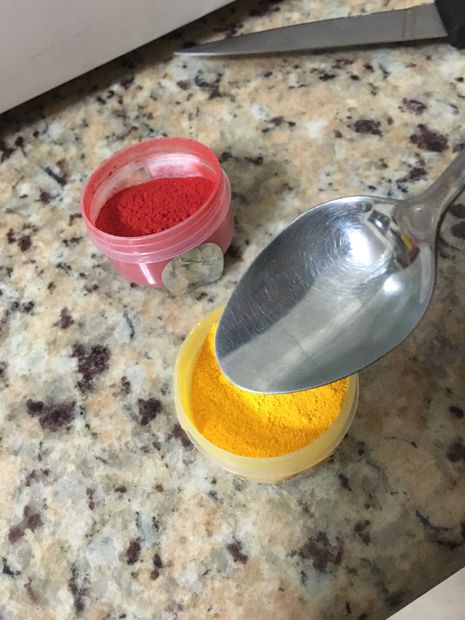
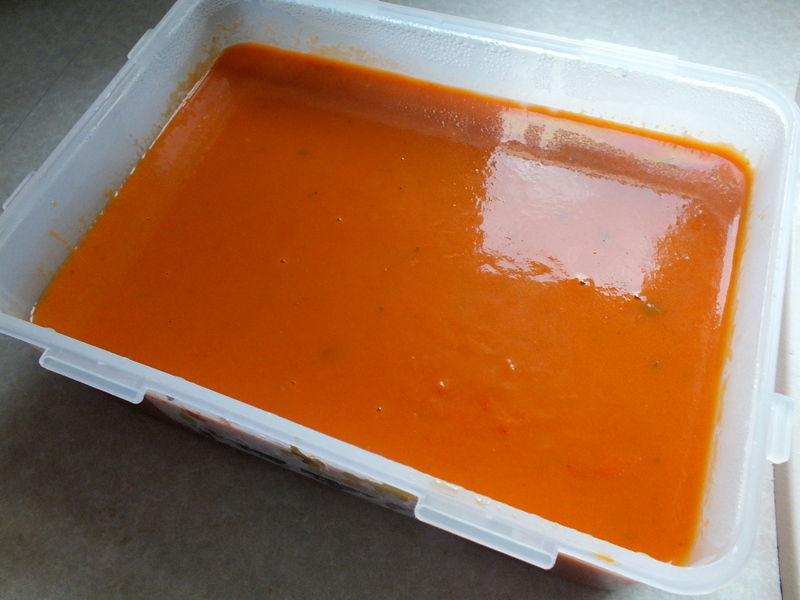
For this step i want to give some more life to my design, so i add some color.I got chocolate color in something similiar to dust and i wanted an orange, so i mixed yellow and red coloring oil, and then mix with some chocolate, this process changes the taste, so i don't suggest to make full colors. There are a lot of possibilities of combinations, some licour instead of chocolate, airbrushing, etc.
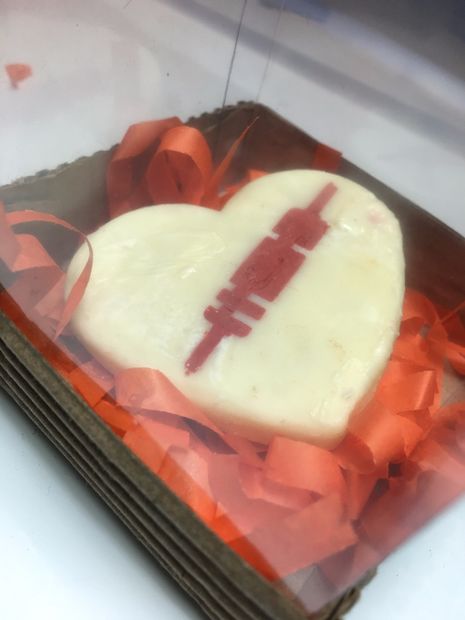
I used the empty spots to give some life with color to this chocolate project, then i trimmed some of it because is hard to pour in very small areas.
For the final decoration i used some papper confetti, put it inside a vinyl box to give it more life and finally a nice lace.The lace i did for this one is the most simple one, like the ones for the shoe.
Question & Answer
Question: Choose the best image for the missing blank to correctly complete the recipe.
Choices:
 |
 |
 |
 |
|---|---|---|---|
| (A) | (B) | (C) | (D) |
|
|---|
 |