Question ID: 4000-12340-0-1-2-4
Recipe Description
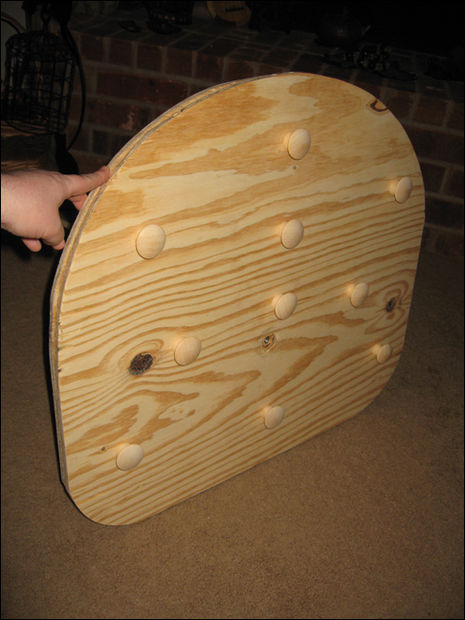
To make the base to support such a heavy cake, I used two pieces of 24" x 24" x 1" plywood. I rounded off the edges of both boards, rounding the front edges more. The display table at the show was rounds so I wanted the base to be rounded off. I then glued them together with wood glue and nailed them together.
You can see an extra strip I added on the back egde. That was to be for some elements that I had to omit due to time constraints so that can be ignored. :)
Once it was together, I sanded it all down. Then I drilled a hole in the center where I wanted my main support dowel to be, the same size as the wood screw shaft, but smaller than the screw head. For this support dowel I chose a 1/2" dowel, 24" long since the minimum height for the competition was 24". I made a small hole in one end with a small drill bit. Then I pushed my wood screw through the hole in the base from the bottom and screwed on the support dowel.
Once done I added some plain wooden cabinet knobs I found at Walmart that came in a pack of ten. I drilled small holes in the base where I wanted the feet to be and then attached them with wood screws.
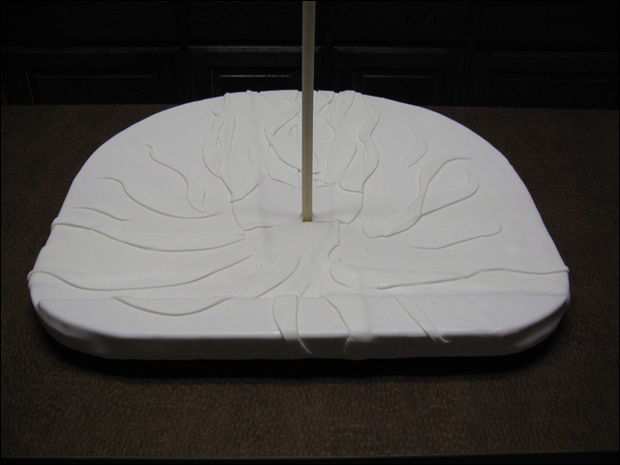
Next I made a large batch of the fondant and covered the base with it.
After making the fondant and setting it aside, all wrapped up so it wouldn't dry out, I brushed on a layer of piping gel to the top of the base and sides and about an inch over the edge on the bottom. This gives something for the fondant to stick to.
I rolled out the fondant and layered it on the base in several pieces, as I couldn't roll a big enough piece to cover the whole thing in one piece. This was OK though since I was going to cover over the seams where the pieces met.
After this was done I rolled out the rest of the fondant and cut random tapering, curving strips and layered them on top of the fondant covered base, radiating out from the center support, mostly in front. These fondant pieces were "glued" to the fondant on the base by brushing some water on the backs of them before putting them down on the base.
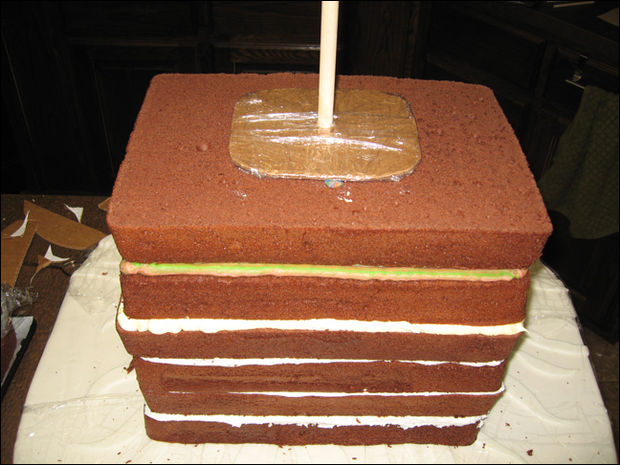
Before I stacked the cakes on the base, I covered the base with plastic wrap, leaving a rectangle of space around the dowel uncovered, so that I could apply icing there before stacking the cakes so that they would stick to the base. The reason I covered the base is so that when I was carving the cake, covering it with icing and fondant, the fondant bas wouldn't get messed up by cake crumbs and icing.
I stacked the cakes, with buttercream in between the cakes. Every 4 cakes I would insert smaller dowels, cut to the same height of the top of the top layer cake, then cut down a carboard cake board, cover it with wrap, and place it on top of the doweled cake, to help support it. I should have done this better, and with every two cakes instead of every four, and used slightly bigger and thicker cardboard. Perhaps using hot glue to glue a few cardboard cake boards together. Still learning about cake support and this was definitely a learning experience!
I ended up using 10 quarter sheet cakes. I also was trying to use up all the leftover icing I had made from my cake decorating class so that's why it's multi-colored. :)
Next I shaped the stacked cakes a little with a knife. I had tons of Hellboy reference photos printed out and layed on the counters so I could look at them easily.
Next I made a triple batch of rice cereal treats, using the recipe on the Rice Krispies box (also on their website) and used them to shape his head and arms.
Didn't get photos of this process as while doing it my hands were lightly coated with Crisco so that the treats wouldn't stick to my hands and I didn't have time to keep stopping and washing off my hands to take photos. :( I was running behind!
I formed the pieces around the smaller cake dowels, with parts of the dowels sticking out so I could push them in to the cake when attaching them.
Again I had photos all around me while doing this for easy reference.
Next I covered the cake and cereal treat with buttercream icing. That gives the fondant something to stick too and helps get smoother coverage, a little "padding."
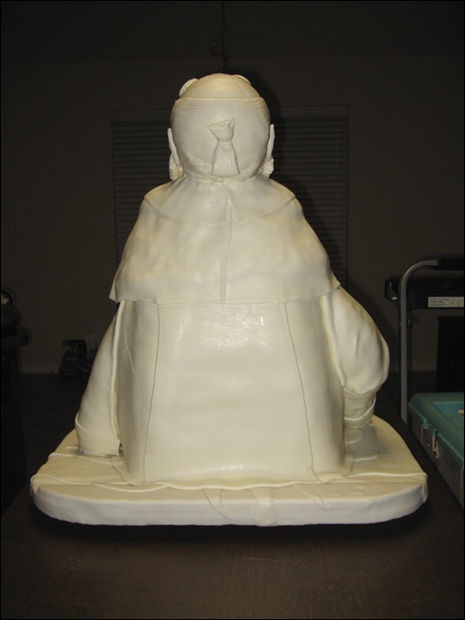
After covering with icing I rolled out fondant to start covering. Again, here's where the Instructable kind of ends, as by this time I was way behind and needed to finish so we could make the 4 hour drive to the show.
I covered it in pieces. Working "background to foreground."
First I covered all the showing skin areas and head (minus the sideburns and the horns) and sculpted and detailed them along the way before they dried out too much. I had made hollows for the eyes and after it was covered added the eyeball and eyelids separately.
Next I did the pants, then belt and horseshoe and rosary.
Next was the lower portion of the coat, then the sleeves, then the upper portion of the coat.
Last was to add the ears, the sideburns of the hair and horns.
I used gumpaste/fondant tools for all the detail.
After it was finished I painted it with Wilton food colors mixed with vodka. you can use either vodka, clear vanilla or other clear flavor extracts, or other clear alcohol to mix the colors with. Water makes fondant gummy and too much will ruin it so you want to use water as glue and alcohol to paint with, as it will evaporate, leaving behind the color and not ruining the fondant.
After the show was over I kept the base, to reuse, and the head since it was rice cereal treats. I took some better photos of the head after I got home. Still splotchy but dry at least!
Question & Answer
Question: What is the correct order of the images?
Choices:
    |
| (A) |
|
|
| (B) |
|
|
| (C) |
|
|
| (D) |
|
|
|---|
 (C) (C) |