Question ID: 4000-13783-0-1-2-3
Recipe Description
This step pre-supposes you already have the three plastic bags of colored dough
from the companion Featured Instructable EASY MARZIPAN DOUGH .
You will need a wooden breadboard
A butter knife
A plastic chopstick and
A roll of paper towels
Clean and dry your hands in preparation to food handling.
Open the Brown and Red dough plastic bags and take out a third of each color dough.
Be sure to close the zip locks up again.
Picture #1
On the breadboard roll a brown cylinder with the palms of your hands .
And cut it into finger lengths.
Then press flatten one end of the cylinder to simulate the mushroom stem.
Now Roll a like number of Red dough Balls between your palms using a circular motion.
Picture #2
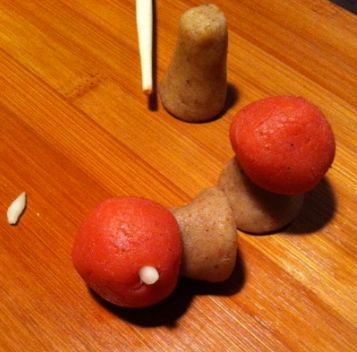
The Mushroom Head is formed by pressing a thumb into a Red Ball and forming the dough around.
Note the desired Houby ( Mushroom ) Stem and Head look to fit snugly together.
Picture #3
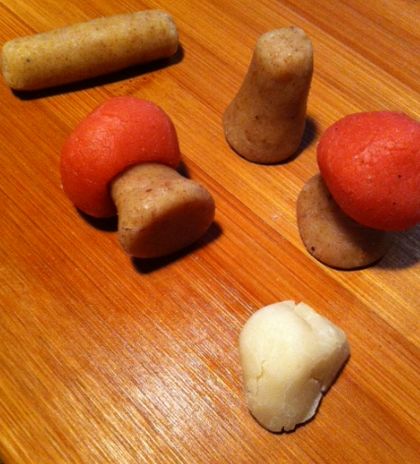
Start by taking a dollop of White dough from the Zip Lock Bag and set it aside.
Mount the Red Head onto a Brown Stem and gently press them together.
Note the good fit of the Stem and mushroom Head.
Not happy :-( with the results ? IT is easy enough to start over at picture #1
Picture #4
Using only hands the Red Houby Heads are fit snugly onto the Brown Stems.
The next step will place the White distinguishing flecks
Of the Amanita Muscaria Mushroom ( Houby ) round marks.
Depending on your speed, ability and desire you should be able to make a dozen Houby at a time.
Now is a good time to clean your breadboard and to again
clean and dry your hands in preparation to food handling.
Picture #1
Use a chopstick to poke a hole half way through the Red Mushroom Head.
IT should be allowed to pierce into the Brown Stem.
Picture #2
Note the clean and smooth hole.
The tip of the chopstick tool needs a moist wipe and dry.
Picture #3
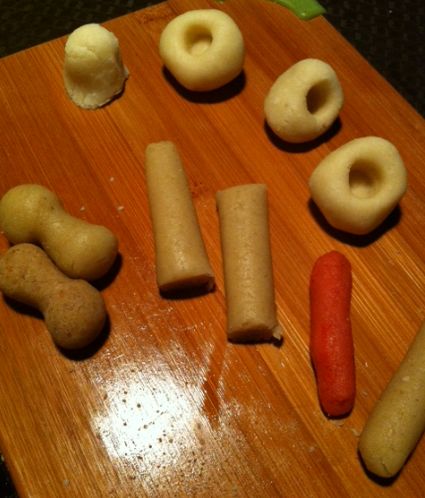
Use the White dough to Roll several Tapered Plug Inserts.
Picture #4
Slide a White Plug into the Mushroom Head Hole.
Gently Press the White Plug to Widen and Flatten it Flush to the Red Head.
Picture #5
Sliding a third White Tapered Plug into a Mushroom Head Hole.
See the two other Flush White Plugs.
Picture #6
Compare a finished Flecked mushroom.
To an UN-finished Houby .
See a White Tapered Plug.
Ready to be inserted into holes created by the plastic Chopstick Tool.
And see a Brown Stem.
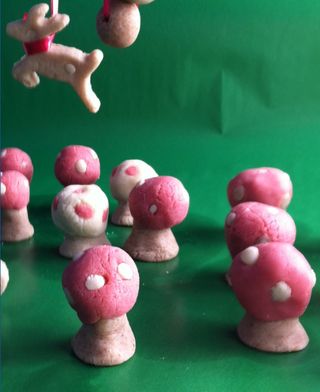
After nine of the Amanita Muscaria Mushrooms have set for a couple days
they will hold shape for decorating.
Picture #1
Drying platter.
Picture #2
Preparations for a White Mushroom with Red flecks.
Picture #3
See Brown Stems and White Heads.
Picture #4White Houby with Red Flecks Same Procedure as the Red Houby.
And those Dumbbell Shapes that never made it off of the Breadboard.
Picture #5
Three finished White Mushrooms
Picture #1
The name sake for the decorative Candy..
Picture#2
Here we see the onterage shapes.
Picture #3
Round Holy Balls Hanging.
Picture #4
Engineering Shapes.
Picture #5
A Close UP.
Note the Drying Creases.
Picture #6
Two Houby.
Last Picture
A Houba Hanging in Our 2011 Tree.
Very Heavenly Delicious Tasting.
You should know some people like Marzipan Immediately.
Others acquire a taste for this nut confectioner's dream
And a few never enjoy it as my family and I do.
Our next door Fifth grader received a family Marzipan gift pack and
later she was discovered behind the couch filling her face with
Marzipan balls, Happy New Year....
Question & Answer
Question: What is the correct order of the images?
Choices:
    |
| (A) |
|
|
| (B) |
|
|
| (C) |
|
|
| (D) |
|
|
|---|
 (C) (C) |