Question ID: 2000-5319-2-3-5-6
Recipe Description
You should be able to print off the pictures shown below. With these, you should be able to scale them however you want to get them to the appropriate size. You can tell how large the final cat will be based on the sized of the body.
Once you have printed off the body parts, tape them to a sheet of cardboard and then trace / cut them out with an X-acto blade or whatever. There are a lot of pieces, so be patient. You can sacrifice quality if you want to remove every other piece, it will still be pretty 3D, but not quite as good looking.
Tip: find a good cutting surface (don't ruin your mom's table)
Now, we will put the whole cardboard model together.
There is a trick to sliding the cardboard through itself, if you don't know how to. You have to make slots in each piece so that they slide into place. You can widen or lengthen your slots as needed to get the pieces to fit snugly.
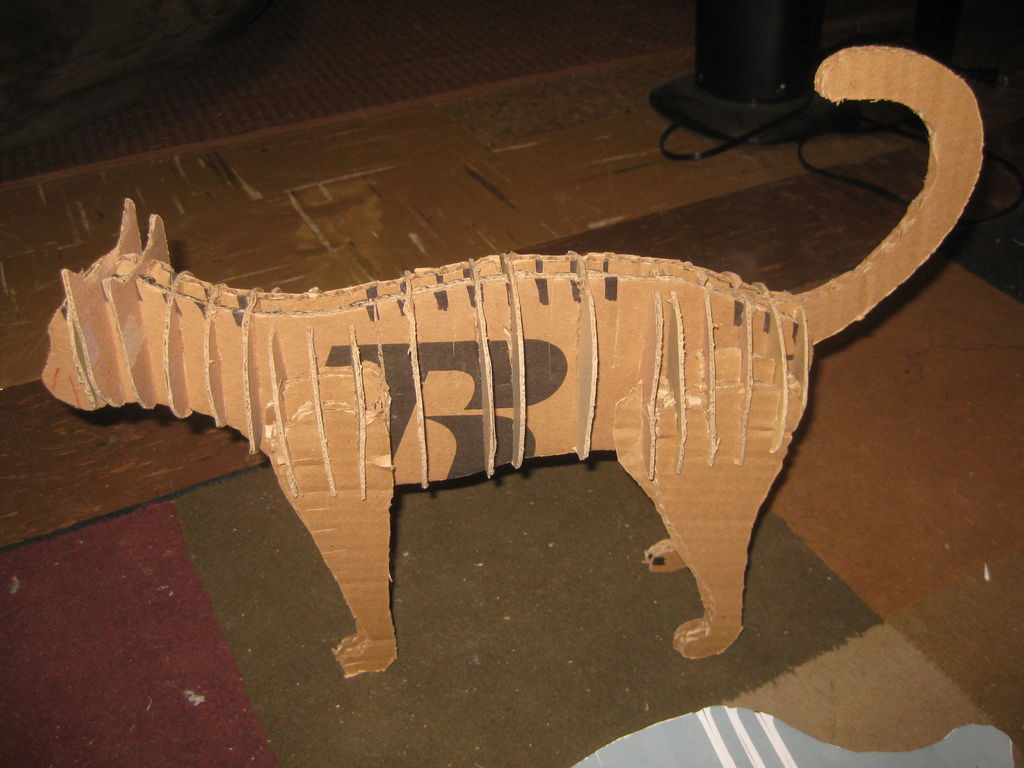
Starting with the head pieces, just put each piece in place on the body in order all the way to the tail. Then put the legs on. It should look something like the cardboard cat shown below.
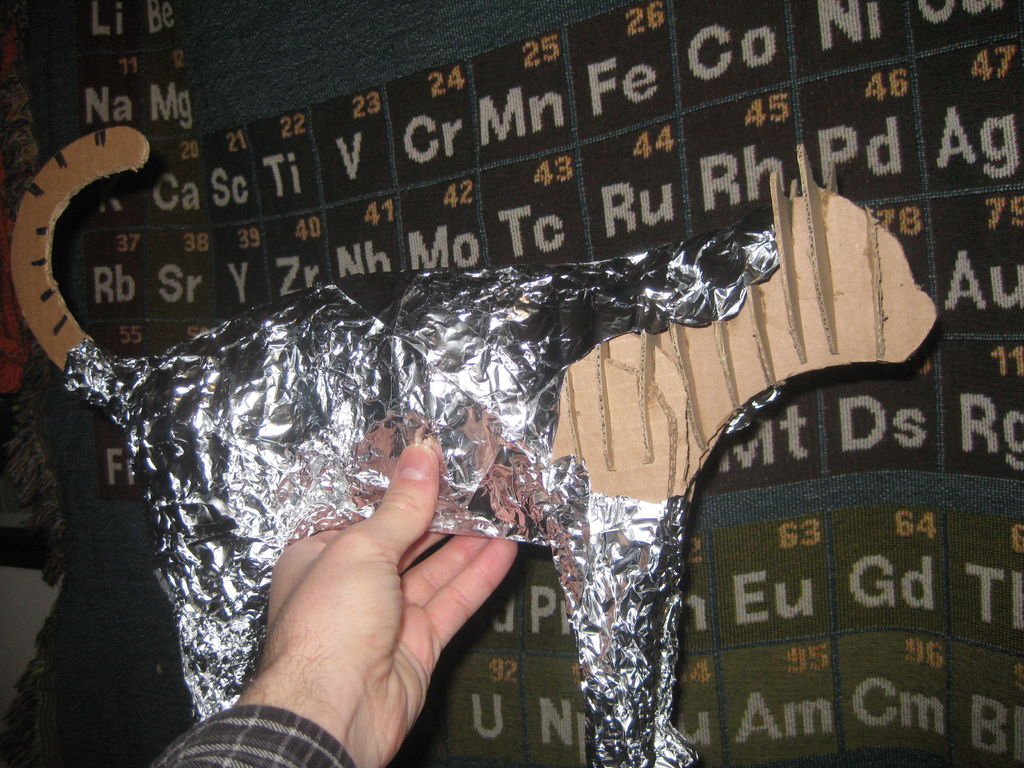
This is a very quick step, just cover the whole thing in tin foil so that you can work out any bumps or caverns in your sculpture. Then cover the whole thing in saran wrap, this will make a later step a lot easier. (I didn't have saran wrap, but it helps when you take the paper mache off)
Time to get dirty :)
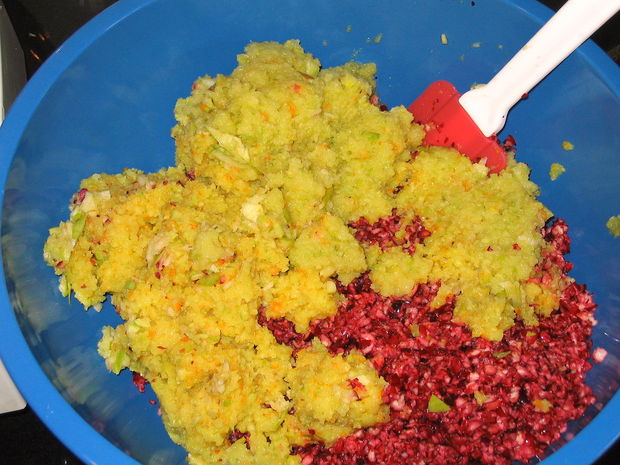
If you don't know how to make paper mache, use the internet, otherwise just try some ratio of flour to water with some elmers glue involved.
Apply a few layers (2~3) of paper mache thickly so that it will keep its form when moved around and cut off. Let it all dry before going to the next step. I always wait overnight with a fan on it for good measure.
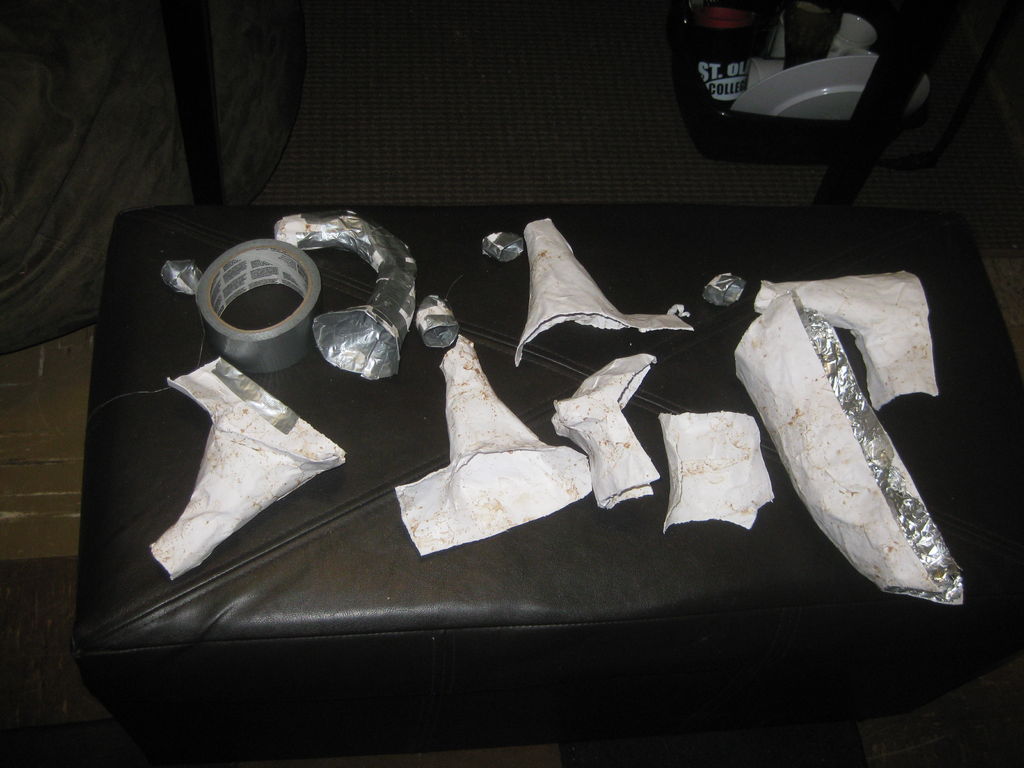
This step takes some foresight. Make several cuts (as few as needed) to get the cardboard out of the paper mache.
I decided to make the following cuts:
Cut the tail off from the body, then cut the tail length-wise
Cut the head from the body, then cut the head width-wise
Cut the body in half width-wise
(if needed) cut the legs so you can get them out (I unfortunately needed to due to the feet)
This should allow you to remove all structure from the inside and leave you with just paper mache. There is an optional step here. I always follow it. That is, to duct tape the entire inside of the paper mache mold before pouring the chocolate. This prevents the head and pressure and moisture of chocolate to melt through the paper mache (this happens sometimes if you dont do this). It only takes maybe 30 mins to do the whole taping, its worth it.
Once you have your pieces cut out and duct taped, re-from the following pieces:
all legs (if cut apart)
tail pieces
head pieces
Now duct tape those pieces together so they are solidly together. The two body halves may be connected too, even though I did not do it that way. For the body, you will have to duct tape the ends so chocolate does not get out. Now you should be ready to pour chocolate in the next step.
Now the fun part :) but first, you will need a stove, a double boiler (or a pot with water and a frying pan with chocolate on top), and either a fridge or a cold open window nearby. (and maybe a cookie sheet or paper towels to catch any mess)
Melt some chocolate (use the internet or my chocolate dinosaur ible for more details) https://www.instructables.com/id/Chocolate-Dinosaur/
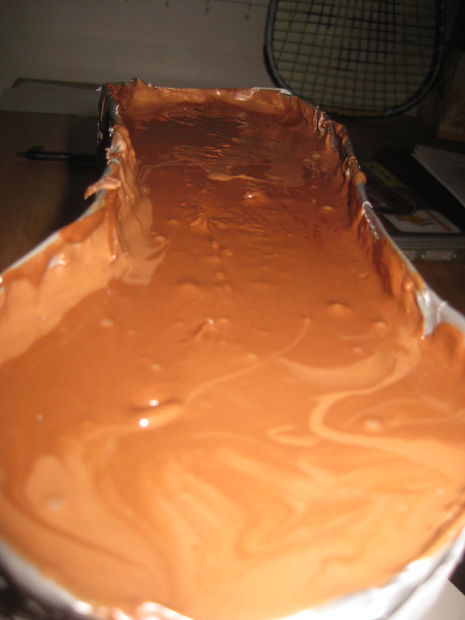
I chose to start with the tail. Make sure you always have enough chocolate for a whole pour batch for each piece when you do them. Use tin foil to prop the tail up so you can pour into it, then use a spoon to help pour the chocolate into the tail mold. Place the filled mold in the fridge or outside in the cold, etc. It can harden over the course of many hours, but in a cold place it will solidify in about 20 mins. nice.
Do the same for the cat's face. And then with the body too.
The next step will discuss how to put them all together...
It is really quite simple to connect the pieces. All you need to do is to hold them together how you want them to look, and then to duct tape around the sides. But make sure to leave a hole so you can get chocolate in from.
Melt some chocolate and pour it in, it should melt the chocolate around it (especially if you rough up the edges of the two mold pieces) and form a nice seal.
Do this so that you get something like the cat shown below. You are nearly done!
All you need to do now is cut away all the paper mache and duct tape! you can do this carefully with an X-acto blade. You can cut in any way you want if you dont care about preserving the mold. After this, you can go back over your cat with melted chocolate to fix any bubbles or not-so-good-looking areas. You can also add eyes, claws (nuts), or color your cat with confectioners chocolate should you so choose to.
Enjoy!
Also, make sure to check out my chocolate dinosaur!!!https://www.instructables.com/id/Chocolate-Dinosaur/
Question & Answer
Question: Choose the best image for the missing blank to correctly complete the recipe.
Choices:
 |
 |
 |
 |
|---|---|---|---|
| (A) | (B) | (C) | (D) |
|
|---|
 |